Welcome to part two of this short but exhaustive series of articles on the Mamiya RZ67 Professional camera system. In part one I gave you a deep overview of the RZ67 system; its history, breadth, basic steps to taking your first photograph, focusing and use cases.
Part two dives deep into the RZ’s revolving back, film backs and polaroid sheet backs. So, without further adieu, here’s what I cover:
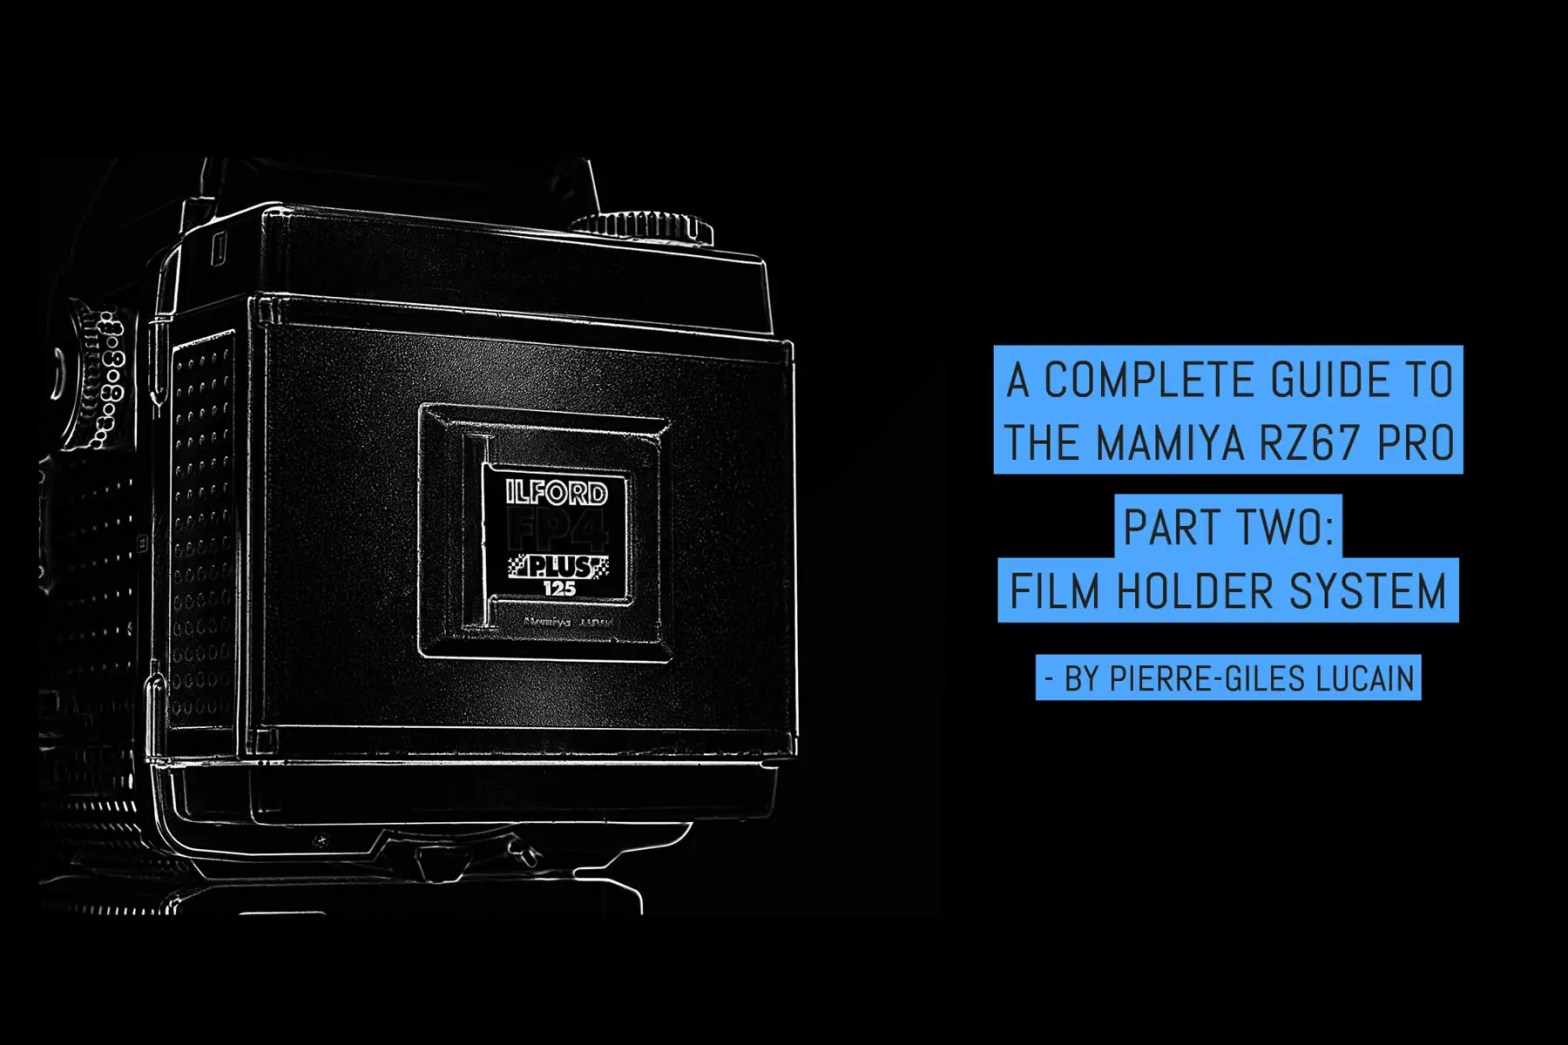
Mamiya RZ67 film back basics
Just like the RB, the RZ67 allows you to swap out the film back mid-roll roll and replace it with another if you want or need. It’s a convenient system if you begin to shoot with a black and white film and decide after few images to try a color emulsion; and perfect when you have changes in light, as you can use emulsions of different sensibilities (ISO) whenever you want.
Like other interchangeable film back cameras – the Hasselblad V-System being one example – you only need multiple film holders (backs) to do that. They are not expensive (actually less than the ones used by the Hasselblad system). Mamiya made many of versions of their film backs, covering many different formats, all can be used and changed during a shoot. For rectangular versions of format (6×7, 6×4.5), the back can be rotated, let you choose to shoot vertically or horizontally.
Roll film holders and Polaroid backs
There are seven different types of roll film holders or backs for the RZ, plus the possibility to adapt and use RB film holders too. For the RZ system, you have:
- Mamyia HA703 for 120 rolls and 6×7 images (10 shots)
- Mamyia HB702 for 220 rolls and 6×7 images (20 shots)
- Mamyia HA704 for 120 rolls and 4.5×6 images (15 shots)
- 6×6 back for 120 rolls and 6×6 images (12 shots)
- 6×6 back for 120/220 rolls and 6×6 images (12/24 shots)
- Mamyia HP702: Polaroid film pack holder for instant images like Fuji FP100C films, makes around 7×7 images (10 shots)
- Quadra 72 for Polaroid 545 4×5 sheet films or Kodak Readyload and produce 72x72mm square format images.
If you want to use an RB back with an RZ camera, you will need the GR/RZ adapter for Pro-SD and Pro-S backs. When you use a 6×4.5 or a 6×6 back, Mamiya made a Viewfinder mask to help to compose images in these smaller formats.
Polaroid 545 and Kodak Readyload films are no longer available in the market. They are hard to find, often sold for a crazy expensive price, and ever outdated. So you can forget the Quadra back!
Principles of RZ67 rotating film backs and the R-M lever
The RZ system, as the RB before it, natively shoots 6×7 format images (56mm x 69.2mm image size) with its standard 120 film back. The RZ system allows the photographer to rotate the film back for shooting in a horizontal or vertical orientation without turning the camera itself. It’s a useful function and one of the reasons that explains why the camera is so big. You can turn the back between one frame and the next and as often as you like while using a single roll. It’s easy to perform and quick operation.
The RZ67’s R-M Lever sets the camera into normal exposure mode, multiple exposure mode and allows the film back to be rotated. The lever moves with your finger (I use my thumb). The central position is the position to take photos (1 image per view). And also the “normal” position. Position M is for multi-exposures. You set it with a finger and you shoot as many exposures on a single frame (take care with your accumulated exposures!)
You put the lever back to the central position manually, too. The R position allows the back to rotate. Again, you set it with a finger and then rotate your film back.
Back to the central position, we have three choices.
- Move it with a finger
- Move it with the cocking lever (just push it forward a little and the RM lever returns to its central position automatically)
- The third way to get it back from “R” to the central position is to take a picture! When you press the release button at the front of the camera, the lever gets back itself to the central position just before the picture is taken.
So, to rotate the film back, place the RM lever (on the right side of the camera) in the R position.

You can then turn the back:


You can’t shoot when the RM lever is still in the R position but softly depressing the shutter release button or pressing the cocking lever brings the RM lever back to its central position automatically and let you shoot. I used to use the cocking lever to do that.
In short: RM lever in the “R” position allows the film back to rotate (landscape to portrait or portrait to landscape). To return to “normal”, a little push on the cocking lever will trigger a “click” sound and then you can shoot. Easy and fast.
As you can see in the second image above, there are two orange marks on camera body, one on the top, and another one on the right side. You will also see a little rectangle that indicates the orientation of your film back (on the film back itself). When mounted on the camera, these rectangles line up next to each orange mark. If you look from the top down, this rectangle tells you if your image will be horizontal or vertical.


It’s the same with the 6×4.5 back, except that the vertical and horizontal positions are reversed. It’s different with square format backs: rotating the 6×6 120 and the 220 backs is pointless and in addition, it’s not possible to revolve the Polaroid back.
120 and 220 roll film backs
To be clear, you should avoid buying the 220 film holder (HB702). 220 films are no longer manufactured and what expired stocks remain, offer considerably less choice. With a 220 back, you can only shoot 20 images, so x2 more images than with a 120! Regardless of if you use a 6×7 back, or a 6×6 back, (Mamiya didn’t make a 6×4.5 film back for 220), it’s really not worth it to break your head yourself with 220 rolls! I should note that the most usual back for 6×6 allows you to use either 120 or 220 rolls.
Loading film
Two levers are placed on the right side of the film holder. Pushing both inwards opens the back:

Take care: you can open the back even if an unfinished film is still inside. There is no locking system to avoid that. So, be sure your film back is empty or only contains a finished roll before opening it. Each time you open the RZ67’s roll film backs, the frame counter reset to zero (actually, it show a red “S”), even if there’s still an unfinished film inside.
The film holder is made of two parts you can disassemble easily:


You have then the film holder itself and a cassette (or insert) which can be separated from its holder.
The film path is not usual, but it’s the same as the Hasselblad V system and many medium format cameras. Take the opportunity to remove the dust when you open your film back.

After opening the film Holder, take the cassette (insert):


The following details describe all operations needed to load a roll film in an RZ back. All actions explained are the same for 6×7 backs, 6×6 backs, and 6×4.5 backs.
The first thing is to place the empty spool on the right side. To remove an empty spool from (from the left), push the little metal spindle at the bottom of the cassette and remove the empty reel as shown:

To set the empty spool in the take-up position, push the little spindle on the bottom right side, and then place the empty roll, as shown:
Next, push the small spindle on the bottom left, and place a new roll at the left side. Pay attention to the orientation or sense of the roll. It must be exactly like shown on this image:

Pull the paper and take it through the front of the cassette like this:


Important note: At this point, if you don’t see a black paper on this front side (and instead of a white, green or yellow one) the roll has been loaded the wrong way round. Stop, roll back the paper, tighten it and flip the roll top-to-bottom, then reinstall. The black side (inside_ of the paper must be visible as you can see on these images.
With the paper wrapped around the front of the film insert slip the tip of the packing paper into the slit in the empty take-up spool.

Fold the end of the inserted paper outwards (in the direction of rotation of the roll), black side to black side.
Turn the big knob above the cassette, without forcing and being careful that the paper wraps without slipping or coming out of the slit of the empty roll. Like this…

…until the arrow on the film paper (left & new roll side) meets the white triangle on the bottom of the cassette. Like shown below. Then you stop!
Note: Lomography films have a shorter film leader at the beginning of their 120 rolls and therefore, to load the film correctly, it is necessary to advance the roll a little more.

Replace the cassette in the film holder:


Then you can close and lock the door:

Now you can turn the big knob above the film holder until you see “1” in the view count window. The knob then locks to the first image. You can now mount the film holder on the back of the camera, and that’s it!
If you use a film brand that is provided with a box, you can insert the end of the film box or another reminder in the “memo” clip on the back cover like this:

You can also advance the film with either the cocking lever (if the back is installed on the camera), or with the film advance knob (above the film Holder) until you see 1 in the view count window. The RZ will lock then, and after removing the dark slide, you’re ready to shoot your first image!
If you use the motor winder with the RZ, then you only have to push the “START” button on it, and the winder automatically winds the film to the first frame. See the “Motor winder” chapter in part four (coming soon!) for more detailed explanations.
Note: If you use the Prism AE finder, make sure you’ve correctly set the desired ISO on Film Holder, so that the prism can use it to calculate exposure! (See below for more details)
The dark slide
The dark slide is a thin metal plate which allows film holder to be changed mid-roll without fogging or otherwise unintentionally exposing the film. It must be in place when you want to change the back. If not, the back is locked, and you can’t unmount it from the camera.
The dark slide must also be removed off before making exposures. Otherwise, the camera will not let you shoot (a fixed red LED glows at the bottom of the viewer). There is an efficient storage slot for the dark slide in the rear of the back for it.


I find that adding a little piece of gaffer helps to remove and put back the dark slide in its place and using colored gaffer helps if you have many film backs. For example, if you have a back with B&W and another with color films. It’s convenient. On my back, the gaffer is pink, and I received it like that. Why not? It’s funny! It also helps a lot to find it in low light conditions. On my other 120 6×7, it’s black, and on my 4.5×6, it’s white.
Removing or changing a film back
As explained previously, you can remove a back without finishing the roll currently being shot. To remove the film back from the RZ67, you first need to replace the dark slide (1). This is to avoid exposing the sensitive surface of your film to light. If the dark slide is not installed correctly, you will not be able to remove the film back! The bottom lever (2) will remain locked.

Note: This security function does not work with the very first version of the HP702 instant film pack holder (the silver one). You can disassemble this back without the dark slide inserted in its place and expose the film. I think it’s why Mamiya added a wire and a big red plastic piece with the following versions, to remind users to put back the dark slide after using this back and before removing it from the camera. When using a Polaroid back, always mind putting back the dark slide before removing the back.
With the dark slide returned, it’s straightforward to remove the film back from the camera: there is a lock on the bottom of the back, as you can see here:


The standard 6×7 roll film back: HA703
The HA703 is the default film back for the RZ. It uses only 120 film and you get ten images with each roll.
You can find two quite identical versions of this back: a version for the first-generation Pro and a version for the Pro II and Pro II D. Mamiya made some minor modifications for the new version: the main difference between the Pro and Pro II and II Pro D backs is an additional counter view on the left side of the latter two models:

This new counter view was made to help you see the frame number much better when the back is rotated vertically.
You can use a Pro back with an RZ67 Pro II or Pro II D, they are usually cheaper, but also older. So, I recommend to buy Pro II backs because they are more recent. Also, according to a lot of online forums, there may be some light leak problems with the Pro version, because this back uses foam to stop light coming from outside, mostly around its door.
Instead of foam, the Pro II and Pro II D backs use labyrinth gates made of solid plastic to stop the light and avoid problems. It’s an improvement because you don’t need to mind about the state of your foam seals. But, even the Pro II and Pro II D backs have a little bit of foam, under a rubber plate next to the door hinge.
If you still want to purchase an original Pro back, always check to see the state of the foam seals before buying it, if possible.
The 6×4.5 roll film back: HA704

This film back allows you to shoot 6×4.5 images, and with a 120 roll, you can make 15 shots. It’s the same system as the 6×7 backs, and easy to use. The only significant difference is the smaller size of the images than the 6×7 ones. Mamiya sold a mask to help to compose your shots with this back. For me, this mask is essential to use with the 6×4.5 back, it was generally sold with this back (if I remember), but you can find a back in the second-hand market without it. And this mask is not very easy to find separately.
It’s easy to install the mask, but you need to remove your focusing screen first.

You have three small rails that hold the mask into position. The button at the right of the image above is used to remove it, and the notches on the left help to guide it in place.

One difference between this and 6×7 film back is that the 6×4.5 back’s vertical/horizontal orientation is reversed:

About the mask – and it’s the same process for any 6×6 or 6×4.5 that doesn’t come with a mask – it’s not complicated to make a DIY one. There are a lot of tutorials on the web about that.
The 645 has an H/V ratio that approaches a little more the one of full-frame:
| Length | Height | Ratio |
|---|---|---|
| 7 | 6 | 1.17 |
| 6 | 6 | 1.00 |
| 6 | 4.5 | 1.33 |
| 36 | 24 | 1.50 |
Using 6×4.5 or 6×6 backs with a 6×7 camera is not such a weird idea if you don’t have a 6×6 or a 6×4.5 camera and already have the RZ. Those kinds of backs much cheaper than buying a new medium format camera and you retain the high quality of the Mamiya lenses for your photos!
With a 6×6 back, you can shoot 12 square frames, with the 6×4.5, you can shoot 15 frames. With its versatile side, the RZ allows you to test and use several different formats that all have their own particular qualities. And because the film backs can be swapped mid-roll, you can easily change the size of your images during a shoot if you have different backs.
The Polaroid back: HP702

One thing to know with this back is it cannot be rotated. You can only use it in the horizontal position (it takes around 7 x 7 cm square images). It also has an ISO knob and electric contacts so you can use the AE prism with it in a semi-automatic mode. And you can recover a negative through a small operation with bleach in your darkroom if you want.
The Polaroid film back was always a fantastic accessory to check your exposure before shooting with film. You have an instant result that proves (or not) if your lighting, framing, aperture, focal length, composition, and all other things are what you want or not, and if not, lets you change them.
With this back and instant film loaded, you can control your exposure, focus, the power of your flashes, the light, and so on before an important shoot. Mostly during studio sessions, which could cost a lot of money, are always complicated to organize, do not support delays, and need a perfect result at the end.
Unfortunately, the newest film available for this back is the Fuji FP100C Classic or Silk, and Fuji decided to stop its production in 2016. Anyway, you can still find some but those boxes cost more and more each month… In Europe, you can find a pack for around 50 Euros at the time I write this. That’s for only ten shots! It remains interesting and can still help in a lot of cases, but it’s costly and most will be outdated soon too!
Note: I’m not a big fan of the Silk version, but it’s the only one I was able to find at this point in this review.

I’m really disappointed by the decision of Fuji to stop the production of this film: it’s the last we can use with this kind of backs. I hope someday that the Impossible Project or the new Polaroid Originals will launch a new film compatible with this kind of needs. Otherwise, this version of backs will be stored indefinately in a drawer. And it would be a shame. Yes, you can use a DSLR instead, to make tests and controls, but it’s different. It’s not the same camera, nor the same lens. The results are always different!
Maybe I’m a little too fussy…
So if you still want to purchase a Polaroid back, think before doing it: do you really need it? If your answer is yes, watch out for the prices. Most are sold at a high price. Take in mind that no longer film will be available soon for this back!
The silver (“metal”) one is the very first version of the Polaroid backs sold by Mamiya for the RZ (Pro). The black (plastic) one is the version sold by Mamiya after the launch of the RZ Pro II. Both work with the RZ Pro, the RZ Pro II, and the RZ Pro II D.
Other companies also manufactured Polaroid backs. For the RZ it was Polaroid or NPC, Mamiya only added their own mounting plate for the RZ, with the ISO dial knob and the electronic contacts for metering connections. Only some versions from NPC had a darkslide holder and the ones made by Polaroid do not. On the second-hand market, you can sometimes find instant backs with a thermometer and maybe also a timer which is very useful for the developing time of all instant film, because the development time is very dependent on the temperature.
With the silver version, I have to put the RM lever (right side of the camera) in the M position to be able to shoot. Instead, the viewfinder shows me an orange alarm which said “cock the camera,” but obviously, cocking the camera with the Polaroid back installed on it does nothing on the back. However, take care to not take multi-exposures for real with this back, when the RM lever is on “M”…
You don’t have this problem with the latest ones (black). You can shoot like with any film holder made for the RZ. But the cocking lever does not advance the film: you need to pull out the film manually, wait for the processing time and peel the negative from the print.
If you use the prism (FE701) in AE mode, you need to set the ISO there:

You can set it between 25 ISO and 6400 ISO.

A very important point: don’t forget to remove the big dark slide before shooting with this back: There is no indication in the viewfinder and the shutter is not locked if you forget to remove it. I often lost my first instant shot because of that.
And also, remember to put the dark slide back in before removing this back, because there is no lock to prevent removing the back and expose the film!

Note: The HP701 was made for the RB cameras, and it’s not compatible with RZ cameras unless you use a special adapter to use RB backs with an RZ camera. The one usable with the RZ is the HP702.

Using an RB67 film back with an RZ67 camera
It’s possible to use an RB back with your RZ, but you need the G adapter to adapt it to your camera. During a shoot, using the lever on the camera after taking an image lifts the mirror and cocks the shutter but does nothing to the back.
You need to wind the film manually using the lever on the film back (Like with any RB camera). The RM lever must be set on M position only. If the lever is set to its regular place (central), the shutter will not release. Mind to wind the film using the lever on the back between each shot. Otherwise, you will really take multi-exposures images.
Onward to part three
Next up is the real meat of this series, a look at the ~27 lenses for the RZ67, plus teleconverters, macro extension tubes and other accessories.
I’d love to hear what you think so far, and if you have any suggestions for expanding what’s already covered. Over to you!
~ Pierre-Gilles
Share your knowledge, story or project
The transfer of knowledge across the film photography community is the heart of EMULSIVE. You can add your support by contributing your thoughts, work, experiences and ideas to inspire the hundreds of thousands of people who read these pages each month. Check out the submission guide here.
If you like what you’re reading you can also help this passion project by heading over to the EMULSIVE Patreon page and contributing as little as a dollar a month. There’s also print and apparel over at Society 6, currently showcasing over two dozen t-shirt designs and over a dozen unique photographs available for purchase.


12 responses to “A complete guide to the Mamiya RZ67, part two: film holder system”
You might want to update to add in the Zinstax back that Han Chen is producing, mating an SQ1 with an RZ back to bring some instant print action back into the picture. I received a unit last month and it’s had me using the RZ quite a bit more than I had recently. https://zins.tax
Hello
In 2020, I acquired the trade marks Mamiya, Mamiya RB67 and Mamiya RZ as well the S-M logo on the earlier RB67 prisms. You can fact check with the Trade Mark IPO office in the UK
Phase One were defeated emphatically and have nothing to do with my brand.
I suggest you make the corrections to you articles and acknowledge my trade mark and brand ownership
Hi Raj, thanks for providing this correction. Do you have a specific edit in mind to better represent this update? Thanks.
Scammer.
Hello Pierre-Gilles,
Excellent indepth review an instruction manual! I’ve owned this camera for many years now, but haven’t used it much since I ran out of Fujifilm instant film! When I heard they had discontinued the film, I scurried off to Ebay and found a large stock at still very reasonable prices.. but that stock has dwindled to just 1 packet. Anyway, wanted to say even after using this camera for so long, I ‘ve learnt so much from your manual.. truly detailed and love all the caveats you mention. With regards specifically to backs, does the 6×6 back rotate? It may not seem important, but I’ve been trying to create tryptics and would like to do them on the negative, not assemble after. The only difference between my ProII back and the images of your 6×6 back is that the safety pins on the mount are not present, but otherwise everything looks the same.. So if you could confirm if the back will rotate, that would be great. Also you might want to add an addendum to your Part II – Backs, as there is a Zinstax aftermarket back that takes Instax square film and fits on the RZ67.. It’s not quite the same as the peel-apart film that I loved, as the images are much smaller and the dynamic range is maybe 5 or 6… so either highlights or shados are recorded.. but it makes playing with my RZ67 fun again.
Antoehr ting you might want to mention with regards to the AE prism finder… it seems like it will allow shooting in half stops on the older RZ67 body. My RZ67 II broke and the cheapest option was to purchase an older Rz67.. which is why I’m using the prism on the older body. Thanks again
An interesting set of articles and a good review.as I haven’t used an RZ 67 ( Mk 1 ) since before the turn of the century. Never had the opportunity to use the later versions.
Regretfully I didn’t purchase RZ items prior to the latest buying frenzy and price increases.
I have never heard of 6×6 backs from Mamiya. Or was there a there a third party brand which manufactured them? Where can I buy such a back? Thanks for any information
Thanks so much! When my father passed in 2013, I inherited sets of RB67 ProSD, RZ67 Pro, and RZ67 ProII bodies, lenses and accessories. I let them sit around in storage, not quite knowing what to do. I decided to sell off all but the RZ67 ProII, then make a crack kit for this format. Your detailed articles are helping me feel a lot better about my choice!
Thank you for this informative post! Is it possible to use 120 in a 220 back?
Thank you for this…I have the 645 back which I have tried, but did not know about the mask. Makes much more sense now!
Where can I get a 6×6 back? I have never heard- that they were manufaktured by Mamiya. Different brand?
Hi Juergen,
i own a RZ67 Pro II and pretty happy with it. I use also a C330S and i realized that i was much more confortable with the 6×6 format…but i LOVE the RZ and the lenses. So, the solution is a 6×6 back. ‘Found them on ebay (price around 450 USD…) but i wonder if anyone around ever used one.
(https://www.ebay.com/itm/255077130625?hash=item3b63c82181:g:P98AAOSwau1g9oBn)
The ebay products are Mamiya branded but when i try to find these backs in the Mamiya catalogue i cant find them.
Have a good day
Gilles