If you have been giving monochrome (aka black and white) film photography a go, you will have realised that film doesn’t quite see things the way your eye does. With modern, panchromatic film stocks that “see” the entire visible light spectrum, the difference isn’t great but can be significant in some areas. In this article, I’ll be providing you with an overview of the main filter types available – from coloured filters that affect tonailty and contrast, to specialist filters for Infrared photography and adding effects like soft focus. Here’s what I cover:
Let’s start with an obvious but necessary question:
Why use them?
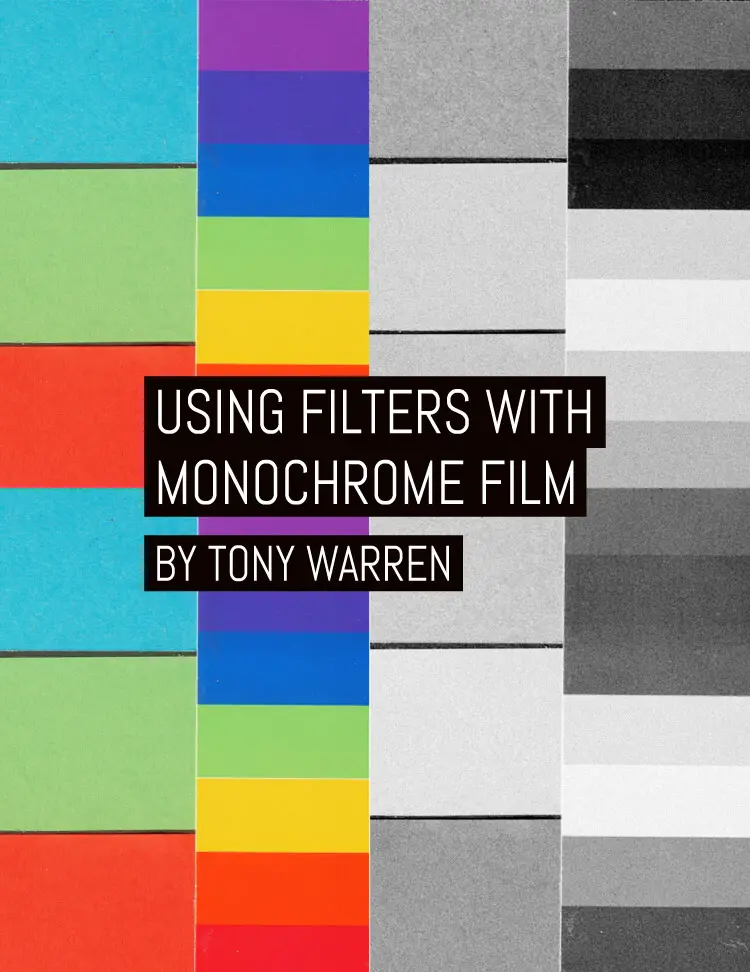
Panchromatic film reacts to most colours of the spectrum quite accurately but blues, skies in particular, tend to be rendered lighter than they appear and, with faster emulsions, reds can also be represented a lighter than in real life. This composite might give an idea of the basic effects they make:

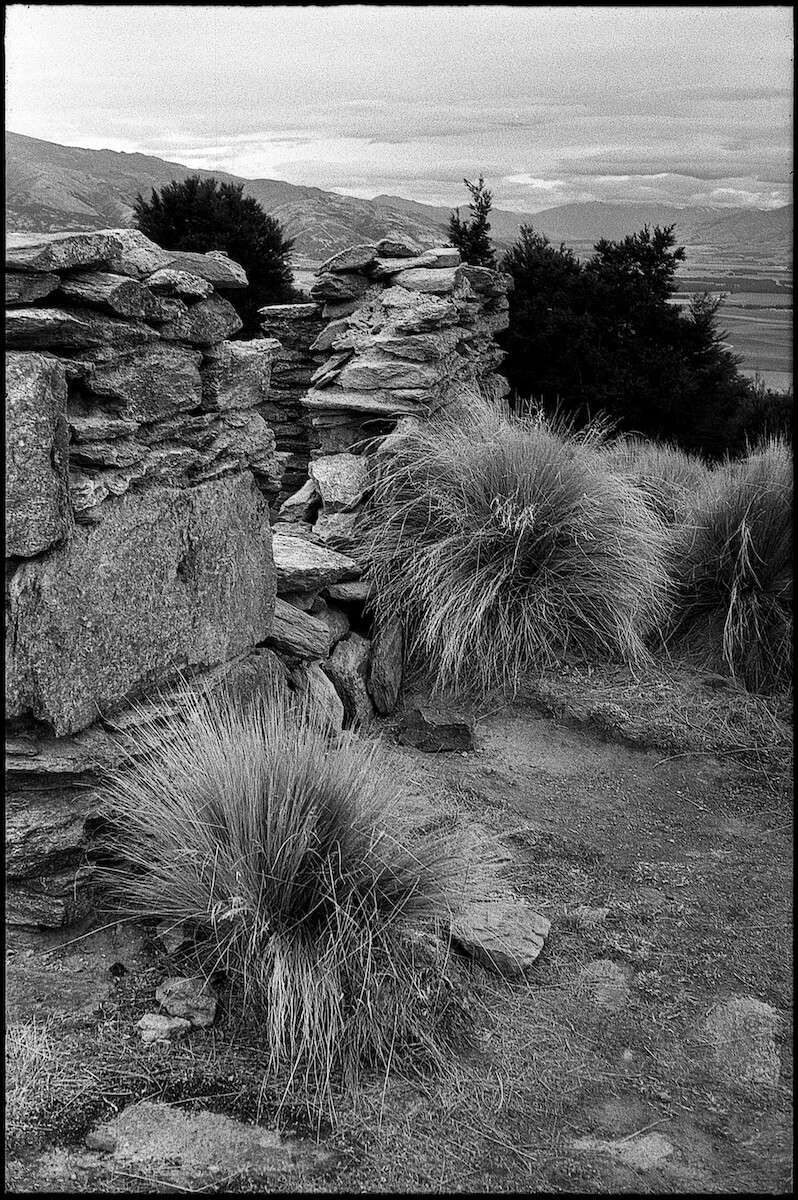
So using filters, various colours can be brought back to a more realistic rendering or taken further to create more dramatic results. Blue skies can be darkened, skin tones and wood grain can be improved and architecture and landscapes given more depth and so on. My opening example used a red filter and then increased in contrast in the way that would be produced in the darkroom using a hard grade of printing paper.
What are lens filters and what do they do?

Lens filters are pieces of glass or resin placed in front of the lens, which have an effect on the image as it is exposed. All filters involve some loss of light and will require increased exposure to some extent with the exception of UV/haze and some special effects filters. They come in either circular or rectangular form which push onto, screw into or are held in place by a frame in front of the camera lens.
They fall into three basic types that alter the image tones on the film:
Additionally, there are specialist filters and weird and wonderful creations that tend to alter the visual result in some way: soft focus, neutral density, etc., or distort it in some way.
Correction filters
Correction filters are mostly to do with matching light sources to colour emulsions and come in quite a wide range of density and two basic colours but have little or no effect on monochrome. The most common you may come across are called A-D or D-A, for using artificial light balanced colour film in daylight and daylight-balanced colour film in artificial (tungsten) light respectively.
Compensating filters
Compensating filters tend to be less deep in colour and are used to bring the response of the film into line with what the eye expects to see. A general rule to remember is that filters lighten like colours and darken their complementary colour. The principal ones are:
Yellow

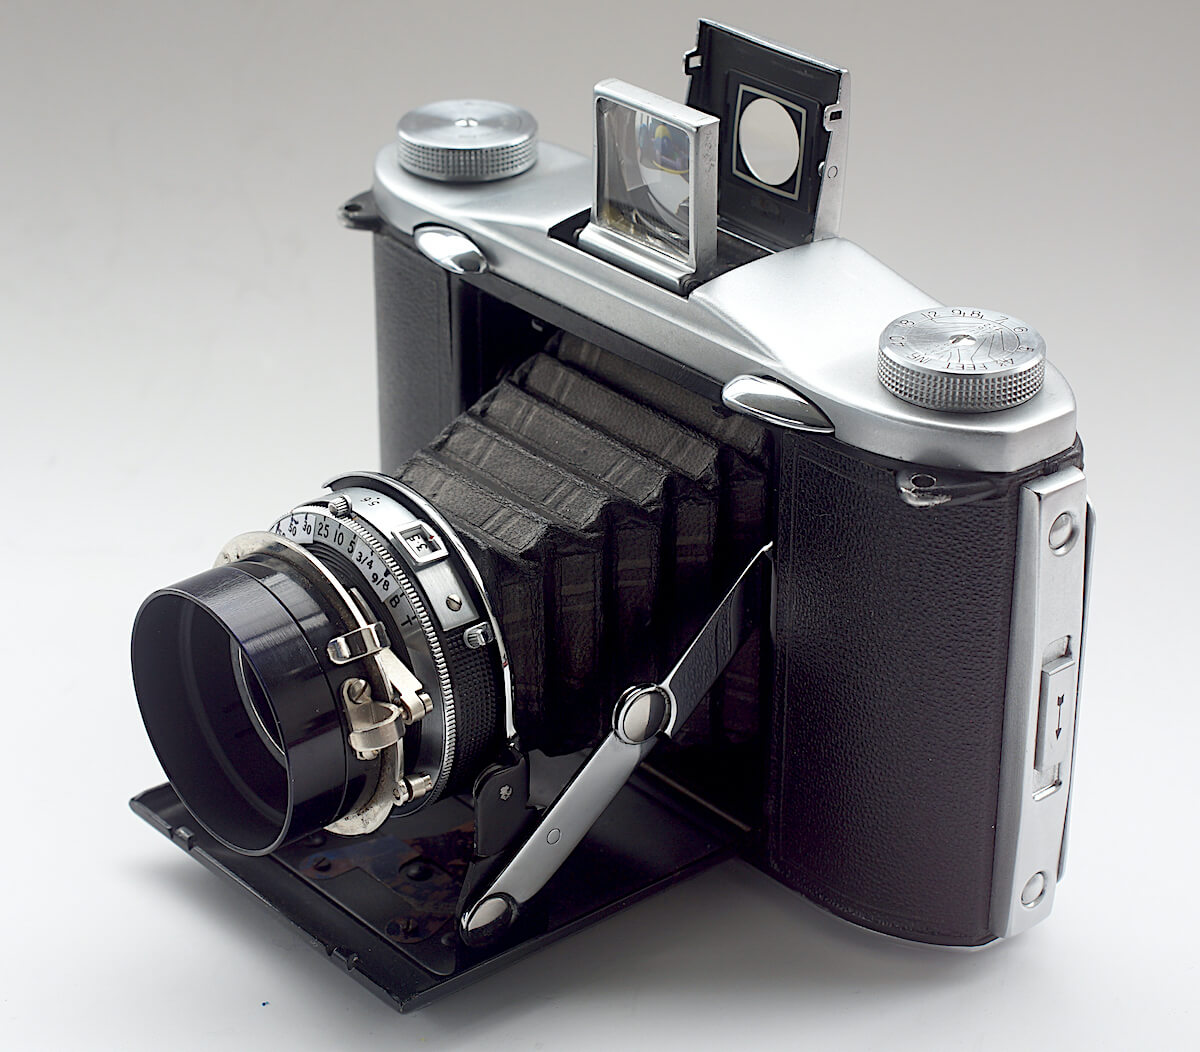
A yellow filter will darken blue skies and slightly lighten some foliage. A secondary effect of the yellow filter is that it gives a little more contrast because shadows being generally lit by “skylight”, i.e. light from the blue sky, not the sun, contain more blue and will be darkened also. Commonly 2x or +1 stop increase, but sometimes weaker or stronger. It was often built onto some early cameras in a swing out mount as on many Voigtländer models or as a slide-in feature in some box and simple cameras from Kodak, Agfa and others.
Yellow-green
Yellow-green is often recommended for male portraiture because of its ability to slightly darken reds, giving a more swarthy appearance to the subject, usually in combination with contrasty lighting. Otherwise it is a rather lighter version of the yellow filter. Usually with a 2.5x factor or +1 1/3 stops.
Green

Green filters are not very common but can be used in landscapes. It will darken the sky a little and lighten foliage with a factor of 4x or +2 stops.
Contrast filters
Contrast filters push the compensation further and actually distort the results but in a way that can heighten the graphic effect and are principally:-
Orange

The orange filter, sometimes referred to as the furniture filter, lies somewhere between yellow and red in its effect, darkening skies and increasing contrast but not quite to the same degree as red. It will also enhance foliage against a blue sky because it will lighten the one and darken the other, especially in the autumn. A factor of 3x or +1 2/3 stops.
Because it lightens its own colour and, because the wood grain, so often a feature of furniture, contains a wide range of yellows and browns, it really flatters these subjects. Grain and figuring is enhanced and contrast increased in these areas, hence the nickname.
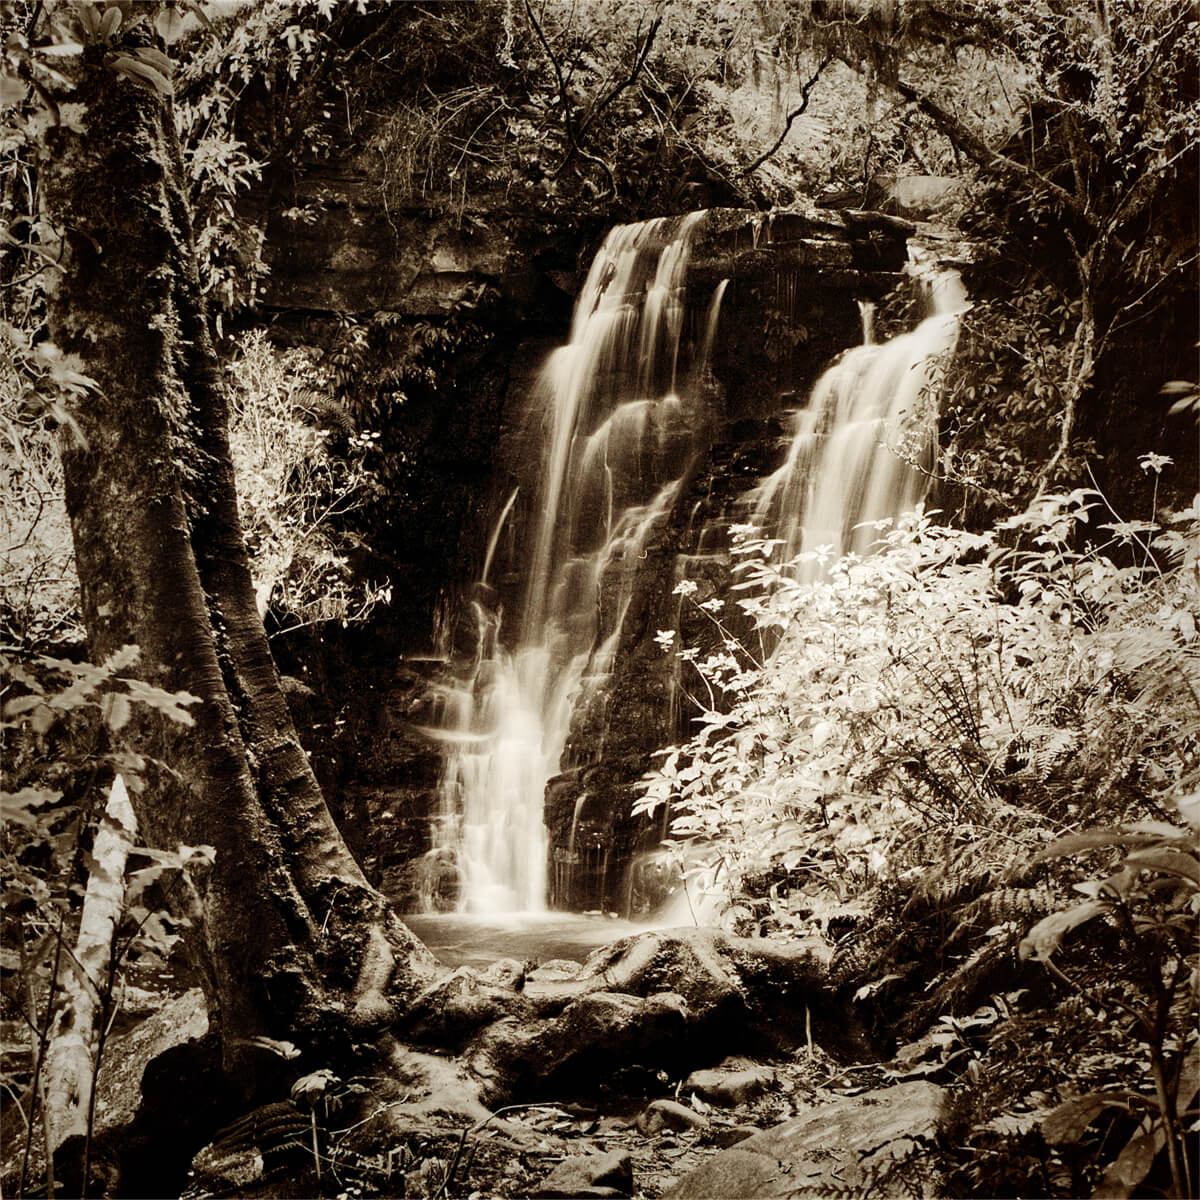
Red

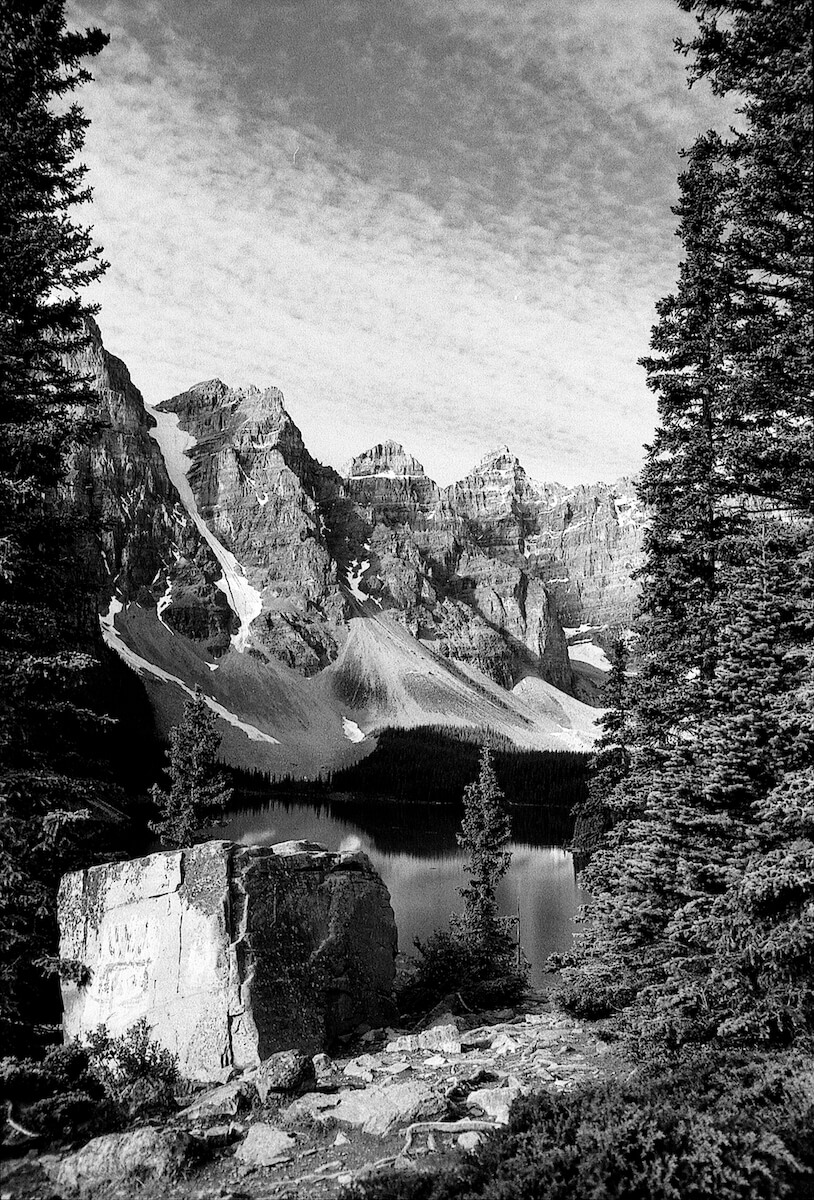
The red filter really darkens skies producing dramatic results in architecture and landscapes
The factor for the common R25 type is 8x or +3 stops.
Specialist filters
Specialist filters include infra red, ultra violet and polarising filters. Used mainly in scientific applications and usually with specialist films, they have some uses in general photography, giving results that the eye cannot see but still produce a very effective image.
Used with specialist films some remarkable images can be produced but need great care in use. 120 and 35mm near infra-red emulsions are still available from Rollei, Ilford and Adox and give an infra-red effect with a red filter and behave more like a regular emulsion. The stronger the filter the stronger the effect.
From left to right: the bridge is shot on ILFORD SFX 200 with a 6x red filter, the lighthouse on Rollei Infrared 400 with a 720nm (R72) infrared filter and the tree on a Sony A3000 digital with the same IR filter.


The factor for an R72 filter is 16x or 4 stops. Full IR filters at 20x+ will give full IR ‘Wood’ effects.
Framing and focusing are impossible using these filters on cameras that offer a view through the lens (such as SLRs and large format cameras) because they will effectively block any useful visible light. An IR sensitive digital is the only option to provide a viewfinder image with these filters, ones specifically modified being the easiest to use.


With a film SLR, initial framing and focus have to be done without the filter and focus adjusted for the exposure. Infra-red focuses at a different distance to full-spectrum light and many cameras and lenses have an infra-red mark on the focus scale.
To use is, set the distance to this mark after establishing distance/focus without the filter. If there is no IR mark, I set the distance without filter to around the f/4 or f/5.6 on the depth of field scale, towards infinity, i.e. further away, and then stop down to f/11 or more.
The 17mm Tamron lens’ mark (3rd image) is between f/4 and f/8, which seems to apply to many wide-angle lenses. Other focal lengths can vary a lot so it is best to do some test shots for them if no mark is provided. The 300mm lens shown is marked between f/16 and f/22 for example, much further away than the 17mm, and the zoom lens has a variable mark to match the selected focal length.
Weird and wonderful filters
At one time there was a great fad for using weird filters that gave star bursts, multiple images, streaking and haloes and all sorts of other effects. Very much in the psychedelic spirit of the ‘70s. The Cokin range was a well known and widely used example. Graduated and neutral density filters are the main left-overs we see in use today, mainly in landscape work plus some of the less extreme offerings. Much of what they offered can now be produced digitally if you really have to but getting it in camera is usually more convincing.


I only have two examples now, from a range East German Zeiss offered at one time. One I am unlikely to use very much and the other still very useable. The first is a diffraction grid and the second for a soft focus effect with a clear circle in the centre. The soft focus filter gives variable results depending on the aperture set. A wide aperture gives more diffusion, a smaller aperture less.
Graduated and neutral density filters
Grouped together because they are often used in combination, graduated filters cut down the exposure in part of the subject, usually the sky in landscapes and neutral density filters allow exposures to be extended for smooth water effects and blurred skies.
Grads come in varying strengths for different degrees of exposure decrease and hardness of the transition and NDs just vary in strength. I don’t possess a grad any more because it is frankly easier to produce the effect digitally for my purposes but for serious landscape work getting it right in camera is definitely preferred. I am sure there will be plenty of examples on line. The ND8 has a factor of 8x and cuts the light by 3 stops.

This example of movings clouds is a pinhole shot at f/360 or so, requiring a long exposure, but the effect is the same as with an ND and slow shutter speed. Another favourite use for the ND is to smooth out waves for a very tranquil effect.
Polariser filters
The most generally useful specialist filter could be the polariser. It is principally offered as a means of deepening a blue sky in colour images but it can also remove reflections from non-metallic surfaces whether using colour or monochrome. So, for example, used in conjunction with the orange filter, a monochrome shot of furniture will produce even stronger figuring or in landscape, reflections off water or foliage can also be controlled for a stronger rendering. Reflections at around 35o-40o from the horizontal and skies at right angles to the sun are most affected. The examples here shows the way the filter effect is cut off quite abruptly and also in the cheeseboard example how metallic surfaces are not affected even though the wood figuring is brought out and the painted table top is slightly darker.


This filter will also have some effect in monochrome, increasing contrast in non-metallic elements of a scene and also darken blue skies, depending the amount of haze present. Other tones will remain largely unaffected.
A polariser usually has a factor of +1 2/3 to +2 stops.
One thing if you are using a TTL, autofocus camera, I understand the older, linear version of the filter can upset autofocus and metering so a circular polariser is needed with these cameras and with a digital camera.
UV and haze filters
These are clear or very lightly tinted filters which have little effect on monochrome film, being most useful in colour work, reducing the blue in distant views and do not require any adjustment in exposure. They are mainly used these days as protection for the lens. Factor is 1x or +0 stops.
In use
We have talked about filter factors for each filter but what does this mean in practice?
Each increment on the scale of stops either doubles or halves the amount of light reaching the film. Filters
will always require more exposure except for those mentioned, and they are given a factor to indicate what this should be. These factors can be confusing to apply being expressed as multiplications. I suppose that is because the shutter speed might be adjusted rather than the aperture or a combination of both in some cases so perhaps makes more sense.
The steps in relation to stops are:
| Filter factor | Aperture increase (in stops) |
|---|---|
| 1x | 0 |
| 2x | 1 |
| 2.5x | 1 ⅓ |
| 3x | 1 ⅔ |
| 4x | 2 |
| 6x | 2 ⅔ |
| 8x | 3 |
| 16x | 4 |
In some situations it may be necessary to alter both speed and aperture to preserve depth of field which means using slower shutter speeds by the equivalent number of full steps, combined with small adjustment of the aperture to get intermediate settings, e.g. 2 2/3 stops would need a step slower speed and a 2/3 opening of the aperture to maintain roughly the same depth of field.
If a very large adjustment which necessitates a very long exposure don’t forget to take reciprocity into account. This is the loss of speed that films experience when exposures exceed one second. For FP4+, Ilford recommend that 5 seconds should be around 8secs, 10 secs becomes 18s secs, 20 secs becomes 45 secs and if you really stretch exposure, 50 secs becomes almost 140 secs.
Mounting filters
There is a great deal of information available on specific makes of filters so only generic types are covered here.
Screw-in


The most common type is the screw in type which is readily available in a wide range of sizes to suit most lenses. Mainly the manufacturers of better quality equipment used this type and many older cameras will not accept this kind of fitting. Those that do tend to take smaller than usual current sizes as shown in the example of the three screw in filters here. The smallest is the Kodak Retina filter. Kodak used a screw fitting for the filter and a bayonet for the lens hood.
Bayonet


Many cameras old and not so old use a bayonet mount for filters and lens hoods. The ubiquitous Rollei Bayonet 1 fitting above is the most common and fits the majority of TLRs that were spin-offs from the Rollei original. The later Rollei TLRs use larger bayonets and Hasselblad also have a dedicated bayonet filter mount.
This is a very secure and easily attached/detached design but very much specific to particular cameras.
Square/Rectangle


An offshoot of the screw type is the square filter such as the Cokin and Lee systems which have a frame to slip filters in and interchangeable mounts in various sizes which attach via the filter thread. One set of filters can then be used with different lens threads via a simple adapter. These are mostly used for graduated and ND filters but usually have slots for several at a time so they can be used in combination with a contrast filter if required.
These systems ideally need to be used on a view camera or SLR to be able to fully assess the effect.
Push-on
Push-on filters were most common until the SLR exploded onto the scene and these vary
in diameter also along with the lenses they fitted. The ‘Series’ filters addressed this problem by having interchangeable mounting rings so that the same filter could be used on different lenses within a fixed range but are only occasionally available second hand.
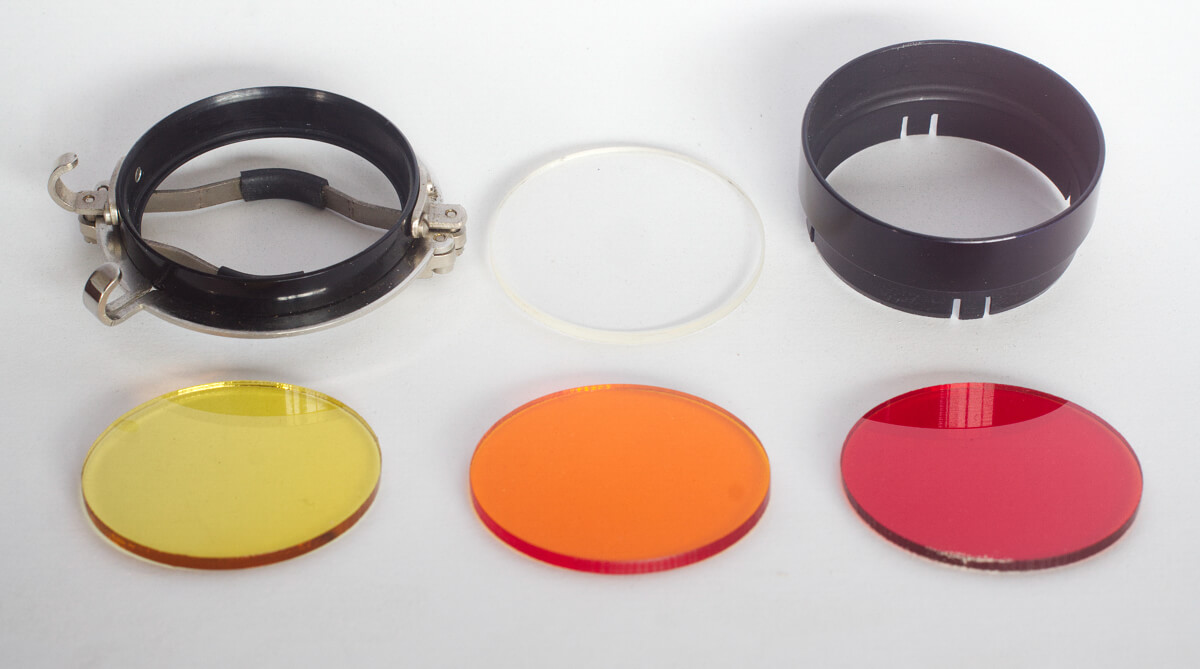
Clip-on.


In the early days, spring clip devices were often used which fitted different lens sizes and still useful today if you can find one. I modified a very basic Johnsons of Hendon version I found a while ago by fixing a 55-52 step-down ring and thin brass sheet disc to it with epoxy so that I can use 52mm filters on various dissimilar lenses from around 25 to 40mm.
More recently I have acquired a Nebro Handcross model which has a more positive and precise mounting arrangement. I have a set of suitable sized resin filter “glasses” made for me by SRB/Griturn in the UK which will make it more elegant than the first one and less bulky. This device fits most earlier lenses with outside mounts of 25mm to 40mm, covering most popular mid 20th century offerings.
Clip-on filters


In the early days, spring clip devices were often used which fitted different lens sizes and still useful today if you can find one. I modified a very basic Johnsons of Hendon version I found a while ago by fixing a 55-52 step-down ring and thin brass sheet disc to it with epoxy so that I can use 52mm filters on various dissimilar lenses from around 25 to 40mm.

More recently I have acquired a Nebro Handcross model which has a more positive and precise mounting arrangement. I have a set of suitable sized resin filter “glasses” made for me by SRB/Griturn in the UK which will make it more elegant than the first one and less bulky. This device fits most earlier lenses with outside mounts of 25mm to 40mm, covering most popular mid 20th century offerings.
In conclusion
Black and white photography can be a very expressive medium, reducing colours and tones to emphasise texture and form. Using a filter will almost always augment these qualities when used with care. Well worth the effort.


This is not an exhaustive coverage of filters, more a practical overview. I have used the ones I have owned but have sold on and ones I currently possess for the examples shown and Google will no doubt throw up examples of many others.
I hope this article will encourage you to give them a try and discover how much they can improve results.
~ Tony
Share your knowledge, story or project
The transfer of knowledge across the film photography community is the heart of EMULSIVE. You can add your support by contributing your thoughts, work, experiences and ideas to inspire the hundreds of thousands of people who read these pages each month. Check out the submission guide here.
If you like what you’re reading you can also help this passion project by heading over to the EMULSIVE Patreon page and contributing as little as a dollar a month. There’s also print and apparel over at Society 6, currently showcasing over two dozen t-shirt designs and over a dozen unique photographs available for purchase.


7 responses to “Using filters with monochrome film”
Will give it some thought EM but don’t have a blue filter any more to work up examples since I sold on my Rollei B1s. If I come across one I will sort something out.
That’s true Martin, but to emphasise the mist and fog of course. It is not a filter I have used but it should have been included. It makes panchromatic film behave more like ortho film, which is not sensitive to red, and because red light penetrates mist and fog better than other colours, it makes the rendition in monochrome more accuarate. It is also useful for portraiture for the same reason. The red insensitivity will emphasise variations in skin tone, good for portraits of some male subjects, and blue eyes will be lightened because of the “lightens like” effect.
Happy to add an addendum for you, Tony!
What about blue filters for B&W films? Rarely used but might have the edge in foggy condition.
Tony, this is one of the best practical write-ups I’ve seen about using filters, especially your information about filter holders and mounts. You have some very cool holders I didn’t even know existed!
Rather than shell out for overpriced Rollei filters for my TLRs, I invested in a Bay 1 to 37mm adapter. Tiffen made quite a few adapters that I’ve been able to pick up like the Bay I to Series VI adapter and a 43.5mm to Series VI adapter for my Olympus Pen, RC and Trip cameras.
I’ve used Cokin P series ND filters with Ektar 100 and I didn’t care for the purplish cast it gave my photos, so I tend to only use them for digital.
Fair comment Kenneth – I processed the examples to maintain a mid-grey for comparison purposes and of course the effect can be made stronger by adjusting the exposure for darker skies, which, as you say will tend to block up the shadows a bit. It does give you more expressive options with the final result though.
Excellent review! My experience with the 25 red filter is even more dramatic than in your examples with skies that are almost black, but at the cost of dark muddy shadows. It can be quite striking (some say overdone) with a light subject against a deep gray-black sky.