Fuji Velvia 50 is my favourite colour film. The colours, saturation and contrast are unique. It’s especially good for golden hour colours around dawn and sunset. And finally, nothing beats seeing transparencies in all their wonderful glory coming out of the developing tank.
However, it can be quite tricky to use for a couple of reasons:
- It has a very limited dynamic range of just four or five stops.
- It has very limited exposure latitude. It must be exposed accurately, otherwise shots can be ruined.
- It has a high rate of reciprocity failure in exposures of longer than 1 second, so calculating the time for long exposures can be tricky.
- As with any transparency film, maintaining accurate temperature and time in developing is crucial.
So yes, there’s a lot that can go wrong – but that makes it even more satisfying when your shots come out perfectly exposed and developed.
So what is the secret of success in shooting Velvia 50 or other slide films?
Well, this short article aims to help dispel some old wives’ tales about shooting slide film and inform you of what you can do to ensure sure that each step you take – from metering to exposure and development – delivers an even result from your film in the context of landscape photography.
There are of course many different “looks” that can be obtained from slide film, just like any other film. You may chose to create silhouettes from certain scenes by metering for highlights, or even capture broad shadow detail by sacrificing everything else. The main thing to remember is that this is just a starting point for you to begin or continue your own journey!
Getting started with accurate metering
I use a hand held meter, a Minolta Autometer IV F with 5° spot attachment. The old adage is to expose for the highlights when using transparency film. It’s not as simple as that though. If you simply expose for the highlights in the sky you’ll get underexposed shots.
Sometimes it’s a simple as looking for the most important element in the shot and metering for that.
In the example below the leaves in the water and the waterfall were about the same EV, so exposure was simple. With the low dynamic range of Velvia some detail in the shadows behind and to the right of the waterfall have been lost, but for me that’s not too much of a problem.
 This shot was spot metered off the leaves in the water and the water in the waterfall. A 6 stop ND filter was used to get the swirl of the leaves.
If I’m faced with a situation in which the foreground is darker than the sky – which is normal – my method is to ignore the sky completely to begin with. Instead I’ll meter the foreground.
I’ll take readings of the various points of light and dark in the foreground to see how much dynamic range I’m dealing with. Quite often it will be more than the four or five stops that Velvia can cope with. In that case I’ll have to accept that some points of the foreground are not going to have much detail in them. Some might even be completely black. But that’s OK, so long as they’re not areas that I’m concerned about.
The exposure that I use depends very much on the scene and what I want to include and the detail that I’m prepared to lose, but typically I’ll set the exposure to be about a stop lower than the brightest part of the foreground.
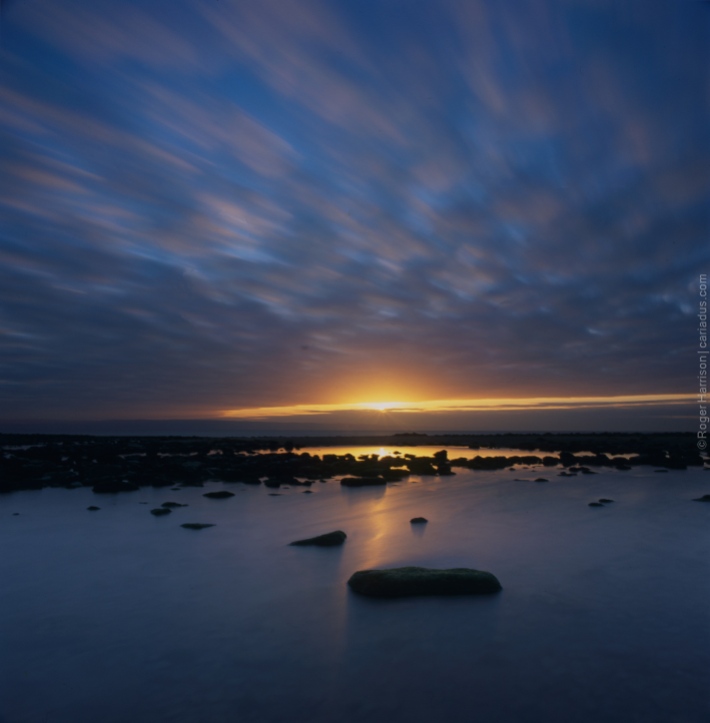
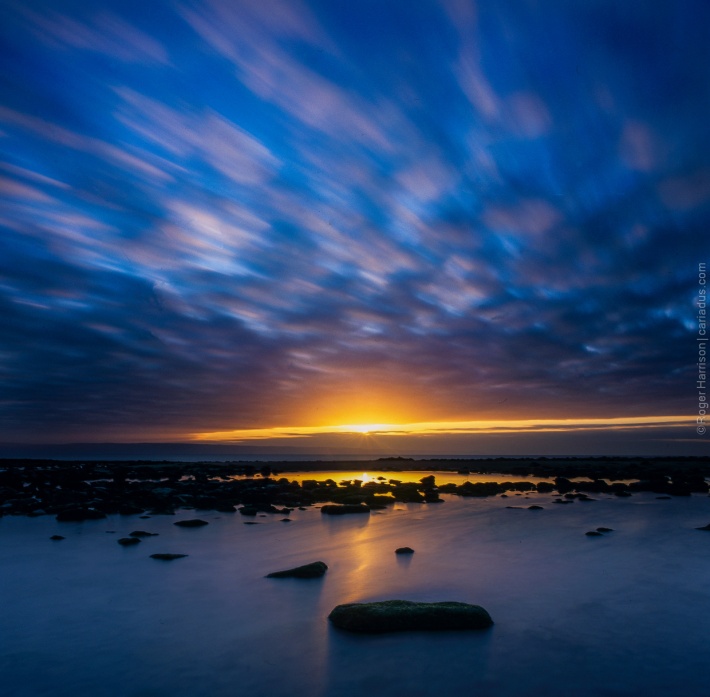
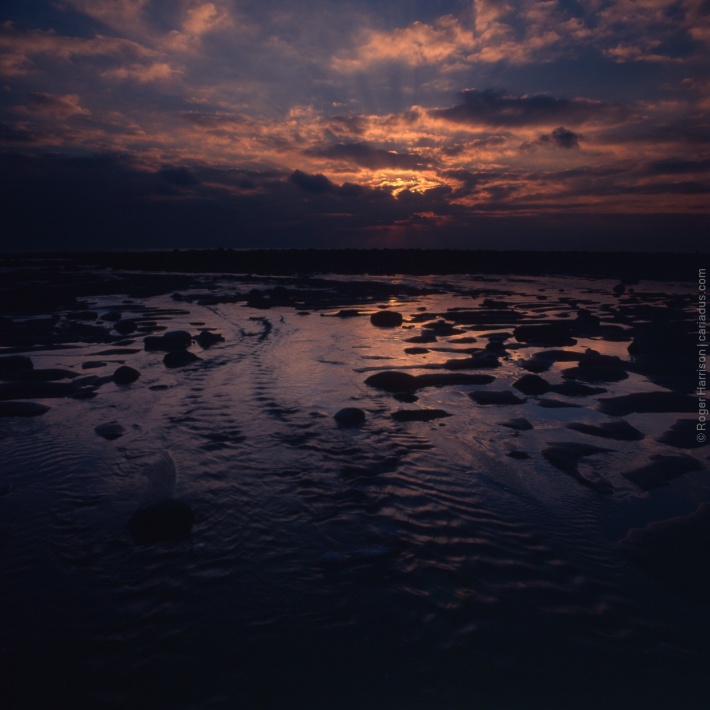
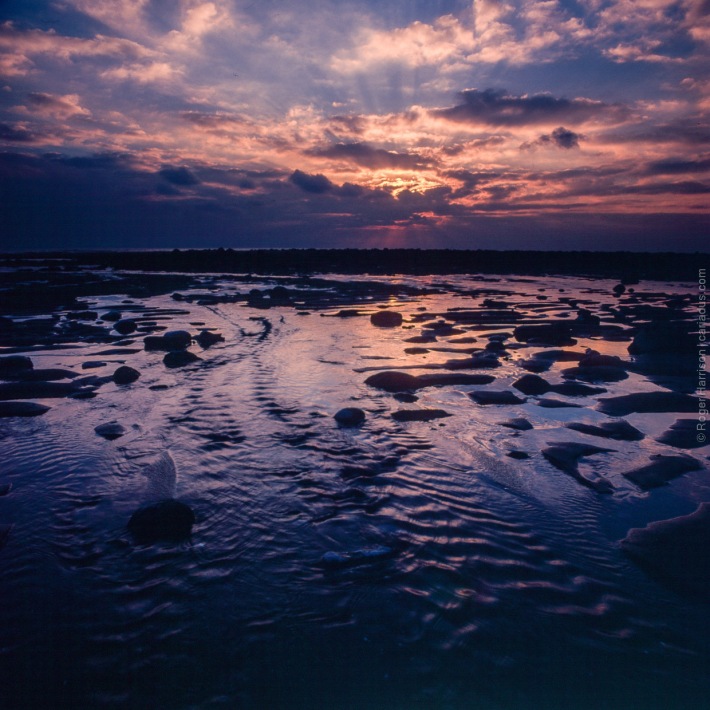
 For this shot I metered off the sand next to the furthermost rocks and positioned the ND grad filter (see below) so that the dark/light border was below the level of the horizon .
If there’s one single element in the foreground I deem the most important in my composition, I’ll meter off that and set the exposure at that level.
For instance, if there’s a pool in the foreground that will be the main focal point of the photo, I’ll meter off the reflective surface and use that as a basis for my exposure.
 For this shot I metered off the water of the pool. It meant that some detail in the sand and rocks would be lost but I was prepared to accept that. A 3 stop ND grad was used for the sky.
The next step is to meter the sky, which will nearly always be brighter than the foreground. This leads us on to…
Use Graduated Neutral Density Filters
How much brighter the sky is determines the strength of graduated ND filter to use (ND grad from here on in). I use Lee ND grads .
For seascapes with a well defined horizon I will use hard gradient filters, and for landscapes with a less well defined horizon I’ll use a soft gradient. I
don’t usually spend too much time on the sky, in fact quite often I don’t even bother to meter it at all, I’ll just choose an ND grad based on how bright the sky looks. A 2-stop ND grad will cover most situations, a 3-stop if the sky is particularly bright or 1-one stop if it’s not.
Using these filters allows me to bring the sky into “range” for the focal point of my scene. Effectively they allow me to remove the sky as a potential complication from my exposures.
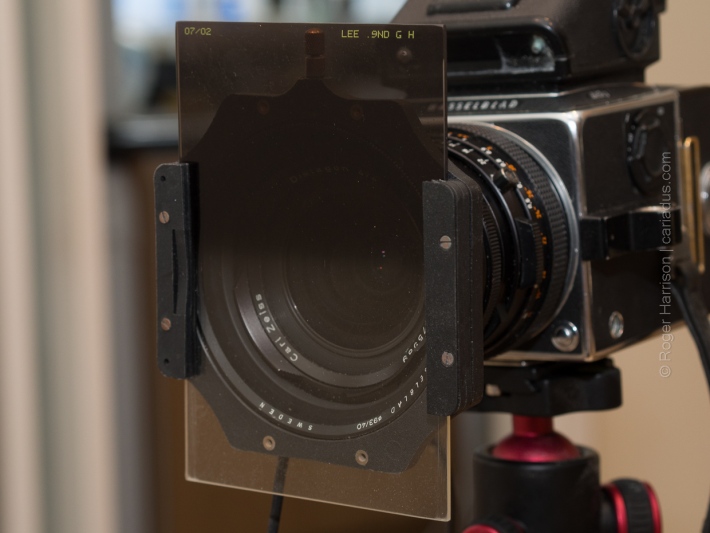 Hasselblad with 3-stop soft ND gradient filter
In addition to using these filters, I’ll usually avoid having the sun in the shot unless it’s very low in the sky, otherwise the dynamic range between foreground and sky is just to much even with ND grad filters.
Over time you will get to know pretty much what the exposure is likely to be even before you meter. Just prior to sunset I normally use ¼ to ½ sec at f/22. As the sun begins to dip below the horizon it will be around ½ to 1 sec. A 2 to 4 sec exposure is normally required Immediately after the sun goes down, although obviously it will vary depending on the amount of cloud cover (in the UK at least).
Long exposures and reciprocity failure
When shooting Fuji Velvia 50, you need to factor in reciprocity failure for exposures of over 4 seconds. From 4 to 8 seconds you will need to allow and extra second and from 8 to 12 seconds you will need to multiply your exposure by 1½. For exposures from 16 to 30 sec multiply by 2.
For example:
- A requiring an exposure of 3 seconds can be shot with no adjustment.
- A scene requiring an exposure of 6 seconds would need to be exposed for 7 seconds.
- A scene requiring an exposure of 9 seconds would need to be exposed for 13.5 seconds.
- A scene requiring an exposure of 18 seconds would need to be exposed for 36 seconds.
You can even introduce ND filters into the mix to get really long exposures. For the shot below I used a Hitech Firecrest 6-stop ND filter and a Lee 2-stop ND grad for the sky.
I decided on f/22 for 4 sec as the basic exposure at ISO 50. Factoring in for the 6 stop ND gave me 4 min 16 sec. And to allow for reciprocity I exposed for 10 minutes.
 10 min exposure using Hitech Firecrest 6 stop ND and Lee 2 stop ND grad
If in doubt, err on the side of overexposure
It is, of course, important to meter accurately when using Velvia, but generally it can cope with a small amount of overexposure much better than under exposure, especially if you are scanning your film. If you underexpose it’s virtually impossible to rescue the image.
You could try to increase exposure or bring up the shadows in Photoshop or Lightroom, but the result is usually pretty horrible. If it’s slightly overexposed, though, it may be possible to darken it a touch without too much of a problem.
So, if you can’t decide between, say, ¼ sec and ½ sec go for ½ sec because it will give you more room for manoeuvre when scanning and processing the film.
This is an example of a shot that was slightly over exposed.
It was quite easy to pull the highlights back and tweak the curves to improve it.
On the other hand this shot was under exposed
To be honest I wouldn’t normally even try to edit this type of shot, I’d just reject it, but just as an experiment I tried to rescue it in Lightroom which resulted in this:
OK, so it’s not too bad, but the blacks and shadows don’t hold up well when you try to increase the exposure in post processing.
However, it is possible to rescue under exposed shots if you have access to a drum scanner. Drum scanning can bring up shadow detail in transparencies much more efficiently than a typical home scanner, as Tim Parkin explains here.
Don’t be afraid to home develop E6
Developing E6 at home is not as difficult as some may think. Kits such as the Tetenal E6 kit come with easy to follow instructions and there are lots of resources online with guides and Youtube videos. [EMULSIVE: including an excellent home E6 development guide from Kikie Wilkins here on this very website!]
Having a processor, such as a Jobo, does make things easier, but it’s certainly not essential. You do need to be careful with times and temperatures, but small variations aren’t going to make too much of a difference, so it’s not something to worry about unduly.
In some ways, E6 processing is easier than black and white because there are fewer variables involved. Development time will be the same regardless of the E6 film used.
Other transparency films
One of my other favourite films is Agfa CT Precisa 100, which is reputedly re-branded Fuji Provia 100F and only available in 35mm sadly.
Precisa is usually considerably cheaper than Provia and makes an excellent alternative. My OM-4ti makes a perfect camera for this film due to its sophisticated, but very easy to use, spot metering.
Precisa is slightly easier to shoot than Velvia 50. For one thing it’s ISO 100, so hand holding a camera is feasible in good light. Also, it doesn’t suffer from reciprocity failure to anywhere near the same extent as Velvia.
Some examples on Precisa…
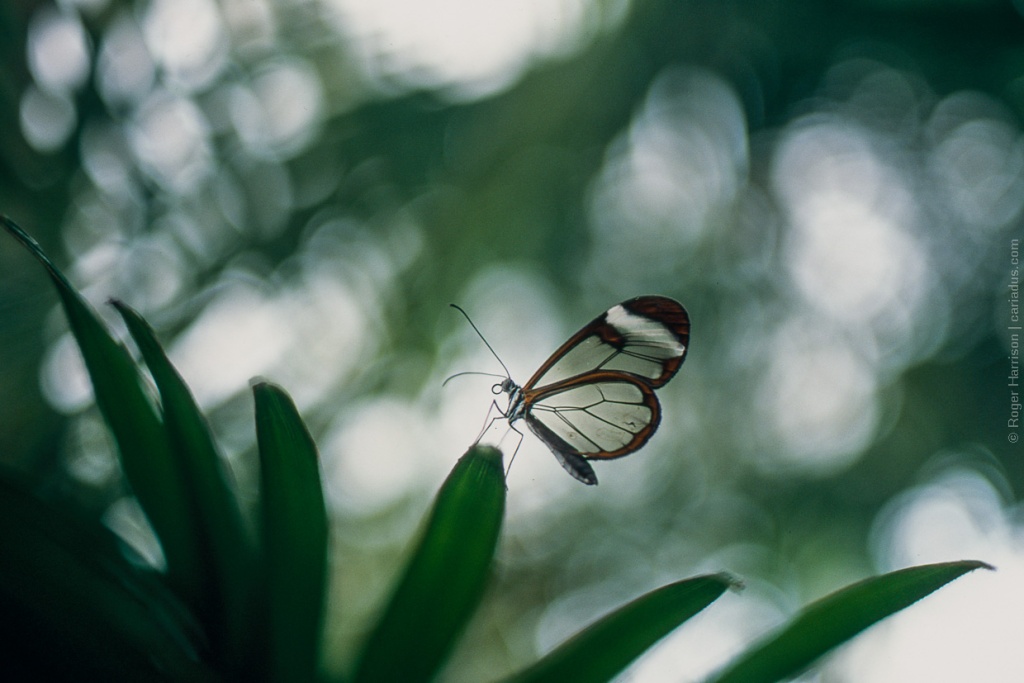 Glasswing Butterfly
  Sunset on Agfa CT Precisa with OM-4ti

Provia/Precisa is a little less saturated and contrasty than Velvia 50, but as you can see from the sunset shot above, it’s still not bad for saturated colours in the right conditions. The colours are a little more realistic than Velvia, though, and better for people shots. One of the main differences is that it suffers far less from reciprocity failure, so it’s much easier to use for long exposures.
Confusingly there is also Velvia 100 which is also better from a reciprocity failure point of view than Velvia 50, but is more saturated and contrasty than Provia. I haven’t shot much Velvia 100 but here is a recent sunset shot taken on an Intrepid 5×4 Mk 2:

All of these, Velvia 50, Velvia 100, Precisa and Provia are made by Fuji, who are notorious for discontinuing films, so lets hope they continue making them for the foreseeable future.Soon Kodak may bring back Ektachrome though, so perhaps there’s some hope on the horizon.
Whatever film you choose, go shoot some slide – you’ll be glad you did!
~ Roger Harrison
Share your knowledge, story or project
The transfer of knowledge across the film photography community is the heart of EMULSIVE. You can add your support by contributing your thoughts, work, experiences and ideas to inspire the hundreds of thousands of people who read these pages each month. Check out the submission guide here.
If you like what you’re reading you can also help this passion project by heading over to the EMULSIVE Patreon page and contributing as little as a dollar a month. There’s also print and apparel over at Society 6, currently showcasing over two dozen t-shirt designs and over a dozen unique photographs available for purchase.


19 responses to “Effectively shooting Fuji Velvia 50 and other slide films”
An excellent article Roger. Extremely helpful for what I hope will be a very interesting new project for me. Thanks very much
An excellent run-down – thanks. I was about to load up a roll and see what happened, but now I will hold off until I can get a filter (and maybe read this again a few times).
Velvia 50. Rate for EI40 and enjoy.
I tried running a roll of Velvia 50 through the FM2 with a super 50mm 1.8 – nervy moments collecting… https://t.co/MPBG2jOPw4
This is a reminder that I need to invest in filters.
Let’s be honest. The only way to effectively shoot Velvia 50 is to click and then pray.
It’s not that difficult, meter for the highlights and perhps use a slight warming filter in bright mid-day sunlight.
What a brilliant write up! Especially with this surge of photographers wanting to take up film photography.
Seeing these images brings back so many memories of shooting with Velvia and Provia. Sometimes very frustrating but always an amazing experience.
Nice work!
5
Thanks so much for this article Roger.
3.5
how do you translate the meter readings to your exposure setting? For instance, when you metered off the pool on the beach (it was lighter toward the top of the pool), did you set your camera to that reading, i.e., a zone 5 in zone system terminology? You also said that you read the brightest spot and set exposure for 1 stop less, which puts the brightest area on zone 6; which makes sense due to the limited dynamic range. I understand exposures better in terms of zone system.
The zone system doesn’t really work for Velvia due to the limited dynamic range – you could use a 1 – 5 zone system I suppose, or 2 to 2½ stops either side of zone 5 and accept that you’re not going to get the very lowest or highest ends of the zone. I tend to work in EV as that translates nicely to my Hasselblad lenses. For the pool I metered about mid way. This is where I find a 5° attachment on my ‘spot’ meter useful rather than a 1°. A 1° spot would give a wide range of readings for the pool which end up being confusing. The 5° is accurate enough to pinpoint an area of the scene but gives a general reading for that area and not a confusing range of values. That’s what works for me anyway.
That is gorgeous!
Thanks!
wow, EM, this is a stunning dreamscape you’ve created!!
whoa, I have to try slide film.
Thanks to @cariadus for this fantastic contributed article!
awesome!