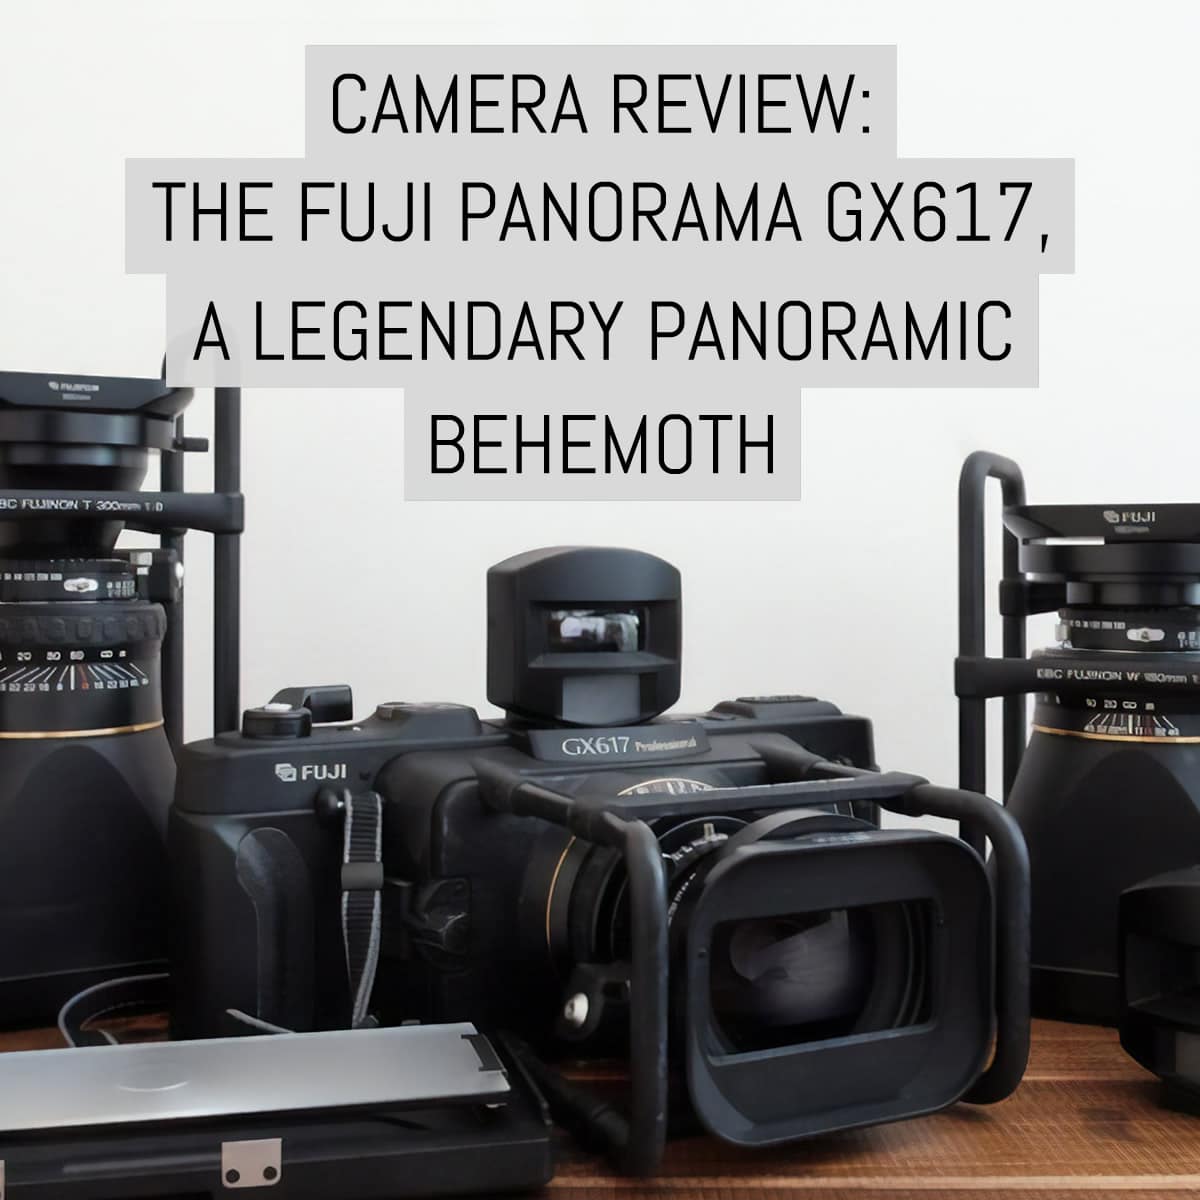
Beloved of landscape photographers, especially those involved with supplying images for calendars and home decor products both before and well into the digital camera era, the Fuji Panorama GX617 was the final iteration of Fuji’s legendary behemoth panoramic medium format camera.
The nominal 6x17cm frames produced by similar cameras from Fuji, Linhof, Horseman and several lesser-known manufacturers of mainly Chinese origin are not strictly a panoramic format. A more apt term might be “wide format”, but the frame size is impressively large and wide enough to carry the panoramic claim.
The 3:1 aspect ratio equates roughly to a sheet of 7×5” film cut in half through it’s longest dimension. Think about that for a moment: these cameras make images that are around 7 inches wide. A well composed and exposed 6×17 transparency on the lightbox is truly something to behold!
Here’s what I cover in this review:
Quick history
The first medium format panoramic camera by Fuji was the Fujica Panorama G617. It was released in 1983 with a fixed Fujinon EBC SW 105mm f/8 lens and fixed optical viewfinder. The camera took both 120 and 220 roll film – four or eight frames respectively. These features were retained in the renamed Fuji Panorama G617, which was released in 1985.
The camera was completely revised with interchangeable lenses and viewfinders in 1993 and launched as the Fuji Panorama GX617. A number of prominent photographers – Colin Prior and David Osborn being two of them – favoured the format and built their reputations and businesses with the distinctive frame size.
The Fuji Panorama GX617 was discontinued in 2003 along with all of Fuji’s rollfilm cameras, but used examples in surprisingly good condition are frequently available from the usual places. It’s a very robust, reliable and durable camera; and built for professional use outdoors. This has largely ensured that many examples on the secondhand market are still in good condition.
My Fuji Panorama GX617
I bought my complete Fuji Panorama GX617 outfit new from Robert White in 1998. It has travelled the world with me and has been hauled up and down the hills of the UK in a backpack shared with camping gear. It is still in excellent condition and nothing has ever broken or fallen off. It just goes on making those large, wide frames and is a joy to use even though it is a hungry beast to feed!


With all of the exposure controls on the lens shutter, the top plate is the realm of the 120/220 film selector, frame counter window, film wind-on lever and electromagnetic shutter release on the right-hand side. On the left, you’ll find the viewfinder release button, rear door lock, bubble level and the raised battery compartment cover. In the center sits the detachable viewfinder. More on that top plate below.
Lenses, hood and viewfinders

The camera has a choice of four interchangeable large format EBC Fujinon lenses:
- EBC FUJINON SWD 90mm f5.6-f/45
- EBC FUJINON SW 105mm f/8-f/45
- EBC FUJINON W 180mm f/6.7-f/45
- EBC FUJINON T 300mm f/8-f/45
These translate to an equivalent focal length of 20mm, 26mm, 46mm and ~74mm on 35mm film respectively and are accompanied by a dedicated optical viewfinder and lens hood. Each of the lenses come built into a standard Copal #0 shutter (with a screw-in port for a cable release) and are set into focusing helicoids.
It’s difficult to say how effective the lens hoods are, but I can say that ghosting has only rarely happened when I’m using screw-in filters and is never a problem when no filters are used. When it does happen, it usually manifests itself as an ugly hexagonal reflection of the shutter/aperture, reflecting from the back of the filter slightly above mid-frame.
As is so often the case with vestigial lens hoods, these Fuji lens hoods might offer a degree of protection for the front element of the lens. I have the lens hoods and I use them mainly for that reason.

The protective “crash bars” you see above form part of the lens mount by locating the bar ends into corresponding sockets in the camera body.
The bars are removable from the front section to allow a filter holder to be used. This involves removing the tiny screws that hold the bar sections in place, but take care not to lose those screws!

The crash bars interfere with Lee and similar square filter systems on the 90mm lens. The filter holder is a tight fit and only one slot will work if the lens is focused closer than infinity. The filter holder and the crash bars will come into contact as the lens is racked out on its helicoid. Lee 100mm and similar filter systems will not fit any of the longer lenses as there is not enough room between the bars to attach the holder.
The lens assemblies are fixed in place by locating the four crash bar ends into their respective sockets on the camera body and tightening the two bolts at either side of the flange to secure the lens. The camera is noticeably heavier and much more bulky with a lens attached!
TIP: Once film has been loaded, it not possible to change the lens unless you have a large changing bag or tent available to do.
Ground glass focusing
An optional ground glass focusing screen can be useful for critical focus and composition but it is fiddly to use. It has a microprism centre spot with a cross-hair target and is engraved with horizontal and vertical lines for levelling up.
You will need to use it with a dark cloth and a loupe as you would with a conventional large format camera, although the image on the ground glass is very dim.
")


The focusing screen can only be used when there is no film in the camera. To attach the screen, release the back door and lower it carefully. Engage the lugs on the bottom edge of the screen with the attachment points on the bottom edge of the film gate and press the top of the screen into place. It fits with a positive click. Lower the rear door locking tab on the top plate to lock the hood and screen assembly. Open the hood to view the screen.
Loading film
The rear door of the camera is released by a lever on the top plate. The door hinges downwards to reveal the film chamber.
The camera can take either 120 or 220 films by adjusting the selector on the top plate flipping the film pressure plate around: the plate is stamped with ‘120’ on one side and ‘220’ on the other and must be removed, turned over and remounted to the correct orientation according to the film type.
You do this by pushing the plate downwards and sliding it off in the direction of the arrow. Once free, turn it over and reinsert it.


There is a metal ‘Start’ arrow on the upper guide rail, which corresponds with the marker on the backing paper of your 120/220 film – you can see it pointing down on the upper guide rail to the left of center in the last two images above. When the arrow and marker coincide, close the back, lock it and wind the film on with the wind-on lever until the stop is reached and ‘1’ appears in the frame counter on the top plate.
After an exposure is made, it takes four strokes of the wind-on lever to advance the next frame – the frame number will appear in the window. The frame numbers are automatically reset when the camera back is opened.
Double exposures – making or avoiding them
To avoid double exposures, you need to adopt a methodical routine. My method is to wind on immediately after an exposure is made but leave the shutter uncocked until the camera is set up and ready for the next exposure.
Only when the composition, focus, aperture and shutter speed are set do I cock the shutter to make another image. There is a convenient film reminder on the rear of the camera.
Of course, if you would like to intentionally make double triple or quintuple exposures, you may disregard the above suggestion!
Operational critique – film door lock
All the controls are easily accessible, my only operational criticism concerns the rear door lock. This is a plastic tab which has to be lifted upward by inserting a fingertip under it and pulling the tab upwards until a firm click is felt and the rear door springs open.


There is only enough room for the spideriest of slim fingertips under the tab and I have found it next to impossible to unlock the rear door with cold fingers and completely impossible if wearing gloves. If you are blessed with pork sausages for fingers, then forget it. You’ll need an implement of some sort to lift the tab.
My usual method is to use something like a car key to prise the tab upwards, but this is a far from satisfactory solution. For such a frequently used part of an otherwise heavy-duty and functional camera layout, the locking tab is one corner that has been cut to the quick by the camera’s design team. That said, mine shows no wear or signs of impending malfunction due to being fiddled with and cursed at on cold mountain summits and windy northern beaches.
In the gallery above, you’ll see the tab raised in the ‘unlock’ position. When a new roll of film has been loaded, the tab locks down positively with a firm click. Despite my criticism of the tab from an operational point of view, it is unlikely that the back to open itself short of throwing the camera onto rocks from a 300ft cliff.
Don’t forget the batteries
The presence of two CR123A batteries hidden under the raised cover seems to come as a surprise to some later users who have bought these cameras with no user manual included in the sale. There is a danger here that as these cameras are successively bought and sold on again that someone, somewhere will leave the camera unused for a lengthy period and the batteries will eventually leak.
If you are considering buying a Fuji GX617, make sure the battery compartment is clean and without signs of leakage. Even the youngest cameras are now around 14-15 years old. As always, caveat emptor.

So what is the battery for and why is it fitted to what is essentially a manually operated camera?
The more astute will have noticed from the images above that there are two shutter releases. One is the Copal shutter, which is tripped by conventional cable release. The other is the matt silver coloured button on the top plate which the film wind-on lever pivots around (just like on a 35mm SLR).
This is the camera’s electromagnetic release, which facilitates handheld shooting – perfectly possible with higher shutter speeds. The button release is also threaded to take a cable release, bulb release or self-timer release etc., just as your 35mm SLR does. The release button must be depressed after each exposure to unlock the wind-on lever and advance the film to the next frame.
Four strokes of the wind-on lever will automatically stop and the next frame cannot be wound beyond its place.
The GX617 in use
For its size and weight, the GX617 is surprisingly comfortable and stable to handhold with a wide angle lens fitted. It’s no more cumbersome than a ‘pro’ DSLR with a standard f/2.8 zoom lens, I would even argue that it’s better balanced than that. One of my most successful images, looking across Wasdale Head from Lingmell to Great Gable in the English Lake District, was taken on Fuji Velvia 50 and handheld at 1/60th second, and it is sharp.
I don’t make a habit of handholding this camera, though!
With the lens removed, you will see the electrical contacts that connect the electromagnetic shutter release on the body to the attached lens.
The lens assemblies are very heavy, there is a lot of glass and metal in their construction and those lenses need this bomb-proof clamping system. No corners were cut in the design here! The base of the camera body is fitted with a substantial steel plate with a 1/4” tripod socket. I have an Arca Swiss QR plate fitted permanently to my GX617 and the camera needs a good, solid tripod.
Viewfinders click positively into place in the slot on the top plate. They are is secured by a sprung metal hemisphere that engages a hole in the underside of the foot of the finder to lock the finder securely in place. To release the finder, depress the red button next to the bubble level and slide the viewfinder out of the slot.

Each lens has it’s own matched viewfinder with bright frames according to the focal length it is paired with. They are large and bright, reasonably accurate but not corrected for parallax. I’ve never found this to be an issue, but it could be in some close subject to camera situations. There is also a film plane symbol engraved into the top plate.
External finders have a great advantage for landscape photographers when carried separately in a pocket. I use mine to pre-visualise a scene for the optimum composition without having to unpack the camera as well. Treat your viewfinder with the utmost care. They are made of a polycarbonate plastic material and are by now irreplaceable. If you break or lose one, you have a major problem and you would have to resort to using a non-matched viewfinder sourced from elsewhere. It would be an ugly and unpleasant necessity to live with.
If you had bought a new Fuji GX617 with a Fujinon SWD 90mm f8 EBC lens before it was discontinued, the image below illustrates what you would have received in the various boxes after parting with your money. If you are thinking of buying a GX617 now, make sure everything shown here is included. The only items you can just about live without are the boxes, strap, lens caps and camera body cap. Everything else is operationally vital and you absolutely must have these items as a basic Fuji GX617 outfit.

In the image above you are looking at the camera body, the 90mm lens assembly, body cap, lens hood, rear lens cap, viewfinder, centre graduated neutral density filter and front lens cap.
The EBC FUJINON SWD 90mm lens is the more popular of the two wide-angle options and has a bespoke 77mm 1-stop centre graduated neutral density filter to counter the heavy vignetting that this lens displays across the format. This filter is mandatory in use and probably impossible to replace if lost or broken. If you are considering buying a used GX617, make sure that the centre ND grad filter and the viewfinder are included in the purchase.
Only the SWD 90mm needs the centre graduated ND filter. In order of use, the SWD 90mm is by far my most used lens and for many photographers, this one lens may be enough.
The FUJINON W 180mm f/6.7 lens gives a more natural angle of view and is good for concentrating on less expansive compositions to emphasise details. The FUJINON T 300mm f/11 lens is my least used lens, it is a true telephoto lens that dramatically compresses perspectives. The difficulty with the 300mm optical external viewfinder is that it does not indicate the telephoto effect of the lens. The only way to use the T 300 successfully is to make images and learn to pre-visualise how it renders perspective.
The T 300 also requires the use of a sturdy tripod, it is heavy and has a long ‘cone’, which makes the camera unbalanced when mounted on the tripod. Any movement will be greatly magnified and images will be ruined unless faster films and higher shutter speeds are used.
The T 300 is a handful and limited in application, but it can produce wide format images that you will not achieve with any other lens on roll film.
A point worth mentioning is that the neck strap attachment points are located in the body with small cross head screws. These screws can work loose over time if you carry the camera by the strap. I say this from personal experience, these screws on my camera had worked loose when I checked them and the consequences could have been disastrous, as I often carry the camera on my shoulder out in the field. I took the precaution of putting a spot of Loctite on the screw threads to ensure that the strap attachments stay put and I check them often!
Sample photos
As with the other images in this article, clip/tap on an image below to view it full screen.


Summary
The Fuji GX617 is a unique camera. It’s big, it’s heavy and it’s idiosyncratic. It’s a hungry camera, it eats film and every time you release the shutter there is a financial investment or penalty. That places it firmly into the realm of large format photography running costs: four exposures per roll of 120 film is a costly way of making images, this is the obvious and rather short-sighted downside of being a 6x17cm photographer.
You don’t buy a camera like this with your head, you buy it because you want to make images that are different to the millions that swamp the internet and other media every day of the week. You buy a camera like this because you relish a challenge. You buy it because you’re adventurous and want to make images with impact, you want to experiment, explore, find new directions and have fun. You buy the Fuji GX617 with your heart as a brave photographer.

Use it on the street, on the landscape, in the hills and on your travels. You’ll love the images for their depth and detail that this format delivers. It will teach you to plan ahead and consider your photographic goals carefully. Sometimes it will bite you, but that’s just the camera letting you know that you need to take your role as a photographer seriously.
Whilst 90% of the of the photographic world is embroiled in a feeding frenzy of megapixels, sensor formats, focus stacking, exposure blending, stitching and plugins, you will tread your own path and return with images that are compelling and different.
When those huge frames leap off your lightbox and smack you in the face, the last thing you’ll think about is the financial cost of making them.
Print them big!
~ Steve
Fuji Panorama GX617 specifications
| Manufacturer | Fuji Photo Film Co., Ltd (Japan) |
| Camera name | Fuji Panorama GX617 |
| Camera type | Interchangeable lens panoramic camera |
| Manufacture dates | 1993-2003 (unconfirmed) |
| Format | 6×17 – 120/220 rollfilm |
| Viewfinder coverage | 100% |
| Shutter | Copal #0 leaf shutter: 1 second to 1/500 +B |
| Lenses | EBC FUJINON SWD 90mm f5.6-f/45 EBC FUJINON SW 105mm f/8-f/45 EBC FUJINON W 180mm f/6.7-f/45 EBC FUJINON T 300mm f/8-f/45 |
| Accessories | Dedicated optical viewfinders (per lens) Dedicated lens shade (per lens) Ground glass focusing screen |
| Metering | N/A |
| Flash | X-Sync (all speeds) via PC connection |
| Power | 2x 3v CR123A (for electromagnetic shutter only) |
| Weight | 1.27kg (body only) 2.43kg (body + 105mm lens and finder) |
| Dimensions (appx) | Body + 105mm lens: 279 x 171 x 204 (WxDxH) |
Share your knowledge, story or project
The transfer of knowledge across the film photography community is the heart of EMULSIVE. You can add your support by contributing your thoughts, work, experiences and ideas to inspire the hundreds of thousands of people who read these pages each month. Check out the submission guide here.
If you like what you’re reading you can also help this passion project by heading over to the EMULSIVE Patreon page and contributing as little as a dollar a month. There’s also print and apparel over at Society 6, currently showcasing over two dozen t-shirt designs and over a dozen unique photographs available for purchase.


17 responses to “Camera review: the Fuji Panorama GX617, a legendary panoramic behemoth”
Fantastic and useful article here mate. Can I ask the focal lengths of the photos at the end? I’ve a chance to buy the earlier g617 model with the fixed 105 and trying to decide if that’s wide enough for me… Thanks in advance!
And a price tag to match. I just looked on eBay. They’re going for like $3k! Holy hell!
Not helping, Em! 😂
I found this review the day I bought mine 🙂
@cpindell1 With a roll cage worthy of mad max
Many many years ago, I was in the Tetons and there was an exhibition by this wildlife/landscape photo… https://t.co/QdVZKU1Uj1
Funny you should mention that…
Great article and work Steve!
I had a G617 about two years ago, I used it for a project, just some ocean landscapes and then sold it. Since I sold it I’ve been missing it and today I ran into a GX617 with the 90mm in excellent condition and couldn’t resist, I got it! It came with the ND2 filter, lens cap, view finder and battery compartment are all great only rhing missing is the Lena hood :/ I hope it doesn’t impact the exposures. I’ve been researching and some say that it doesn’t really affect the exposures. What do you think? Thank in advance.
All three of my viewfinders have only one rectangle with a centre cross and four mid-point markers at the top, bottom and both sides of the rectangle. Sorry, Jeremy, I can’t answer your question! It may be that some viewfinders like yours show parallax compensation marks for close range subjects, but I’m only guessing.
Superb photos, absolutely beautiful work. Really enjoyed this review.
Thanks for your kind comments Bent_Brent, so pleased you enjoyed the review!
One question that I’ve wondered, as have others, is what do the additional inner rectangle and lines in the 180mm viewfinder mean? It’s not like my 105mm viewfinder that just has one rectangle. It may have been covered in the manual that came with the lens, but I didn’t get that when I bought it second-hand and all I have is the GX617 manual which doesn’t mention it……….
Thanks, Jeremy! I agree, with you. Without the dedicated viewfinders these lenses are somewhat handicapped. The 300T an interesting lens on the 6x17cm format, in the UK I would say it is limited in application but potentially spectacular when the scene is right for using it.
Great write-up Steve! I absolutely love my GX617. I have the 105mm and 180mm lenses. Would love to try a 300mm but the only two that have been for sale recently didn’t come with the viewfinder, which is a game-ender in my book.
Thanks for your comments, Neil!
You clearly have a grasp of the craft and are making some special images there. This would have only been a viable option for me in collage days of photography, where the facilities were available to develop such beauties. Awesome stuff!
@stevewaltonfmpa @RobertWhitePhot The doublewides! So cool.