I want to spread the idea that a photographic enlarger is fundamentally a very simple thing. An enlarger can go from concept to printing in a just weekend, using a lens and materials you can find in a dollar store, stationer’s or hobby shop. Only basic tools and materials are needed and you don’t need the skills of an optical scientist or a cabinet maker to make something that produces good results.
Enter the Simple Enlarger:

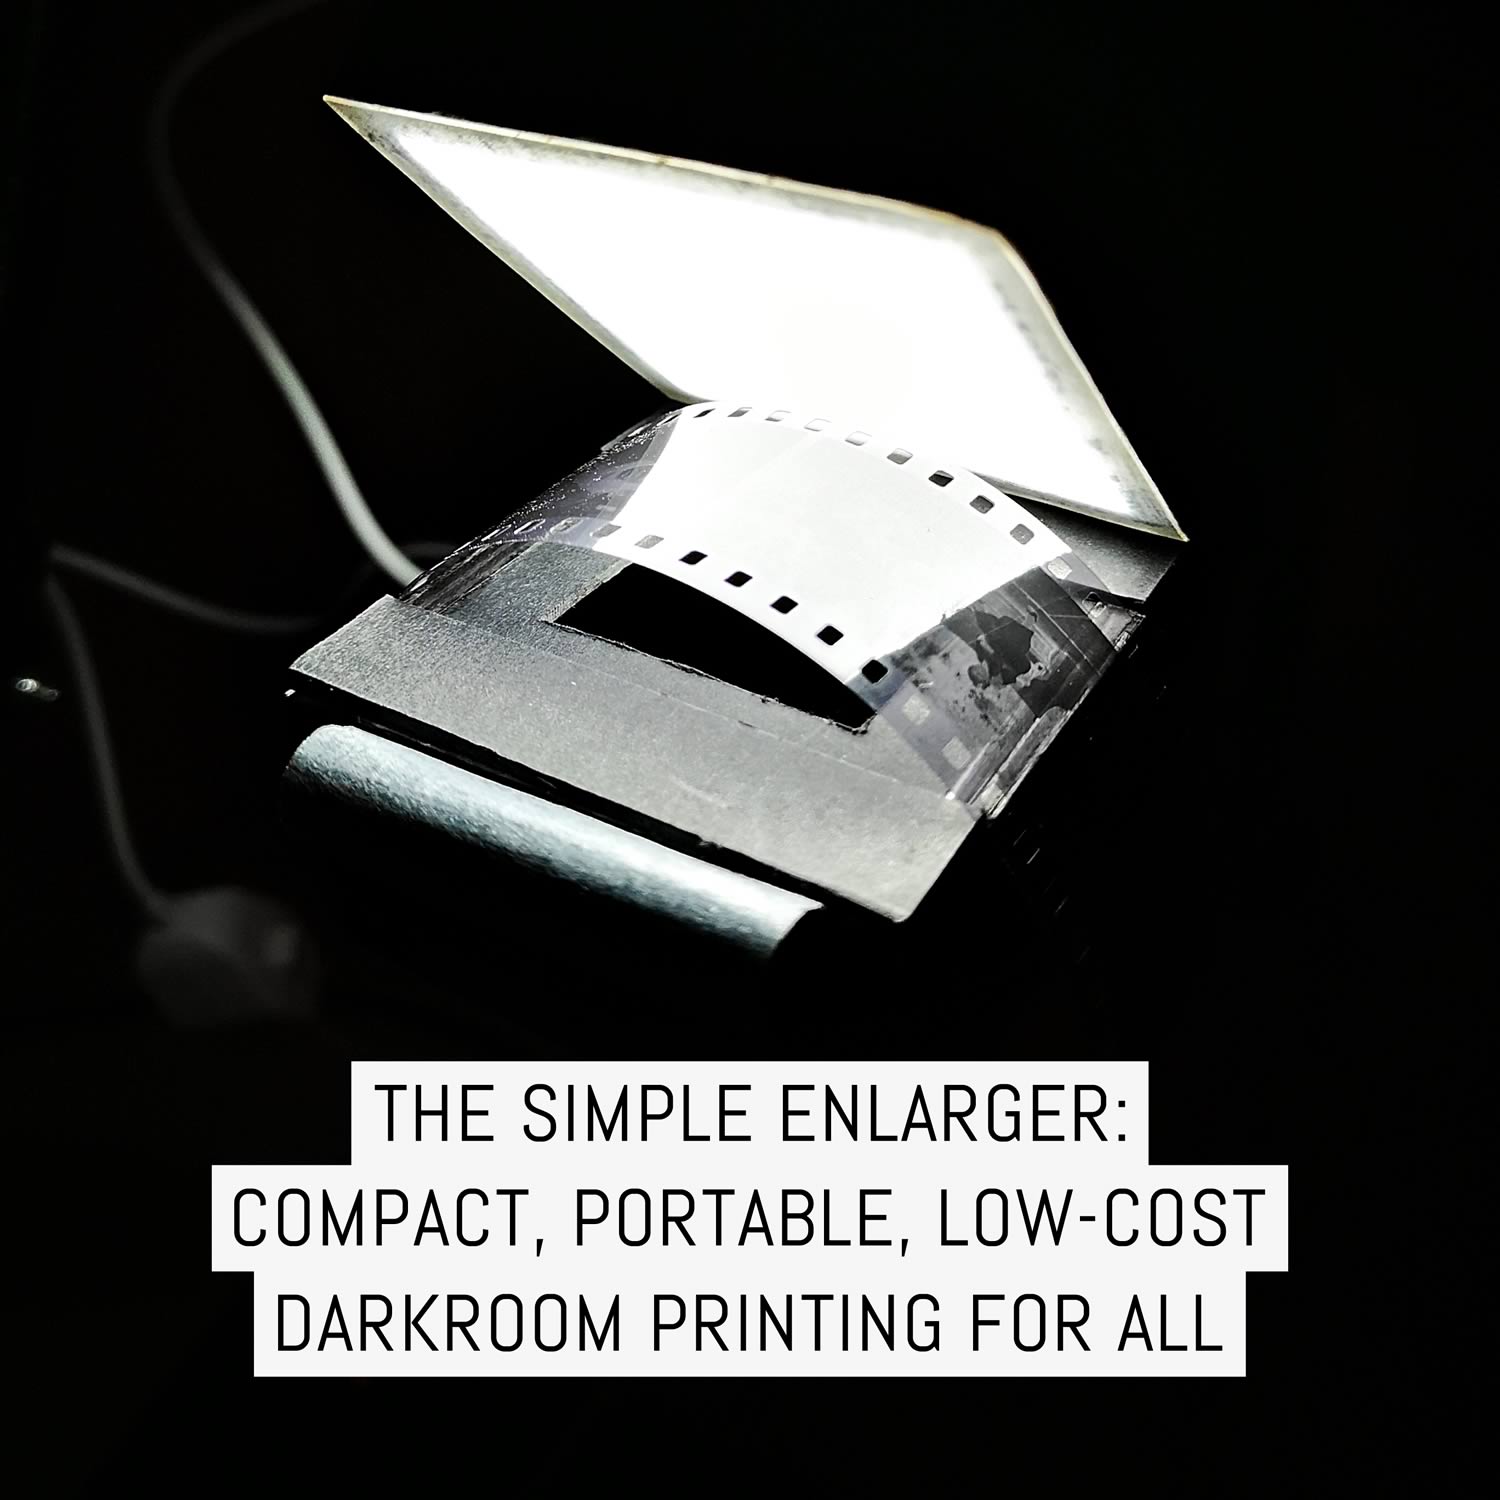
The finished Simple Enlarger
This is a quick and dirty project that should take only a few hours of effort. My approach features a lot of creative corner cutting and only judicious refinement with the goal of a working enlarger in mind. If a part is cheap or ubiquitous, use that instead of reinventing the wheel. This is not a sophisticated product, ready for market. Treat it like a fun craft project that will give you a taste of darkroom fun and you can decide later if it’s time to upgrade to a commercial enlarger. And remember, you’re working with electricity (even low voltage, low current), lights not designed to be encapsulated, and maybe sharp and pointy tools, so take all necessary care.
You assume all risk.
Everyone’s needs and available parts will differ, so I won’t be giving detailed step by step instructions about how to make The Simple Enlarger. Instead, I will be talking in vague terms about the principles involved and how to do (or avoid) the calculations and measurements and how to troubleshoot. Here’s what I cover:
I hope to inspire others to make enlargers for their own use, as craft gifts and maybe even make products that I will be tempted to buy.
Background
I am on a bit of a mission to get EM to start darkroom printing. He has such enthusiasm for analog photography but doesn’t have a home darkroom. A few weeks ago, I sent him a bound photobook, full of exposed but undeveloped paper, marked “DO NOT DEVELOP!”. I knew his curiosity would get the better of him and he would be forced to print it. He rushed out and picked up a set of paper, trays and tongs.

Paterson developing trays. Credit: Paterson Photographic
Only then did I realise he didn’t have a darkroom. He explained that he didn’t have the space in his apartment, didn’t have the space to store an enlarger when not in use and didn’t really have the budget to buy a thousand plus dollar kit.
About the same time, on Twitter, people suggested we set up a group of interested parties and mail an enlarger around so we could each have a go printing and I quickly realised a commercial enlarger isn’t something I would like to carry in a suitcase, much less post at my expense around the world. So, I started researching online to find the simplest, lightest and most compact enlarger that’s ever been on the market and while I discovered a couple of rare 1930s-50s steel or bakelite models, this left the problem of shipping an expensive and delicate incandescent bulb, that would also need a voltage conversion in some countries.
Objectives

Parts
I would design and build the most basic, yet practical, enlarger that would print from a given film format to a fixed sized of photographic paper using a camera lens instead of an enlarger lens.
Furthermore, I would exclude any other part or “nice to have” feature that wasn’t strictly needed to make the print unless it didn’t entail an extra cost or effort.
Going back to first principles
Whereas a camera exposes a photographic film to a focused image from an externally lit subject, an enlarger works in reverse. An enlarger illuminates a negative with light so that the lens can focus the light going through the negative onto a sheet of photographic paper. The exposure is controlled via the duration of the exposure and (if available) an iris in the lens. Essentially, it’s like a slide projector, but it uses negatives instead of slides and is not as bright.
My design, like most commercially available machines, has two main parts: The head, which supplies the light, and the optical module, which holds the film and lens a fixed distance apart to facilitate focusing.
The lens
Always start with the lens. The lens determines the dimensions of the focusing system and the system’s illumination requirement.
I chose to use an old Soviet 50mm “normal lens” in Leica screw mount. Technically, you could probably use any lens: an enlarger lens, an SLR lens, a zoom lens, even a magnifying glass (if you made a way to adjust focus).
Enlarger lenses are designed with a few desired features, like a flat focal plane, even illumination, etc. Some examples are even pretty cheap. I decided to use a camera lens instead because it had a focusing helicoid and that meant I wouldn’t have to make bellows to tune the focus. Also, the flange-focal plane distance between the film and the back of the lens is easy to look up.
I chose screw mount because I could use a cheap (doesn’t have to be accurate) M mount adapter and screw any compatible lens into my enlarger. It also meant other people could follow my design with a lens they probably already have.

L39 thread mount adapter set into unpainted enlarger focusing unit
I chose a 50mm lens (actually 52mm) for a number of reasons. First, it’s easy to make a normal lens with good optical properties and so they are cheap. Even this knackered old Soviet lens is a good performer with even illumination. Second, 36mm horizontal frame length is about 7 times enlargement to get to 10″ paper length, so 50mm focal length requires a suitable hight over the easel.

FED Industar 52mm f2.8 mounted to unpainted enlarger focusing unit
I chose a Soviet lens (a FED derived Industar 26/2.8) because I don’t need a fast lens and they can be had for about USD30. Why pay more? f/2.8 is nice to have for focussing, but you stop down to mid apertures for printing.
The focusing unit
A commercial enlarger’s focusing unit has a removable film carrier, which sandwiches film between anti-Newton ring glass above and a film mask below. It has a liftable carrier holder, a set of bellows on a geared focus rack, a red filter, a tiltable front standard, interchangeable lens mount holder and maybe attachment points for various filter holders and other things.
However, when you skip all the expensive refinements away, the focusing unit is just a box with the film held at one end and a lens at the other.
That’s what I reproduced.

Focusing unit, bottom half (lens and film mask in place)
I used a 65mmx65mm thin plywood box. It’s some kind of kid’s pencil holder from the dollar store. The material doesn’t really matter as long as it’s got a little structural integrity and you can cut it with the tools you have.
A teabag tin would be OK, as would maybe even foam-core or strong cardboard.
I cut a hole in the bottom to fit the LTM to M mount adapter in the centre of the base. If you get it mounted just right, you can even read the aperture off the lens from the front. The bottom of the box was a bit flimsy (I cut it with a matte cutter) so I retained the adapter with a liberal pool of epoxy, which I was careful to keep off the thread. Keeping the adapter in is harder than keeping it from turning, so I added 3 screws to prevent rotation. Had I done it properly, and drilled through the metal plate and countersunk the screws, I’d be able to use older Elmar-style lenses, but this is a quick and dirty proof of concept build.
The only important thing here is cutting the box to the right length. The Leica screw mount flange-focal length is 28.8mm and holding the film that far away from the front side of the flange means the focal distances will work. Except that the standard focal range of 1 metre to infinity is too far away. This is designed to make 8×10 prints, so I figured out what macro extension ring size I’d need. Deducting 1mm for the M mount adaptor, and adding a few more millimetres, I settled on around 35mm from the base of the box and cut off the rest.
You know the axiom: “Measure twice, cut once”? The simple prototyping solution is to cut, or sand more off if you need it shorter, or shim it up with cardboard if you need it longer. Indeed, I later ended up cutting off a few more millimetres so I could print a little bigger.

The basic build
You don’t need to be too precise. The lens’ focusing helicoid goes in and out a few mm and that’s plenty of tolerance. Do cut as square as you can, though, or you’ll not get all your image in focus. These extra few mm beyond the standard flange-focal length limit the distance that you can focus to. Larger prints require less extra distance. I settled on using 8×10 paper because it is cheap and easy to get. I feel smaller prints don’t do the photo justice and much bigger prints require better focus than you are likely to get out of kitchen table grade manufacturing.
I painted the box inside and out in a few coats of black spray paint. Technically, this cuts internal reflection and gives better contrast, but honestly, I did it because it was embarrassing to see it glow brightly from the outside.
I made the frame mask from thick (about 2mm) black core cardboard. It’s good and stiff. I cut just under 24x36mm and centred it on the cardboard square which had been cut to fit the inside of the box. Next, I cut two more strips and used them as a film guide so I could slide from frame to frame without opening the enlarger. These strips are stuck to the mask and rim of the box with double-sided tape. A film guide is a bit of an unnecessary luxury, but they support the film mask, which would be otherwise tricky to glue in place.

Film, mask and lamp
Before sticking down the mask, it’s time to address attaching some kind of stand. I was going to attach 4 legs made of dowel to stand the enlarger up and hold down the corners of the paper instead of using an easel, but it was easier to attach a tripod. I drilled a hole centred on the back of the box, towards the bottom and used brute force to “self tap” a 3/8″ to 1/4″ tripod adapter ring into the plywood. The friction is enough to keep it from slipping. I guess a threaded machine screw insert or T-nut (both 1/4″ inside diameter) would also work.
The final step is to check focus, and if necessary curse a bit and re-cut or shim as I explained earlier. You check focus with a flashlight shone onto the film on the mask, emulsion side down, projecting at the correct height to focus an image projecting across 8×10 paper when the lens is around half way through its focus throw. This gives a little leeway in each direction to accommodate an easel if used instead of masking tape, or for cropping in a little.

Initial illumination tests 
Through the lens mount
So now you have an enlarger and all you need is a decent-ish light source to put light through it.
The illumination head
The illumination head is just another closed box, but with a light inside. In the interest of easy assembly, I used the remainder of the box that I had cut off when making the focusing unit. The height is not important, but the light shouldn’t be too far away from the diffuser. The top of the box is sealed off with black card for a light seal. The light source is attached to that. I could have used wood, but card is easy to cut.
I opted to use white phosphor LEDs for the light source. You want the type of LED that has a fixed white colour, not fancy colour changing bulbs and ideally get it in a cool white, instead of warm white.

Focusing unit, top half (light source unmasked) 
Focusing unit, top half (light source masked)
So why choose LEDs over incandescent and halogen bulbs? I’m putting a bulb in a little box made of plywood, cardboard and foam board, and I don’t want the risk of starting a fire or killing someone with bad mains voltage wiring. If I was making something much bigger, in metal and with a heat sink, I may well have chosen a more traditional light source or used a custom dimmable RGB LED source.
I settled on a complete consumer unit of a LED emitter inside a magnetic housing with a diffuser built on and a switch on the way to a USB plug. I figure anyone will have a USB charger handy, or I can run it off a battery pack. It’s all in one, I don’t have to do any wiring, it should be safe to use and the handy switch on the USB cable allows me to turn the light on and off without disturbing the enlarger. For a timer, I can just count seconds in my head and use the LED’s external switch.
The use of USB as a light source still allows the light to be controlled with a mains voltage enlarger timer by plugging it into the timer through a USB power socket, provided that the USB power socket doesn’t have a big capacitor that would delay power being supplied or cut off to the light source.

Ready for testing
I actually used this box for focus testing and discovered that the projected image had strong central brightness. Commercial enlargers fix this problem either by using a carefully designed collimator made of two usually aspherical lenses or with a diffusor plate. The collimator gives a little more light, but that’s technology way beyond this home build and way beyond my budget of a few dollars. Especially not since a small square of plastic will do.
The diffuser is supposed to diffuse the light to create even omnidirectional illumination, but without blocking too much of it. It can’t be too thick, or too dense and opaque. Find some homogenous and opalescent white plastic like acrylic, or a thin plastic chopping board. These seemed too much of a bother for me to cut so I opted for some white foam board backed with plastic. Do avoid textures and dirt or markings, especially on the bottom side, because it’s right next to the film plane and will end up in your print. The diffuser should be flush with the bottom of the illumination head. Mine was recessed a little and it can interfere with poking the end of the negative through.
I lined the illumination head in aluminium foil to make the most of my light source and ran the cable out of the stuck down cardboard lid.
Assembly

Through the lens mount
Screw the lens onto the mount. Mount the focusing unit on a tripod or some other stand, facing down. Put the illumination head on top, diffuser facing down. You can stick it down, use masking tape on the outside, or do something fancy with magnets holding it on, but on mine, the illumination head is neither heavy, nor delicate so it’s not really necessary to stick it down. With film guides providing the spacing and position, I can just feed film in.
Printing

In the darkroom
At this point you’re ready to print.
Put film in it, emulsion side down, focus on some scrap paper under a safelight and have your developing trays filled and ready. You might want to use a hand-held red filter. Instead, I prefer to prefocus, get the paper or easel in the right position and print straight away.
For
Simple enlarger on the left, Kaiser on the right (click/tap to open).

Simple enlarger: Grade 2 no filter 
Kaiser VCP6005: Grade 00 full yellow

Simple enlarger: Grade 2 no filter 
Kaiser VCP6005: Grade 2 no filter

Simple enlarger: Grade 5, full magenta 
Kaiser VCP6005: Grade 5 full magenta

Simple Enlarger Mk I + Industar 26, first print
In short, happy printing!
Further Refinements
Remember I used Leica screw mount? Most enlarger lenses also use it and that means you can use enlarger accessories like a below-the-lens multigrade filter kit (light source permitting). I normally use a colour head or filters in a filter drawer, but I believe there is a below-the-lens filter kit which installs on the mount screw thread and includes a swing-in red filter.
You can also use screw thread enlarger shims and extension tubes to adjust focus if needed, as well as fine-tune your tripod or copy stand mount if it permits.
Another advantage to using a camera lens over a proper enlarger lens is the flange-focal length will be the same no matter if you change the lens and even if you use a length of another focal length. Note that a shorter focal length requires less extra distance between the lens and the film to get to close focus, but there is some wiggle room in the focus helicoid, macro rings, how close the enlarger is to the paper and even how much the lens is screwed in, so you might want to experiment if you have more than one lens.
Finally, there is no reason that this approach couldn’t be adapted for lenses capable of printing medium or even large format film. The limit is your imagination and ingenuity. As I hope this article demonstrates, all you need is a couple of boxes, a lens, a light source and a few hours of tinkering.
Thanks for reading,
~ Dan
Share your knowledge, story or project
The transfer of knowledge across the film photography community is the heart of EMULSIVE. You can add your support by contributing your thoughts, work, experiences and ideas to inspire the hundreds of thousands of people who read these pages each month. Check out the submission guide here.
If you like what you’re reading you can also help this passion project by heading over to the EMULSIVE Patreon page and contributing as little as a dollar a month. There’s also print and apparel over at Society 6, currently showcasing over two dozen t-shirt designs and over a dozen unique photographs available for purchase.


22 responses to “The Simple Enlarger: compact, portable, low-cost darkroom printing for all”
I was on my way looking for ideas on how to make a light blaster with a broken RB67 body and also a darkroom enlarger with that for 6×7 negatives. I’ve never used a commercial enlarger so I have real hard work to do. Thanks to your tutorial, ideas are drilling my brain. Thank you !
Great idea and very do-able! One suggestion. If using a camera lens then mount it reversed. Adapter rings available for this. Reason, your ‘subject’ is the neg so you want this ‘in front’ of the lens. Then the ‘image’ of the subject will be projected onto baeeboard/paper surface. This should give you better quality for the image.
The takeaway message from this article is you can make prints in your home without significant expense, bulk, or difficulty.
genius
Thank you Dan, for a wonderful post. Human ingenuity like this gives me hope for the future of film, great stuff!
@ZDP189 Thanks, Dan. This is brilliant. I would like to make a medium format version. Would I need to… https://t.co/a2yP3KG2Ot
You need a lens that will cover the format and a way of focussing. e.g. For 6×6, why not put an appropriate light source on the back of a Kiev 88, or something?
Have you thought this through? I’m guessing that the closest focusing distance of the 80mm lens is around 3ft. So reversing the process, this becomes the projection distance if the lens is set to this. I’ll let you work out what the size of the projected image is. But to be viable, it could work if you can get a bellows unit that fits the Kiev. However, at this point why not buy a basic 6×6 enlarger and do the job properly>
I’d agree with Terry; I hadn’t done the math. The reason why I went with 24×36 is the ease of doing slight macro and because of my gut feel that MF users would be more willing to buy a commercial unit.
This sort of project is for people who either want to dip a toe into the water, or who don’t have the space for something bigger.
@ZDP189 This is a great project, thank you @ZDP189 for sharing
@ZDP189 @ZDP189 that’s a great article, thank you for your work and sharing it!
Reminder: I’m giving away LED light sources to anyone who wants to make something like this. While my… https://t.co/YM5AnIXLjj
The Simple Enlarger was nearly called something else entirely. Would have caused some search engine i… https://t.co/fJjV7XAE1e
excellent job Dan! I followed the «DO NOT DEVELOP» thing with EM, pretty amazing idea. After giving away my last darkroom in 2001 I returned to film some weeks ago and got myself a V35 Multigrade and Ic Leitz focomats and lots of different paper experimenting away, shooting Tri-X in an M6 and FE. The Philips 13139 in the V35 gave out last week, now I’m about to test the Heiland Splitgrade. Thanks for posting this, quite inspirational!
GReat fun, and decent results! I wonder how it stacks up to those portable briefcase-type enlargers… https://tinyurl.com/yxtjqvdr I have one that I’ve never tried, because I have a big Durst set up in the darkroom, but yours looks very effective!
Are you looking for a file to print locally, or for someone to market a product? I know there’s at le… https://t.co/n3k9Rj9sQe
This project brought a smile to my face as my first enlarger as a 15 year old in 1960 was a conversion using a old bellows folding camera, which also provided the enlarging lens. The lamp house was made out of balsa wood lined with aluminium kitchen foil and the illumination provided by a 75W pearl bulb. The negative carrier was a sandwich made from cut exhibition card mounts and held flat by a small sheet of opalised glass. Paper size was fixed to 1/4 plate from 35mm. Very crude, but great fun.
If anyone wants to chat, reach me at my twitter @ZDP189. Thanks, Dan K
An very interesting idea.
Totally brilliant! As a lifelong duct tape fan I love the simplicity of this and the use of an LED light source is the cleverest part. What you have made is actually an ideal travel enlarger and could be tremendously useful in out of the way places. You have got me thinking now about a variation that uses your camera as the main part of the machine, just add light box and neg carrier. Hmmm……
Howard, yes that would work. I originally considered making a light source that would go on the back of a camera. But there are technical challenges. First, you need macro rings. Second you need to shoehorn the diffused source into the back. That’s easy for some cameras and impossible for others. You should build it.
I was thinking the same thing – a great use for a dead camera which still advances the film. Or a good camera come to that.