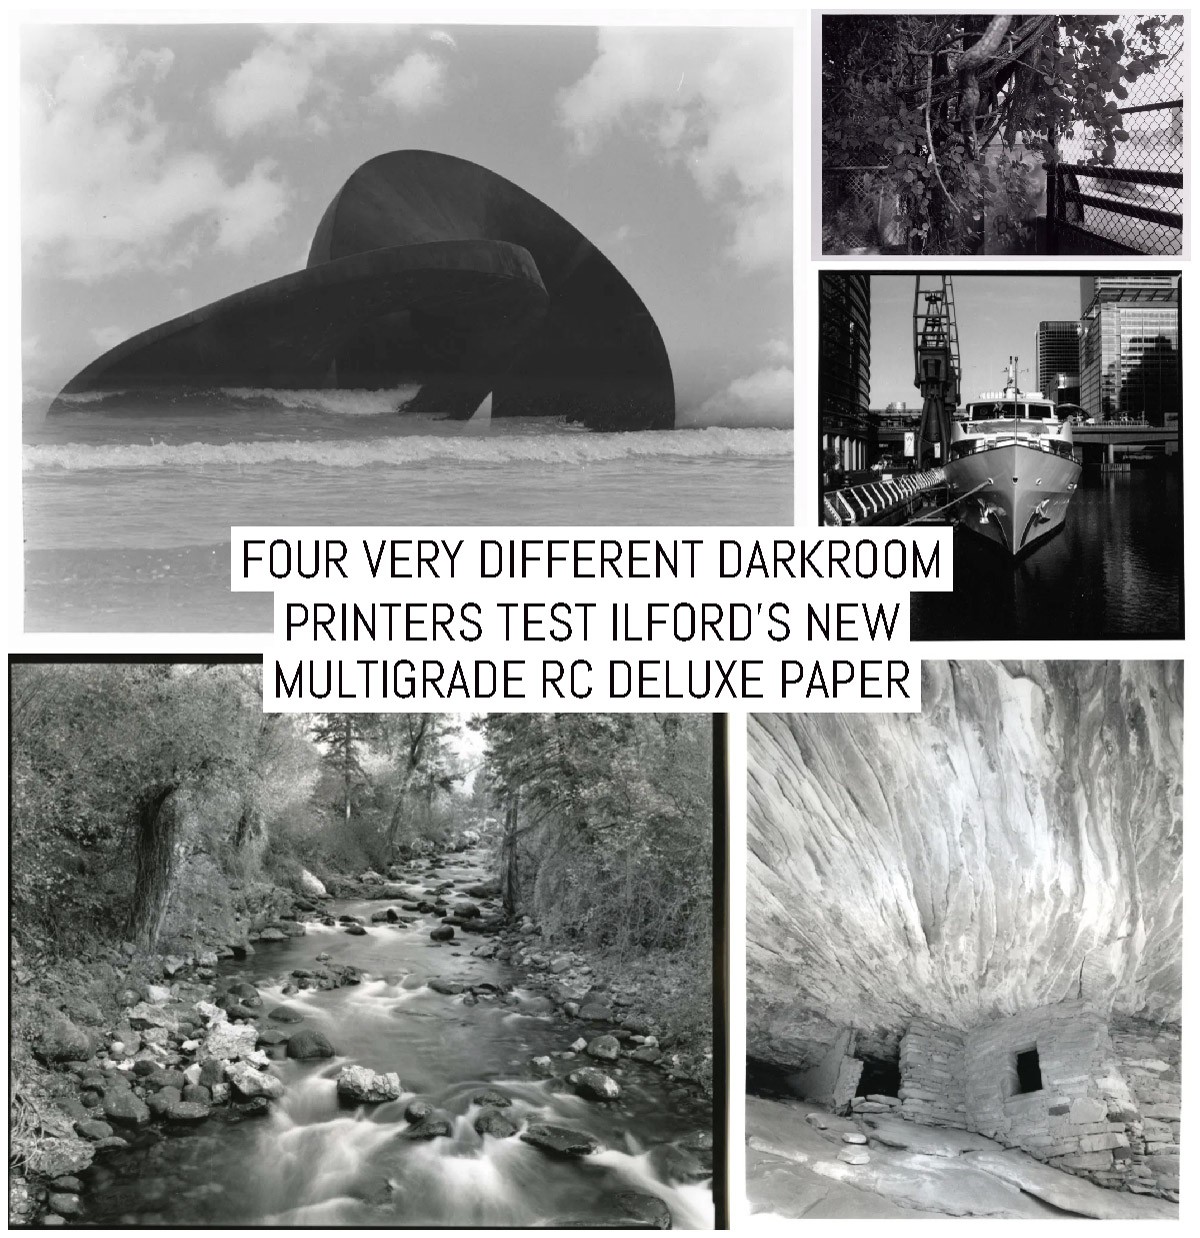
ILFORD released a raft of new and updated products in late 2019, one of which was brand new Multigrade RC Deluxe paper. Called “MG V” by some in our community, I was provided a box some weeks before the official release to either test myself or give away as part of a competition/event.
I decided to do something a little different: I split the box into several smaller packs and sent them out to photographers in our global community to see what they made of the new papers. These are the results from four of them.
One set of results was published back in October 2019 as part of my release announcement. That and three more follow below. The fifth. Well, let’s just say that’s taking a bit longer than expected and I’ll be publishing those results as an update to this article in the near future.
Here’s what’s covered:
The tests
Below you’ll see tests from Ashley B Williams, Craig Pindell, David Allen and Erik Gould. Each set of tests is presented as a discrete block, with my only request to each photographer being to test the paper and provide comparative results against papers they were familiar with.
The Multigrade RC Deluxe provided to me by ILFORD was satin finish and I didn’t go out of my way to make the testers use the same finish of MG IV. My main desire with these tests was to see how darkroom printers would use the paper in their current workflow and what measures (if any they would take to arrive at results that pleased them).
While there is a strong case for a like-for-like comparison (satisfying the desire of technically-leaning darkroom printers), that was not my goal, nor was it a specific concern for me. It’s all about how people would use the papers and how their results and conclusions would (or would not) differ based on their diverse backgrounds, approaches, photography and desired final result.
As with all the images in this article, clicking or tapping on one will zoom to full screen.
Tester #1: Ashley B Williams
EM asked if I would be interested in doing a photographic paper test. “How exciting and privileged”, I thought! I agreed with excitement and then realised I am comparatively a novice when it comes to the darkroom arts, fear took over.
By the time of presenting this, I had already seen Craig Pindell’s highly informative conclusions (below) and wondered what I could add. I decided to approach it as a novice, using my simple setup for a basic head-to-head with what I now know to be ILFORD MULTIGRADE RC DELUXE against my regular ILFORD MULTIGRADE IV DELUXE. I also wanted to see how it transferred to my usual paper, ILFORD MULTIGRADE FB Classic. This later part would normally mean starting again with test strips considering the difference in sensitivity.
Equipment and materials
- Gnome 6×6 colour enlarger (quite vintage!)
- Soligor f4.5, 105mm lens
- Jessop ET99D Timer
- Ilford multigrade gel filter set
- Ilford multigrade IV RC De Lux, Pearl
- Ilford multigrade V RC De Lux, Pearl (test paper)
- Ilford multigrade FB Classic, Gloss
- Ilford multigrade developer 1:9
- Adostop 1:9
- Ilford Hypam fix 1:4
- Adox Selentoner 1:9
- 4’x5’ corner of my cellar
ABW test one
I decided to make the most of the 8 sheets provided and halved all sheets to make smaller prints. Negative 1 was selected purely on my judgement that I could print it straight, no faff of dodging and burning.
It was a fairly low density negative and with the enlarger head low the initial test strips on my usual RC IV gave quick but very workable settings, f/22 for 7.5 seconds at grade 3 looked good. I then used the exact same settings on the new MULTIGRADE RC DELUXE (MGRCDL).
Here they are side by side (A and B):


There was clearly a difference!
I now ran test strips on the MGRCDL to establish the difference. A reduction of 20% on time. I dropped to grade 2 (remaining at f/22) and it seemed to be very close. I do feel the new MGRCDL looks to have better separation in the lighter and mid-tones. Blacks looked blacker while retaining good shadow detail.
To me, it has some characteristics I see in fibre paper. Here is the first RC IV (“A” from above on the left) beside the corrected MGRCDL (“C” on the right).

Now to see how it would transfer over to my usual MGFB Classic.
Sadly I couldn’t get Pearl finish, so Gloss would have to do. I did a straight print using the corrected MGRCDL settings and put it straight on the fibre, it was surprisingly close! I felt just a little less contrast.
MGRCDL (“C on the left) and MGFB Classic (“D” on the right) below.

Finally, I upped the contrast filter by one half, a small improvement and hard to see in the scans but I was very happy with the results, D and E below.

ABW test two
I decided to try a second negative, this negative had given me a headache the week before. A frame I shot on my old Graflex while out with another photographer, Sandeep Sumal. It was a very grey flat image with lots of mid-tones. Balancing it with the sky had defeated me so here was an excuse to have a fresh start and see if the new RC V helped get it onto fibre.
I started where I left off the previous week: f/22 at grade 3 for 20 seconds. I then applied the 20% reduction and 1-grade drop as before for the MGRCDL. They again matched pretty well but you can see, not right! Here’s pair 01 RC IV “1a” on the left, MGRCDL “1b” on the right.


At this point, I decided to just go with the MGRCDL and make a print-ready for fibre. Test strips done, I settled on f/22 at grade 2½ for 16 seconds with a gentle dodge top third for balance, I gave the second on the left a short selenium bath to how it looked. Here’s pair 2:


I took the above settings and applied it straight to Classic FB, again the second one has a short 1-minute selenium bath. Again a fairly satisfying result, although it’s not the cleanest negative – expired ILFORD HP5 PLUS that rattled around my camera bag for several weeks accounting for the dust.


Final thoughts
I don’t profess to be a great printer of vast experience, just a bloke fumbling away in the corner of a cellar trying to learn how to print well. What I can say is this, the new Multigrade RC Deluxe is a lovely paper to use. It is a step forward from its predecessor and as a stand-alone paper, it has better separation in the highlights and mid-tones.
The blacks are rich while retaining shadow detail. Overall, it feels cleaner and appears sharper. By accident or design, ILFORD has managed to get a balance between this and its Multigrade Classic FB which is a great bonus for me. A big thank you to all at ILFORD for their hard work, and to EM for letting me make a twit of myself,
Tester #2: Craig Pindell
My goal was to provide an accurate and impartial comparison of the test paper sent to me by EMULSIVE, using a known negative and known comparison photo paper to eliminate as many variables as possible. Due to the limited amount of test paper available, I choose to not bleach any areas of these prints.
[EM: Craig’s tests can be seen on my ILFORD ORTHO PLUS announcement here.]
Methodology, equipment and chemistry
I selected my negative number 980 for the enlarging tests. This negative has a very long tonal scale, especially in the brighter zones, as well as dark areas that are challenging to show in prints. I will use the same negative, enlarger, enlarging lens, easel, developer, stop and fix for all prints.
I followed my standard printing procedure exactly for all prints:
I started by making an 8×10 test print, with multiple 3-second exposure strips to determine the appropriate printing time. I then developed, stopped, and fixed the test strip print exactly as I do the final print.
Once I determined the correct printing time, I made an 8×10 test print at that time, with no burning or dodging, then processed and washed. From this print, I confirm that contrast is correct and determine the burning and dodging scheme.
In my process I decide the contrast is not correct, I adjust the filtration in the enlarger and make another test strip to find the correct exposure time. Once I am satisfied with the contrast and exposure, I make the final print with the chosen burning and dodging.
CP test one
For this test, I choose to compare MULTIGRADE RC DELUXE Pearl with MGIV because it is the only RC paper I use. I made a duplicate of each final print in order to compare the effect of selenium toning. Here are all four contact prints together.

In the gallery below, the top row (left to right) are ILFORD MGIV and ILFORD MULTIGRADE RC DELUXE, untoned. The lower row is ILFORD MGIV and ILFORD MULTIGRADE RC DELUXE, both toned in selenium toner diluted 1:20 for 10 minutes. Click to view in fullscreen.


CP test two
I had a few sheets of ILFORD MULTIGRADE RC DELUXE Pearl left after making the enlargements, so I made contact prints of an 8×10 negative using the paper and current ILFORD MGIV. These were made by placing the negative on the paper, emulsion to emulsion, in a glass contact printing frame, and then processing the paper as normal.

The papers used were:
- Adox MCC 110 8×10 Glossy Fiber Based paper
- ILFORD MGIV 8×10 Glossy RC paper (4th gen)
- ILFORD MULTIGRADE RC DELUXE Pearl (5th gen)
Some may consider the Adox paper a strange choice for comparison. I choose the Adox because this negative was made to print on Agfa MCC – visualise for the print, after all. Adox MCC 110 is the closest available alternative to Agfa MCC. As with the enlargement test, I choose ILFORD MGIV because it is the only RC paper I use. So, you have a print on paper as close as to what I originally intended, plus the current ILFORD RC paper I use and the new ILFORD RC paper.
In the gallery below, the top row (left to right) are ILFORD MGIV and ILFORD MULTIGRADE RC DELUXE, untoned. The lower row is ILFORD MGIV and ILFORD MULTIGRADE RC DELUXE, both toned in selenium toner diluted 1:20 for 10 minutes. Click to view in fullscreen.


The equipment and chemistry I used is as follows:
- The enlarger is a Saunders/LPL Super Dichroic 4500II, with a glass negative carrier.
The enlarging lens is a Rodenstock Rogonar-S 150mm f/5.6. - The easel is a Beseler Universal 20 16×20 4 blade easel.
- The developer is fresh Kodak Dektol, diluted 1 part Dektol to 2 parts water. Development time is 2 minutes at 68 degrees F.
- The stop bath is Kodak Acetic Acid extremely diluted. Stop bath time is 30 seconds at 68 degrees F.
- The fixer is Kodak Kodafix, diluted 1 part Kodafix to 7 parts water. Fixing time is 4 minutes at 68 degrees F.
- The selenium toner is Kodak Rapid Selenium Toner diluted 1 part toner to 20 parts water. Toning time for this test was 10 minutes at 68 degrees F.
- I used 11×14 Cesco-Lite trays for the 8×10 prints.
- Prints were washed in a 16×20 Calumet Archival washer.
Observations
The new ILFORD MULTIGRADE RC DELUXE Pearl paper is lighter and more flexible than the ILFORD MGIV paper, but is still easy to handle and was no problem in the trays. The new paper was about 1 grade more contrasty than the Adox paper, and about ¼ grade more contrasty than MGIV paper.
MULTIGRADE RC DELUXE Pearl has better separation in the light tones than either the Adox or ILFORD MGIV papers, while still showing good separation in tones in the dark shadow areas. In this respect, this paper reminds me of the old Forte Elegance paper, that I used to love so much!
Before selenium toning, new MULTIGRADE RC DELUXE Pearl is not as warm as the Adox paper and appears slightly cooler in tone than MGIV.
The new paper toned faster than either the MGIV or Adox paper. I toned all three for 10 minutes and at 5 minutes I could see the MULTIGRADE RC DELUXE Pearl’s tone changing, while the other two took at least 3 more minutes before the toning became apparent.
This characteristic reminds me of the old Forte paper as well.
My preference is to use glossy paper, and the MGIV and Adox are both glossy. The MULTIGRADE RC DELUXE paper supplied by EM was a pearl finish. Not dull like a matte paper, a bit of shine to it, but an obvious texture. It is not at all offensive and it seemed to scan fine.
One of the strange things, to me, occurred when I made the contact prints. The MULTIGRADE RC DELUXE Pearl prints definitely look sharper. I don’t see the same difference in the enlarged prints, but in the contact prints, the leaves are more distinct and the rocks are clearer. I checked with a loupe and with magnifying glasses and there is a difference between the prints. It is more pronounced when the prints are toned.
Final thoughts
After using these few sheets, I am convinced I would try more of this paper, especially in a glossy finish and fiber base. It held up very well to both of the comparison papers and tones very nicely. I will be very interested to hear the story behind this mystery paper.
Tester #3: David Allen
Some time in mid-October EM sent me some mystery paper. I didn’t, however, use it until after the mystery was revealed — it was the new ILFORD MULTIGRADE RC DELUXE, their 5th generation photo paper. I honestly don’t know why he sent it to me. I’m prone to get lost in an idea and blow through paper at a rate contraindicated by only a few test sheets. What’s more, he has awesome darkroom printers like Craig Pindell at his disposal. Not only did Craig have MGIV to compare it too, but he is smart enough to use a negative he knows, allowing him to conserve paper AND to inform useful feedback on the new stock.
Well, I had neither the MGIV for comparison nor the sense to use a negative on which I already have notes. I pulled out two negatives I’ve never printed before.
The first negative is actually a “normal” photo (see, I play ball… sometimes). I chose it mainly because it’s something that I’d normally only print on fiber, not RC paper. Typically, fiber (particularly glossy) gives deeper blacks, which would serve this particular image. Intrigued by the promise of blacker blacks on this new MGV, however, I decided to give it a spin with a dark negative. I was actually impressed.
I did a test strip of the sprockets to get a level of the paper’s “true” black and to inform my exposure time. And, while I hadn’t the former paper to compare it to, this did feel much better. I had no qualms with the blackness of its blacks. And, when I scanned the print with low contrast, I was amazed at how much info was in the shadows.


Does it solarize?
Next, I descended into typical Dave darkroom mode, deciding to solarize a print of a negative I’ve never printed. I quickly made a few first attempts with a light too dim, adjusted, adjusted again, and then realized I had run out of the paper EM sent me. So, I threw in a sheet of ILFORD Matte Fiber paper I had, to finish my vision. I was so “in the zone” that I hadn’t even realized I had fixer on my fingertips—putting permanent white fingerprints on my prints (they’ll be worth more later, right?).


The first two are ILFORD MULTIGRADE RC DELUXE, the third is MULTIGRADE FB CLASSIC.
Anyway, the moral is:
If you’re not Dave: Don’t give a precious few sheets to Dave
If you’re Dave: You’re dumb.
Tester #4: Erik Gould
EM was kind enough to send me a sample of ILFORD’s new photo paper, MULTIGRADE RC DELUXE. In this brief test, I compared it to its predecessor, MULTIGRADE IV, and a bargain brand paper sold by B&H under the name Multitone. Little information comes with the Multitone; no country of origin, not even a data sheet. All three papers are resin-coated multigrade types with a pearl surface.
My setup
- Bessler 4×5 enlarger with a stabilized cold light head. Lamp is a V54 Aristo.
- Timer is a Zone VI compensating timer.
- Lens is a 150mm f/5.6 Schneider Componon S.
- Developer is Ansco 130, development time was 2 minutes for all prints.
- Negatives used were made on 120mm Kodak TMY-2
Step wedge contact prints
I began by making contact prints of a Stouffer step wedge. A quick comparison told me that the papers are very close if not identical in speed; they were given the same exposure and development, and the highlight values on each were extremely close.
Below, left to right: Multigrade RC Deluxe, Multigrade IV and B&H Multitone


Midtone values were also very close, and I determined that the contrast of each was within the same grade. I made the test strips with a #2 filter.
One big difference I could see was the density of the blacks. The new MG V print showed a much blacker black than the MG IV, and the Multitone had the weakest black of the three.
Enlargements
The subsequent enlargements confirmed my observations. I made exposure test strips on each paper and found that the same base exposure would work for all. I then made straight prints with a #2 filter and followed that with a final version that had minimal dodging and burning.


Test strip prints above and straight prints below, left to right: Multigrade RC Deluxe, Multigrade IV and B&H Multitone


Final prints below, left to right: Multigrade RC Deluxe, Multigrade IV and B&H Multitone


With this negative, I burned the sky area in with a #00 filter. I could see that the speed of each paper was indeed very similar, as was the overall contrast, but the difference in the black values was very striking.
The deeper black in the MG V gave the image a snap that, by comparison, was lacking in the other two samples. At that point, I had run out of the Multitone paper. However I still had enough of the MG V to make one more set of prints, so I chose a new negative and compared just the MG IV with the MG V. This image was printed quite directly, with minimal edge burning with the same #2 filter that I used for the base exposure.
As the enlargements were drying, I circled back to the step wedge prints. I measured the steps with a densitometer and found the following values:
| Step 1 | Step 2 | Step 3 | |
| ILFORD Multigrade RC DL (V) | 2.51 | 1.65 | 1.16 |
| ILFORD Multigrade IV | 2.38 | 1.61 | 1.13 |
| Multitone | 2.05 | 1.67 | 1.13 |
Perhaps the MG V has slightly more contrast than the IV, or maybe the differences are due to variations in processing. Only further testing will determine that answer. To my eye, the deeper black of the MG V certainly gives the prints the impression of more contrast even as the intermediate and high values sit in the same place.
Other impressions and final thoughts
From what I’ve seen in this quick test, the MG V is markedly improved over the MG IV, with a higher D-max that results in a deeper black and a sense of greater contrast. The new paper lays very flat when dry, but I don’t see much difference from its already quite flat predecessor.
If there is a difference in the pearl surface between the V and the IV, I can’t see it. The paper base on the V seems slightly warmer than the IV, although the image color remains quite neutral. All around this paper is an excellent upgrade to an already superb RC paper, and I look forward to using it. The Multitone, at its bargain-basement price, is suitable for contact sheets.
Bringing it all together
Darkroom paper has just as many variables as photographic film, so it’s no surprise that all of the testers featured here spent some time dialling-in their existing processes for the new paper.
I expected their differing processes and preference for a final look to have some impact on their interpretation/commentary about the paper but their conclusions all point in the same direction:
- Better separation in the highlights and mid-tones (compared to MG IV and other papers tested).
- Good separation in tones in the dark shadow areas.
- Richer blacks.
- Good shadow detail retention.
- Sharper prints.
I have yet to try it for myself but I’ll get there. To those of you who are reading this and have tested/used the paper already, I’d appreciate your thoughts in the comments section below.
~ EM
Share your knowledge, story or project
The transfer of knowledge across the film photography community is the heart of EMULSIVE. You can add your support by contributing your thoughts, work, experiences and ideas to inspire the hundreds of thousands of people who read these pages each month. Check out the submission guide here.
If you like what you’re reading you can also help this passion project by heading over to the EMULSIVE Patreon page and contributing as little as a dollar a month. There’s also print and apparel over at Society 6, currently showcasing over two dozen t-shirt designs and over a dozen unique photographs available for purchase.


5 responses to “Four very different darkroom printers test ILFORD’s new Multigrade RC Deluxe paper”
Anyone making prints by stopping down to f/22 should not be a tester for anything in photography. Maybe diffraction test only…
Dear EM,
When the new paper was announced, I placed an order at B&H to buy up a few boxes of Multigrade IV. I’m in the middle of a big project and I started it with the MG IV RC Satin surface. I was more concerned with keeping a consistent look to my prints. Switching midway through the printing was not going to be an option.
Thank you for enlisting the aid of Ashley, Craig, Dave and Eric to field test the new Multigrade paper.
Ashley, Craig, Dave & Eric, you produced good work and gave us a ‘real world’ look at this new product. It’s gratifying to read about serious darkroom talent.
I can’t wait to get the new paper. I think it’ll be a great fit with Ilford’s Delta 400 film.
Regards,
Dan
@ILFORDPhoto @Grumpyfck @cpindell1 @ClickErik @DBloomsday Brilliant write up everyone, interesting to… https://t.co/5eWPIjL5qZ
I’ve tried it in both the satin and the pearl surfaces, and really like both. I somewhat prefer the satin, which seems a touch warmer than the pearl. I have a print done with the pearl that I’m quite pleased with, and the pearl seems to have slightly deeper blacks, so I intend to keep both on hand. All in all, this new paper is great–it also seems to be a tiny bit less expensive than the Multigrade IV? At least at B and H. I think it’ll be my go-to RC paper for a while.
I’m also glad that all sizes seem to be available! When I went to pick some up a month or so ago, there was very limited size selection. I’m eager to print something larger than 8×10.
@ILFORDPhoto @Grumpyfck @cpindell1 @ClickErik @DBloomsday Excellent reading! Following on twitter all… https://t.co/4pTXyhf0vD