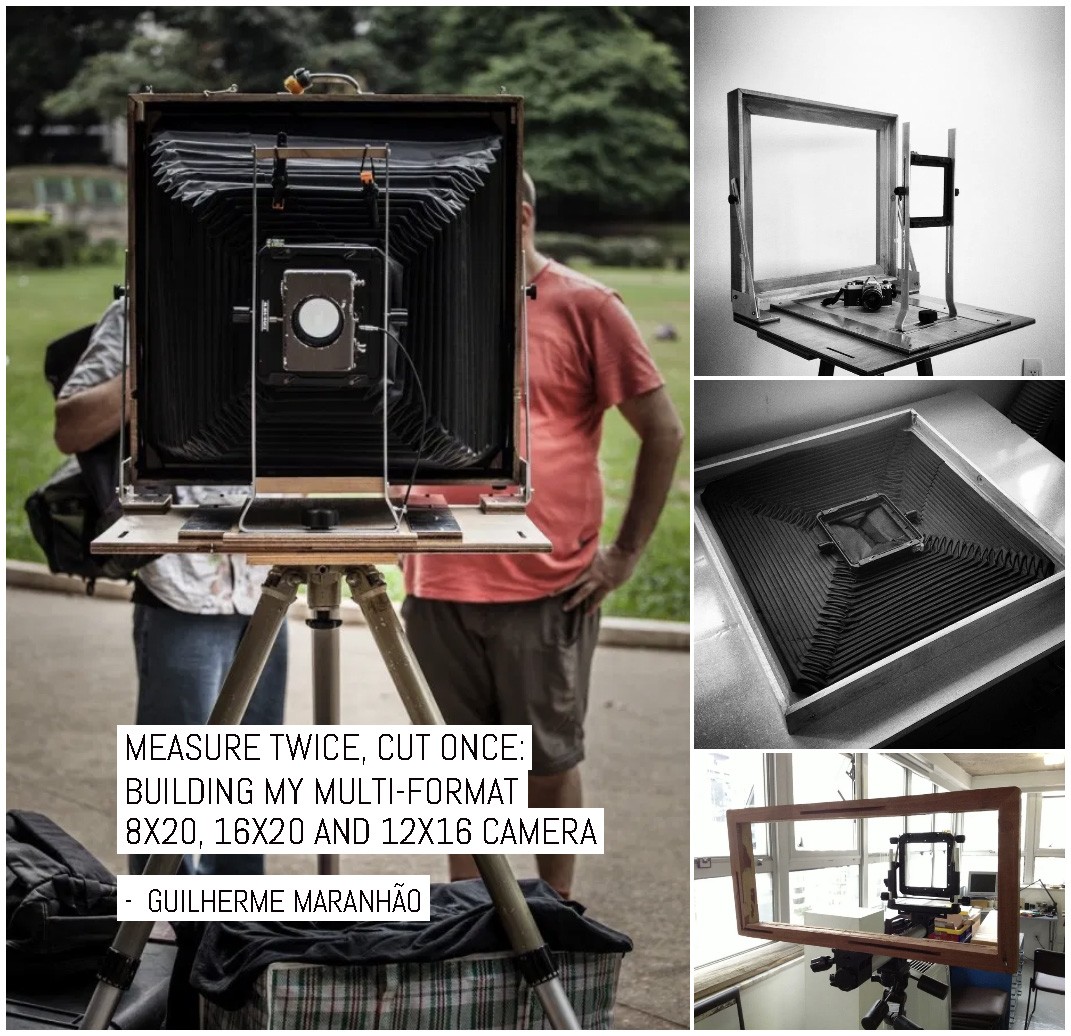
I lived most of my life in São Paulo, Brazil, with its 20+ million people. I have photographed São Paulo in many different ways, but ever since I got a box of expired 16×20” lith film I have imagined shooting large landscape negatives with lots of details and contrast, this is a small tale about a camera that came to be as part of this desire.
My story begins a little before my first son, Pedro, was born – he was due in March 2002 and I decided to build him a crib. At that time, I was working in a plant that packed auto parts for export in Tillsonburg, Ontario, Canada. My job was to photograph packaging procedures and make up some instructions for each part that came by.
We also had a woodshop to make trial crates for large parts, the man responsible for this shop was Joe Marshall and we used to talk a lot about travelling and woodworking. He offered to help me with the crib and one day during lunch we went to the outskirts of town to see a lumberjack. I ended up buying a large chunk of maple and one night a week I would join Joe in his basement to cut the wood up for the crib. All worked well and Pedro had a crib when he came home.


Fast forward a few years, back in São Paulo, the crib came back from loan to a friend for his daughter, my second son used until he was too big to fit in it, but this time, when I took the crib apart there was no plan to use it again the future.
The film holder leads the camera…
It was September of 2013, I had already made a proof of concept holder in black Gatorfoam and black museum heavy card for 8×20” film. I had entertained the idea of converting a Toyo monorail camera to 8×20” and even made a frame for the rear standard and put in place in an improvised fashion, but never finished the spring back.
The idea behind the holder was simply a bunch of layers of material to construct something similar to a regular 4×5” plastic film holder. It worked really well and I could load and unload a sheet of previously 8×10” of film with no problems. My major concern was with the film holder not being completely flat, but this test proved me that a spring back could flatten the holder on the camera for the picture.


When the wood from the crib became “available” in 2014, I drew up some new sketches of a field camera with 3 different backs, a multi-format camera that should accept all films that I had gleaned so far and yet couldn’t use:
- ILFORD FP4 PLUS in 8×20”
- Lith film in 16×20”
- X-Ray film in 30x40cm (12×16″)
The sketching phase is a critical moment, I always remember a camera build by Flickr’s user Tony and Rachel from New Zealand, it was a nice camera, but the first time round they made a field camera that wouldn’t close, they had to change the type of hinge and move it to another spot. I drew the camera opened and closed and imagined the transition.
I researched where I would buy aluminum profiles and how I’d cut it to make the metal parts needed. I also calculated how much room I could spare for the bellows, I knew my bellows would have a strong taper and that would help, but I still needed lots of room for a 1 meter long bellows.
In March 2014, I took the maple to a friend’s house to use her table saw. I did my best to fit the design to the pieces that I had on hand and everything went as planned. The next day I glued some pieces together and let them dry. It soon became clear that the pieces I had cut to serve as the bed of the camera were not good.
The idea was to have an extension sliding on top of the bed and neither of the two pieces was reasonably flat. I’d have to buy some plywood and cut those pieces from it. On the other hand, pieces for the frame were good, so I went ahead and trimmed them to a 45-degree angle to form the 60x60cm rear frame.


The Toyo monorail that didn’t get converted to 8×20” ended up donating its rear standard to be this camera’s front standard. Like many monorail cameras, lens boards for the Toyo would fit both front and back standards. I already used Toyo boards on another camera and my Kodak 500mm f/10 Ektanon Duplicating lens was mounted on one. I like this lens for 8×10” portraits, but earlier tests revealed it covers 16×20”, yay! I found this lens in NYC in 1997, in a clearance tray on the counter of the late Lens and Repro, which closed in 2012. It has its scratches and demands careful use but for 49 USD it has been a good investment.
The other standard from the Toyo was used to convert an Agfa Commercial 8×10” to have all front movements, but that is a completely different story.
Bellows
With the rear frame made and the front standard chosen, I already knew the dimensions of the bellows for this multi-format 16×20” camera. I read a few tutorials, mainly Bellows Building by J.B. Harlin from which I used most of the math and planning, this tutorial helps planning the bellows a lot, and planning is very important when going big, should I stress this a bit more? So I went shopping.
I found a black rubberized nylon textile, something people make backpacks from. I got some black cotton for men’s shirts for the interior and some white card stock for the ribs (this card stock was probably 250 gsm but should have been 400 gsm at least, as the bellows ended to hard to manage and even with grips to hold it in place, I know for sure that in at least one image it sagged over).


Measure twice, they say. I measured for six months straight, made more sketches, started rethinking this whole idea about a really big camera, but in the end I decided not to give it all up. In November 2014, I cut the ribs and started glueing the bellows together using 3M Super 77 spray adhesive. The spray glue was a very good idea given all the different materials I was using, too bad I decide to use an outdated can I had (as well as a new one I bought). Now, some 5 years later, large bubbles are developing in the bellows. Still, the bellows came out to be really inexpensive this way, around 15 USD for the nylon and the same for the cotton, card stock I had as leftover from a workshop I taught on building a portable viewing camera.
Metalwork
Also in November 2014 I went to a place on the east side of São Paulo to find a nice assortment of aluminum profiles. I needed an L profile to make the hinges and a nice flat bar for the front support. My plan was to use my drill press as a router and cut grooves in the aluminum. It wasn’t easy, but with the right lubricant, it worked fine. I made a small jig to run the bar straight against the routing bit attached to the drill press. The parts don’t look pretty, but they work.
One thing to keep in mind when making a ULF camera is that tolerance is on your side, major mistakes won’t mean much. Had I been making a 6x9cm camera for shorter lenses, any small mistake could mean out-of-focus images.
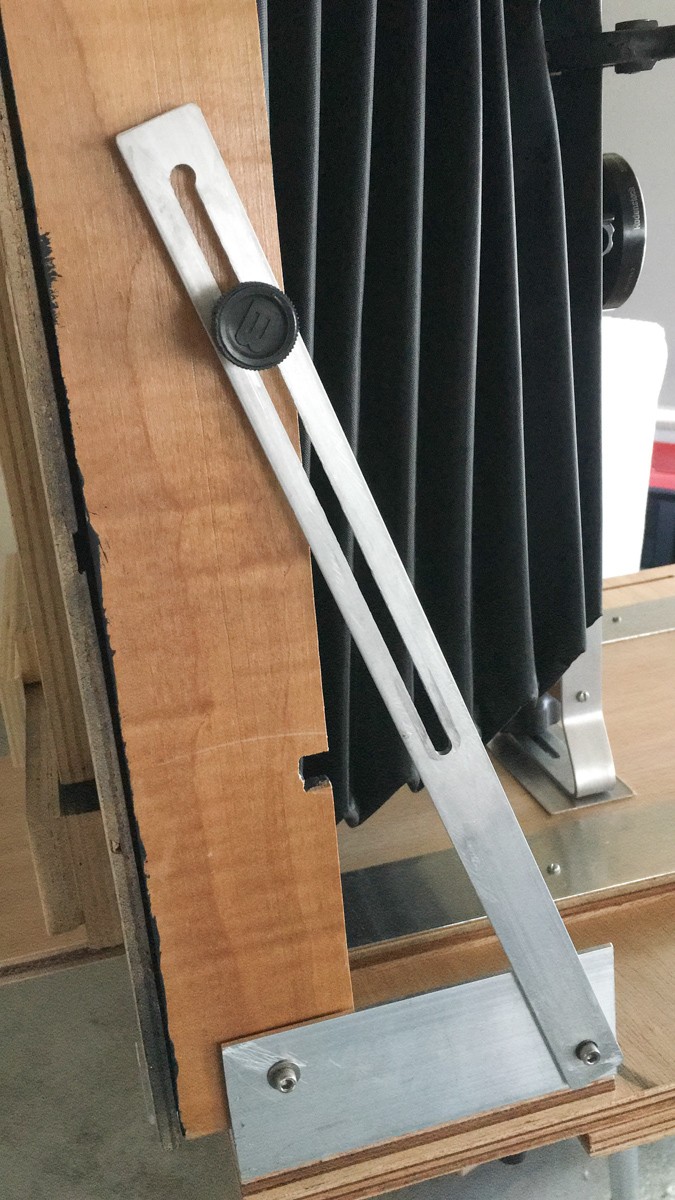
The support for the front standard has some minor details, I bent the base wider to get more side movements than the width of the front standard, the bottom part forms a small arc and it is only when the thumbscrew applies pressure that the entire bottom sits against the bed, extra grip this way. The part itself is bent tighter than the standard, securing it in its place even without the upper thumb screws, this helps setting lens height (rise and fall). Front movements are: side shift and swing, rise, fall and tilt.


There are two strips of sheet aluminum holding the central bed extension in place, each has 4 screws securing it to the bed, each screw received a minimum amount of torque at the end to avoid getting the extension stuck, it was a trial and error operation setting these screws. There is nothing to lock the extension in place, once you focus the camera (by moving the extension back and forth by hand) it will hopefully stay in place.
This extension has 3 holes into which the front standard and support can engage, depending on the lens focal length to balance the camera. To avoid the camera the bed from appearing in photographs when using really wide lenses (I have Protar Series V lenses in 110mm, 140mm and 183mm focal lengths) there are two extra slots to move the entire rear frame forward. By the way, these slots are a bit wider than the screws that pass-thru, so in practice, they allow for a little asymmetrical rear swing besides regular field camera asymmetrical rear tilt.

The idea was to avoid any kind of cost, but I had to get a wood router to finish the backs, cutting their edges into a slot that would make a light trap against the camera’s rear frame. There was a sale on a very simple hand model and I had a go at it for 50 USD, later I fitted the router to a thick sheet of aluminum to turn it into a table router.
A router is a very messy tool and a dangerous one as well, every person I know that had an accident in a woodshop was struck by a router. Be careful. My studio is quite a clean place, so late at night I would go to the underground garage and set up a small woodshop, I couldn’t resist photographing the pile of wood chips at the end of a working night.


I applied some finish to the camera itself (clear spray paint) but left the backs unfinished for now. I cut some short ends of polycarbonate I had in the studio and with aluminum oxide powder made 3 large focusing screens. My plan was to finish the film holders, measure them and use the router to make a groove on the backs at the right depth for the focusing screens. I made a test fit of the entire camera and 30x40cm back two days before Christmas, 2014. I checked for light leaks, sagging bellows and I tested all my lenses for coverage.
A test and a pause
November and December of 2014 had been two intensive months of building and a changing point for those living in Brazil with the coup that removed Dilma Rousseff from the presidency.
What I still had ahead of me would demand most of my patience. My plans were to build 9 holders total, 3 for each format. Each holder had 32 strips of different materials with different thickness and sizes. Total of 315 pieces, plus a few strips of felt and lots of PVA glue.
The core of the holders was one big piece of Gatorfoam and the darkslides were of premium quality black museum board. All this material would set me back around 120 USD, it took me 11 months to set that aside for this purchase. So in November 2015, I was starting to cut all these narrow pieces of black paper, black Gatorfoam and black museum board, boring, tedious. What was I to accomplish with such a big camera, I asked myself, while meticulously cutting strips. What was to happen to my profession, I asked myself that year.


So, I had this negative to look at and these bags of strips waiting for me. The more time passed, the less I remember how to put the film holders together. I had cut some plywood for a small cart, to haul the camera around. I had some old wheels as well, they were small and solid, I really could use some larger rubber wheels but I had no more budget to fit them in. I laid some closed cell foam on the bottom of this cart and set the camera inside along with it unfinished backs, a piece of bubble wrap on top and two years went by as I tried to push forward some other projects and a shrinking photography market in Brazil pushed back.
Easter 2018
During Carnaval of 2018, in February, I started finishing all holders and backs. A piece of plywood glued to an old tripod acted as a locating plate to help me manage the weight of the camera while securing it. I made a few trials of removing the camera from the cart and putting it together over the tripod with success.
I found a perfect large bag to protect the film holders, I added an inner layer of very thick card stock to protect their corners. An additional camera bag housed my main ULF lenses (183mm Protar, 360mm Sironar, 500mm Kodak), cables, light meter, a digital camera. With the tripod secured on top of the camera cart, I could haul everything on flat ground, for sure. Going up or down even small ramps was tricky.


My film holders don’t have locks or anything, but it takes a lot of strength to get one open. I made light traps with felt, but avoiding the removal of the dark slide made faster pictures since they were tricky to insert. With a silver permanent marker, I made a series of lines on the dark slides so I know when the image area is clear. This kind of detail became obvious during the first trials.


I made an appointment on the last working day before Easter to visit an office in a building overlooking a power plant in São Paulo. After lunch I drove to the studio and dragged the cart near the car, I suddenly became scared as I didn’t know if the cart would fit in the trunk. I grabbed the cart used all my strength to lift it from the ground. It fit. I felt my heart pounding and my arms a little sore already. What a stupid idea to build a camera so large and heavy, that’s all I could think. I loaded the other bags and drove away. What a beautiful fire I could have with this maple camera. Too bad the nylon textile would give off a bad smell, otherwise I could have a barbecue as well.
Getting the cart out of the trunk there was another suffering, but by then I had another mindset, this would eventually help me pick places that really deserved to be photographed.
This first place I went was a good pick, a controlled environment and I had lots of time to get things done in the correct order, I ended trying all three backs and exposing many negatives there just to get a feeling of what I would have to do on the streets. It was in the middle of Fall, a couple hours before sunset, the camera was looking East, it was the perfect light for my first negatives.
I came back home and left the car prepared. I developed all my shots from that day and I was very happy with my 8×20” negatives. My 12×16” x-ray was completely blocked. I tested an unexposed sheet from the envelope and found out they were gone. I cut some 12×18” to size to use on these holders from this point on.
A couple of notes on darkroom stuff here: I always preferred to use Lloyd Erlick’s single tray processing method for large pieces of paper and film. This works very well even in complete darkness and I’ve used this method for all these photographs. I experimented a lot with Soemarko’s LC-1 developer when using lith film, but probably not enough as you can find lots of mottling especially in my 30x40cm images. This film was so expired, I was using it at ISO 1, probably needed stronger development, but that could cause more fogging.


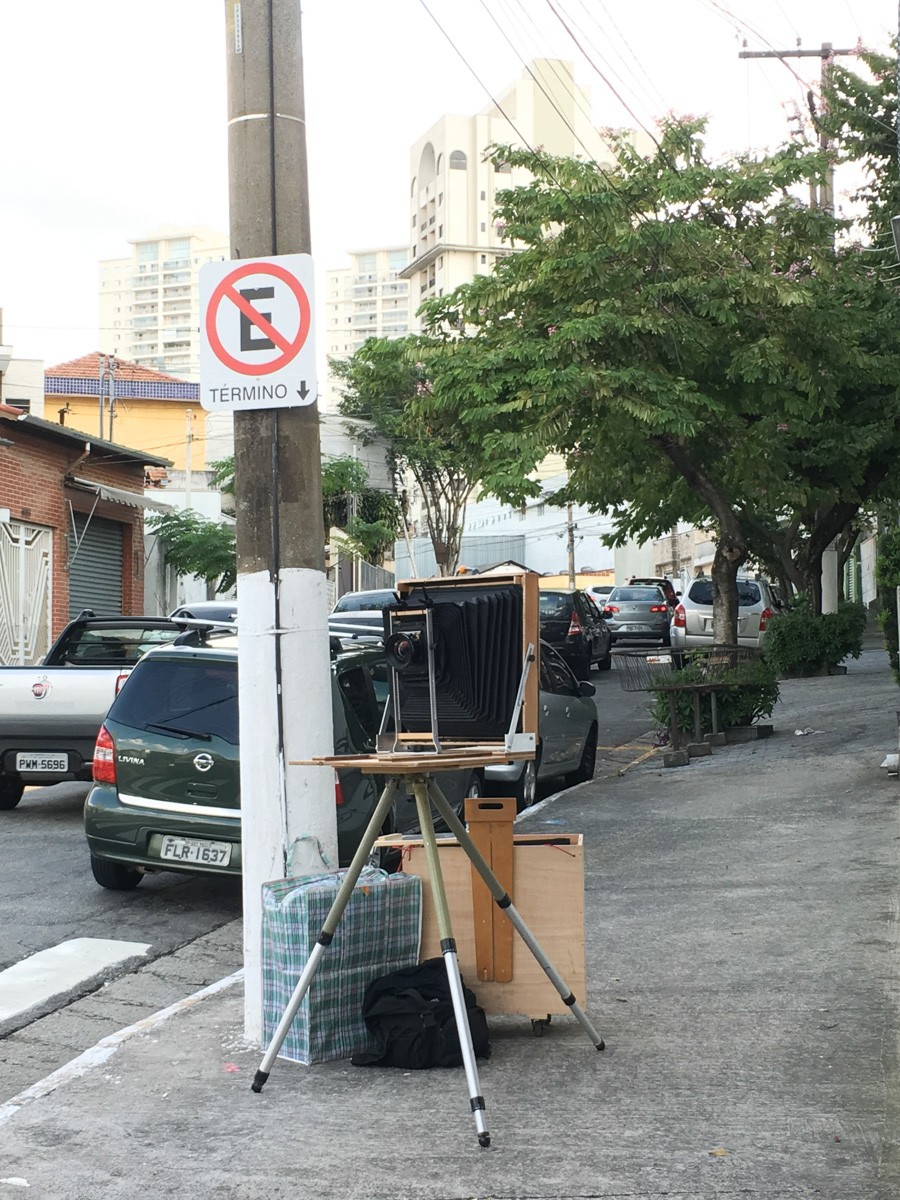


I attracted some attention on the streets, but not too much. Some people came to talk, asked if I still used film and similar things. Not many people noticed my camera was kind of big. I should have made a 20×24” (but I didn’t because I didn’t have a lens for it and lith film I had in 20×24” I could cut into a 16×20” plus an 8×20”).
At least in one of these days, I had the help from my son Pedro, the first owner of that crib. He is a bit bigger now and can carry very heavy tripods, what bliss!
Changing from horizontal to vertical and back worked very well. And to photograph in 8×20” vertically is indeed something! It is a format I was not used to and I found it very challenging, had lots of fun trying to figure out compositions for it.
My cell phone pictures gave me an idea of where to locate myself in terms of desired composition and that part of the planning was very good. In a couple of instances I decided to change place with the camera setup on the tripod, it wasn’t too hard, but I’m glad I have avoided it for the most part. Finding a suitable parking space was also a must for some places, so some times I waited a bit until I got a good one.
Post
At first, I didn’t think much about the 12×16” negatives, but as soon as they were dry, I noticed they would fit both of my large scanners at that time (Cezanne and PFU2400), so I could easily access the image, apply a curve to get tones where I want and judge my results. This was a pleasant surprise, something I hadn’t imagined until it happened.
My PFU scanner that takes A3+ size originals, I cut a “negative holder” out of gatorfoam, a simple window A3+ outside and 29x39cm inside. With magic tape I would hold the negative by its four corners, slightly stretching it to keep it flat and away from the scanner glass. This scanner has autofocus and this solution was optimal, I was able to achieve 800 dpi with a 12×16” negative, that’s 9600×12800 pixels approximately.
I made some contacts proofs with a few 8×20” and these looked promising for a future darkroom session (in my next studio, someday in the future). ILFORD FP4 PLUS is a pleasure to print anyway.


As for the 16×20” negatives, my first proofs were really bad. I didn’t quite understand how to get I nice contact proof from that lith film and haven’t had an opportunity to try again still. The images on the negatives look very promising for my taste, so I guess it is a matter to try a different paper or developer and get the right curve to make the image pop.
Lint remover a.k.a. Dust roller
Somewhere in the spacetime, between building the crib and building the camera, a friend gifted me a box full of used sheets of lint remover. You may ask yourself what kind of friend would do this, but today people would call it a collab: he wanted me to enlarge those and make art. We did that and it was beautiful.
Years later, I bought a Swiffer duster at the supermarket to keep the studio clean and when I removed the first used dusting sheet I was in love with the texture created. So I started saving those too (because I was still saving lint roller sheets, right?)


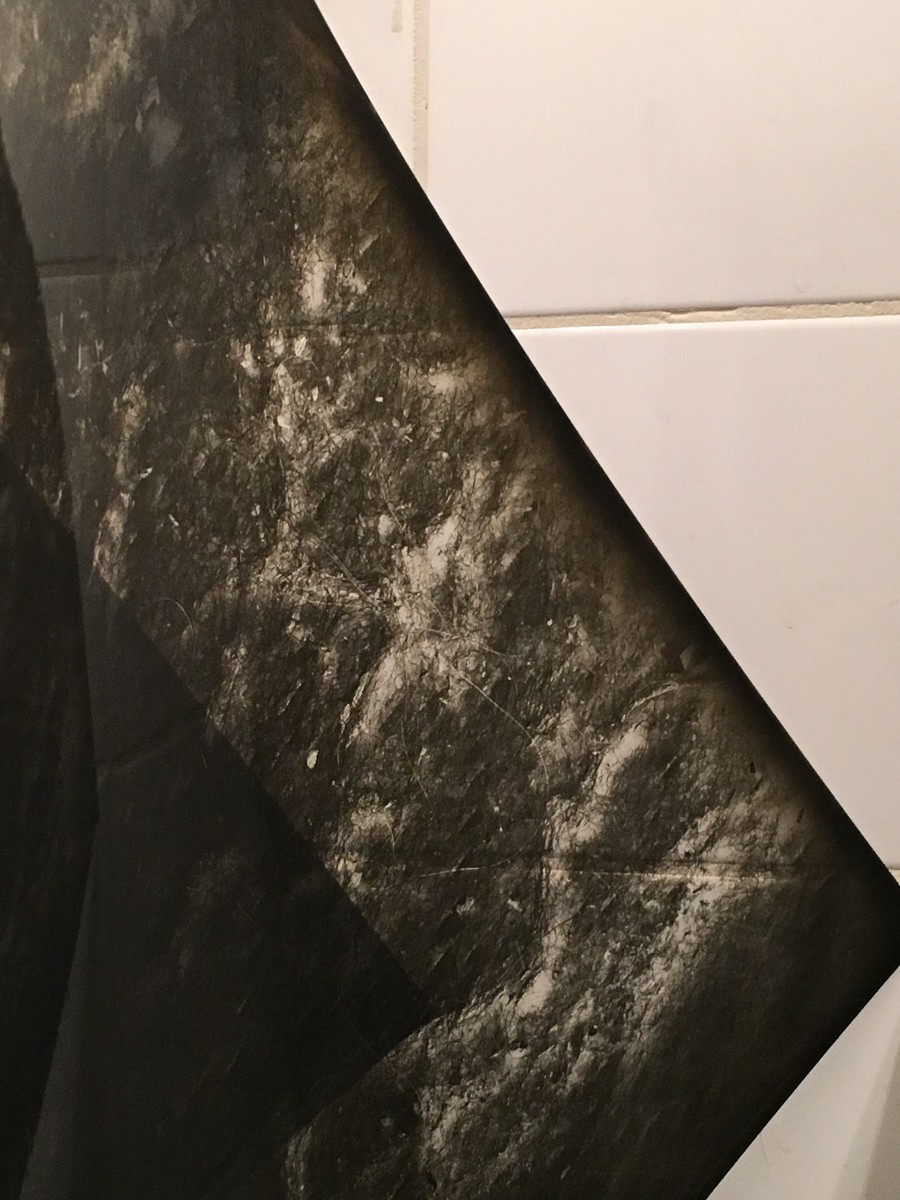


Swiffer sheets are much thicker than lint roller sheets, with the right light and an in-out of focus situation, this could become a nice image of an ethereal world full of clouds and sparks. I tried two enlarging lenses, Nikkor 50/2.8 and Rodagon 150/5.6 on 16×20” film. The shorter lens gave a result I was more interested in.
Most negatives I made of the swiffers were with another lith film that presented fogged edges all around. After they were dry, I trimmed these corners so they would fit the PFU scanner in the same way as the 30x40cm negatives.
Portrait marathon
Portrait Marathon was the name me and a group of friends gave to a meeting we organised in a very green square in São Paulo. Before this meeting, we were doing photowalks, but those who liked large format cameras were always left behind. So we organised these marathons every once in a while so LF people would fell welcome after they missed a couple of photowalks.


I took my 16×20” camera once to a Portrait Marathon (with 12×16” and 16×20” backs), but the sun didn’t show up. I had a tough time managing 4 to 10-second exposures with people standing up. My friends got a little blurry, I eventually lower the exposures too much and had to give extra development which in turn led to extra base fog. It was a mess, but I believe I like the results even more today.
These problems with a larger camera were fun and very visible in the images. The camera itself didn’t stand in the way of the portrait as much as I imagined and people kind of enjoyed it.
Modification
Obviously changing angle and composition is way more complicated than with an 8×10” camera and that was the most irritating part of the experience. After this week of using this camera, I decided I needed something way more simple. I took the 8×20” back and eliminated the excess wood on it, added a box on the front and a recessed lens panel to hold a Protar 140mm in fixed focus position. It turned out to be a good solution and made it possible to achieve some interesting results photographing plants and trees that appear on the streets of São Paulo, growing in small asphalt cracks or tiny spaces between blocks used to separate bus and car lanes. (My joy photographing these subjects didn’t last long, at least near my home, as city workers removed most plants and painted over these blocks.)


With this “point-and-shoot in 8×20 format”, I was able to ride the bus anywhere I knew there was a nice subject (I have also made notes about these plants and trees, and addresses I can go back to every now and then to see if they are developing).
I felt so good about this modification that I found myself thinking again about why I had built such a large camera. A few years back I had lots of fun using a Fuji GSW690III and Adox CMS20 film, this combination created smaller negatives, but with lots of detail too, a combination that could rival the images I made with my 16×20” camera in many ways. So why the large camera? I don’t know, for now.
I made some contact proofs of these images into 12×16” paper developed in lith developer to achieve some interesting highlights and deep blacks. On that paper I cropped out 4” of the image and got some wide black borders. My negatives had strong vignetting from the Protar Series V lens, I compensated as much as I could with burning in. ILFORD FP4 PLUS deals quite well with this extra exposure on the center of the image and I was happy with my proofs.
So what exactly was I looking for?
I got the maple in my twenties, I started building this project in my thirties and finally used the camera in my forties. I probably also read to much of the Large Format Photography Forum over the years. That picture on page 103 of Beaumont Newhall’s History of Photography got me thinking about building a camera for so long.

My curiosity has taken me so many complicated and troublesome places. But, maybe, as the years go by, I find myself less interested in the challenges and more focused on the results. On the other hand, it takes time to learn what you need and to make what you want.
Thanks for reading.
~ Guilherme
Share your knowledge, story or project
The transfer of knowledge across the film photography community is the heart of EMULSIVE. You can add your support by contributing your thoughts, work, experiences and ideas to inspire the hundreds of thousands of people who read these pages each month. Check out the submission guide here.
If you like what you’re reading you can also help this passion project by heading over to the EMULSIVE Patreon page and contributing as little as a dollar a month. There’s also print and apparel over at Society 6, currently showcasing over two dozen t-shirt designs and over a dozen unique photographs available for purchase.


One response to “Measure twice, cut once: building my multi-format 8×20, 16×20 and 12×16 camera”
😳🤩🤩🤩