The Twin Lens Reflex (TLR) is a camera design over 130 years old and it’s almost a hundred years since its now-familiar appearance first was brought to the mass market by Franke & Heidecke and subsequently, so widely and successfully copied.
It is a “just right” Goldilocks camera if ever there was one.
I am not saying the TLR was perfect, far from it. I doubt there is such a camera. Being essentially a tool, the TLR served a purpose just as other types of camera serve their purposes. But whilst the SLR in either 35mm or medium format morphed into modern-day DSLRs and digital medium format cameras, the roll film TLR had a completeness about it that persisted to the very end, joining the large format field camera as the least altered of camera designs following their introduction.

The Rolleiflex design that Franke and Heidecke produced in the late 1920s was improved upon with essentially only two innovations after its introduction: the technology of the lens and shutter of the earliest examples were improved of course, yet the addition of an exposure meter, either automatic, coupled or uncoupled.
Mamiya’s C-series of cameras was a unique system, its own branch of evolution of the type. Along with Voigtländer’s prototype TLR with interchangeable lenses and the Gowlandflex, specifically made for a fashion photographer of the same name, Mamiya was the only interchangeable lens version to go into serial production.
Anyone can pick up a TLR of almost any era and be immediately comfortable with its basic operation. The only exceptions might be the later, short-lived and dumbed down, automatic models various firms produced, each model having its own operational specifics, but the same basic layout was unchanged throughout its life.

We have autofocus and auto-everything else these days but there is something very satisfying about seeing an image come into focus on a ground glass at waist level in a TLR finder. Of course with the TLR you have to deal with a laterally reversed image, i.e. right is left and vice versa for framing and composing the image, later versions having the option of a pentaprism attachment to overcome this. Mind you, I was always told to judge a print upside down or in a mirror. Having to consider an image that is reversed in some way seems to force a more objective assessment, so a TLR could be said to improve your photography into the bargain!
Because the TLR has been such a popular type of camera for so long, there are many useable examples available. I have used a TLR on and off for around half the 60 years I have been using a camera seriously and for me, it is one of the most practical and easy to use cameras of all time. I hope this article, based on my personal experiences, will be useful for anyone thinking of dipping a toe into film photography or just wanting to give the TLR a try.
History of the TLR design
One of the most critical aspects of making a photographic image in the early days was composing the image and ensuring it was sharp. The image was focussed on a ground glass screen placed in the film plane and replaced by the film to make the exposure, a cumbersome and lengthy procedure which would not suit every type of photography.
Early portraits, for example, were characterised by stiff poses and fixed expressions, partly because of the long exposures early emulsions demanded, but also because the sitter had to hold their pose for quite a long time whilst the photographer framed and focussed before replacing the ground glass with the plate holder. Some early studio accessories included clamping frames to hold the sitter in position for the necessary time.
Then, as film speeds increased and shorter exposures were possible, a means of focusing, composing and making the exposure as a single operation was desirable and the reflex camera was developed. These used either a single lens and hinged mirror or twin lenses with fixed mirror, both approaches having advantages and disadvantages but were positive improvements.
The earlier twin-lens camera concept with fixed mirror formed the basis for later development of the Rolleiflex. Any design process inevitably involves some building on previous experiences so that this and one type of stereo camera would have had a strong influence on the design of the first Rolleiflex.

The stereo camera was a popular type introduced in the late 19th century, one type having two lenses on a common, focusing panel in matched, linked shutters, with a viewfinder placed centrally on the top surface. A third, central viewing lens was added on more advanced types, showing the image at the film plane on a horizontal ground glass screen via a 45º mirror, with a folding hood to shield the screen from light. With the glass plate already in position, framing and focus could be chosen and the exposure made without delay. Early models were quite large devices eventually evolving to make them more practical, culminating in the Voigtländer Stereflecktoskop (no “o”) which formed the basis of many other stereo cameras that followed.
Franke and Heidecke (F&H) were employees of Voigtländer but left the firm when the German economy struggled to recover from the First World War. The company they established made the Heidoscop and Rolleidoscop stereo cameras which followed the same basic design of the Voigtländer in the early1920s. Their cameras adopted the same layout with the addition of a modified finder hood, replacing the Voigtländer’s frame finder with a second eye-piece and mirror for eye-level viewing, plus the ability to focus, SLR style. The Heidoscop used 120 film giving 6 pairs of 6×6 cm images.
Their design for the Rolleiflex TLR built on earlier designs and included several components which were similar to those on their stereo models. Remove one taking lens from the stereo camera and place the remaining taking lens below the finder lens and you have the familiar, classic arrangement, in a compact and portable camera.


The compact design of the Rolleiflex camera was made possible by using 120 size roll film, giving 12 6 x 6 cm negatives on a roll. The spools of film could be tucked into the spaces below the mirror and the slope of the imaging enclosure. It featured the same focus arrangement as the stereo cameras through a fixed pair of lenses, usually 75-80mm focal length and focussed by a knob on one side. The taking lens was mounted in a between lens, leaf shutter, all in a compact, lightweight body with a folding viewing hood above the ground glass screen incorporating a magnifier for critical focusing.


The design has been copied many times by many different manufacturers in all countries where cameras were made, from the very basic Kodak Brownie Reflex type of snapshot camera to the extremely developed Mamiya C330S system. I have personally used a Microflex from the UK, a Yashicamat, Autocord and Mamiyaflex from Japan, a Flexaret from Czechoslovakia and a Rolleiflex from Germany. Other versions were made in China, France, Russia and the USA that I am aware of, though I have no experience of any of those, but they almost all used the basic Rollei configuration.
Handling a TLR
One of the best features of the type is that it is held in only one orientation, being a square format. The decision on the print format was made later in the darkroom, or after digitising these days, landscape, portrait or square.
Depending upon how you work, the Rolleiflex can involve swapping hands between exposures because the focus is on the left side and the wind on the right. If you use the neck strap to support the camera this can be avoided and some models of the Rolleicord and other makes placed both wind-on and focus controls on one side which improves handling. Most lever wind transport versions follow the original arrangement, however, something most photographers adjust to quite easily but it is not ideal.
A few makers found a different solution to smooth out the focus-frame-release-wind sequence, notably Meopta’s Flexaret, Minolta’s Autocord and the Kowa Kalloflex.


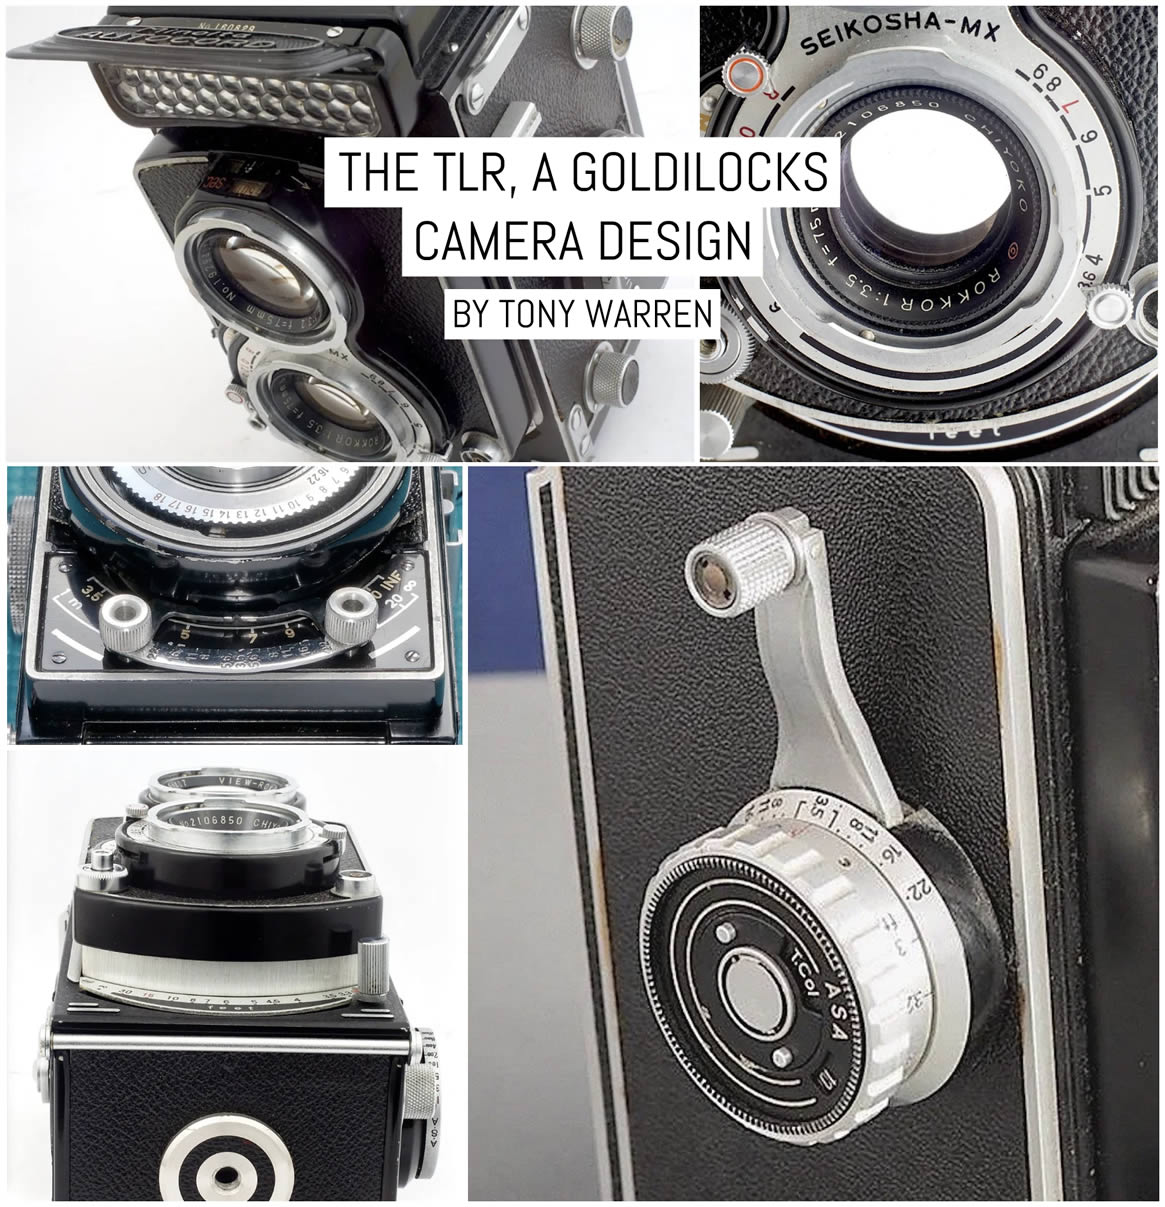
On the Flexaret, left-top, focus is controlled by a quadrant below and concentric with the lens which allows the left hand to support the camera and focus, whilst the right-hand releases the shutter and winds on without having to change grip. The Autocord, above, bottom-left, is similar, with a simple lever so that the left hand supports the camera and focus lever, leaving the right hand to deal with winding on. The shutter release can be operated with either hand being located at the bottom right of the base.
The Flexaret suited me best having two knobs, one on each end of the focus quadrant, making it easy to reach at both the closest and furthest focus settings, whilst having the release on the right of the front plate gives a smoother sequence of focus-frame-release-wind.
I believe Kowa, above right, made best fit of it with the Kalloflex, though I have never been fortunate enough to handle one. Here, the wind lever and focus were concentric on a common hub so that the right hand focusses the lenses and operates the wind-on lever, leaving the left hand to support the camera and release the shutter.

The later Mamiya C-system arrangement above, of a focus knob on each side of the camera, was a significant innovation allowing focus to be operated from either side overcoming the handling problem neatly. Wind on and shutter release are both on the right-hand side so everything can be done with the right hand if preferred with this rather heavy camera supported in the left hand.
The later C330 had an additional release on the front of the base, Hasselblad style, allowing the left hand to release the shutter whilst support the camera.
Film transport
Almost all these cameras load film in the base and turn it through 90º over a roller to pass up to the take-up spool located below the mirror.
The criticism eventually levelled at this method was that a kink could develop in the film where it turned 90º as it left the base to travel up to the lake-up spool. This kink would fall just below the top of the image area causing possible localised focus errors in the lower part of the image. It would be made worse if the camera sat idle for an extended period with film partly used.


Mamiya still ran the film vertically, above right, but placed the spools immediately above one another, creating a straight path to avoid that potential problem.
Frame spacing and counting is generally automatic on all but the basic cameras which rely on a red window. Early automatic versions require the first frame to be set in a red window after which counting is automatic. Later this was replaced by matching arrows on the film backing paper with marks alongside the camera film rails, red dots on the Autocord, before closing the back. Winding then took the film to the first frame automatically and set the counter to “1”. Fully automatic loading on later, Rolleiflex cameras used rollers to sense the start of the film passing through them, triggering the spacing mechanism.

Later cameras are fitted with an adjustment of the counter and pressure plate to allow the use of double-length 220 film which only had backing paper at the beginning and end of the roll to make space for the longer film. So far as I am aware, 220 is no longer available, however, and any adjustment of the wind and pressure plate should be set to “120”.
Later cameras of various makes could be used with 35mm film either with add-on kits or integrated into the design. Rollei, Meopta and Yashica included this in their ranges. This capability is particularly useful for portraits, the 75-80mm focal length being considered ideal for this type of work and the film travels vertically so is in portrait format with the camera held normally.
TLR viewfinders and screens.
The basic finder takes the form of a folding hood closing over a ground glass screen incorporating a magnifier that tucks out of the way in the front or back of the hood when not in use and magnifies the central area of the ground glass for critical focusing. The design is much the same as was used in the stereo cameras mentioned above.


The viewing lens generally has a larger maximum aperture than the taking lens in cameras with f3.5 lenses, not only for a bright image in the finder but also to ensure accurate focus, having a smaller depth of field than the taking lens.
Almost every manufacturer of the type used this kind of finder with few variations. Most notable is the arrangement in the Rolleiflex which allows focussing at eye-level via a second eye-piece and mirror, whilst Zeiss used an Albada type of eye-level finder in one of its Ikoflex models.
The design has also been used on most roll-film SLR designs such as the Hasselblad and the rest. Early cameras could be fitted with a prism clipped over the finder hood for latterly correct, eye-level use.

Later models of the Rolleiflex and the Mamiya C-series had interchangeable finders allowing a more integrated pentaprism finder to be used, or the Mamiya Porrofinder, which used mirrors instead of a prism. The prisms are heavy and add quite a bit to the weight of the camera, whilst the Porrofinder is lighter but does not give as bright an image. Mamiya also offered a chimney finder. Metering was included in alternative versions of the Mamiya accessory finders.
Mamiya also supplied interchangeable screens to suit various purposes for the C330.
The range of accessories offered is shown below.

Exposure control
This is another feature of the design which was used in almost every make on all but their most basic models. Levers or wheels mounted on the lens/shutter unit control shutter speed and aperture with the settings visible from above the camera, usually in windows above the finder lens or on top of the shutter housing. The Flexaret I owned had conventional controls on the lens surround without a readout visible from above.

Some later cameras incorporated exposure meters, coupled or uncoupled. Some used a match needle method, adjusting a pointer against a needle to match either a pre-set speed or aperture. Uncoupled versions read settings from the meter to be transferred to the camera.
The levers on the metered Minolta Autocord LMX I owned operate against a numbered scale for speed and aperture. The meter gives a single numerical read-out, based on the film speed set and the shutter and aperture values must add up to the meter value. For example, if the meter read 10, then an aperture value of 5 and a shutter speed value of 5 would give the correct exposure, f5.6 and 1/30, or set to 4 and 6, f/4 and 1/60. Actual values appear in windows above the finder lens as with most other types to check the settings in conventional fractions of a second and f-stop values.


The Light Value shutter improved on the Minolta system by interlocking the shutter and aperture scales. Setting the single-digit Light Value given by the meter whilst disengaging the interlock then ensured that the exposure remained constant whichever control was altered to suit the subject. With the interlock re-engaged, increasing the shutter speed opened up the aperture by a matching amount and vice versa.
The automatic models mentioned above had varying systems of exposure control allowing variable amounts of intervention by the photographer. The Rolleimagic I and II were examples, other versions being made by Yashica, Ricoh and others.
Lenses
There are four basic designs of lens used in the TLR. The most basic is the type used in simple, snapshot cameras and what we would call entry-level cameras nowadays, and would be a simple one, two or three-element lens mounted in shutters with limited speed ranges.
The next level of sophistication is the three-element design of better quality than the first, used in the Rolleicord, Yashica A to D models and similar cameras. The Triotar and Yashikor are examples. These lenses perform well when stopped down a little but suffer edge fall-off at large apertures and are usually mounted in partial or fully speeded shutters.
Most of the best quality models, Rolleiflex Automat, Microflex, Yashicamat and similar almost all used a design known as Tessar types. These lenses have four elements, two air-spaced elements in front of the diaphragm, and a cemented pair behind it. The Tessar, Rokkor, Yashinon, Belar and many others are of this basic design and give extremely good performance across the board. The maximum aperture is the limiting factor with these lenses, however, most being f/3.5 or some with an f/2.8 maximum aperture.
Rollei produced wide-angle (below) and telephoto lens models later on for specialist purposes, but the lenses were not interchangeable and these relatively rare models command high prices, whilst Mamiya was the only company to offer a range of interchangeable lenses.

The final level of design and development is seen in the later models of the Rolleiflex which were fitted with lenses still topping out at an f/2.8 aperture but with more elements for better correction and giving much/improved performance at all apertures. The Zeiss Planar and Schneider Xenotar are examples and are fitted to the last range of Rollei TLR cameras, the 3.5F and 2.8F.
Lens coating, initially on only one or two of the lens elements’ surfaces, was introduced from the second World War onwards to reduce flare. Coatings were gradually improved so that the later the manufacture, the better the coatings, with the latest lenses having multi-coating on all surfaces.
Shutters
Shutters fall into three groups, the very basic, having two, three or four speeds, through the 9- or 10-speed types, culminating in the meter coupled shutters fitted to some of the later models. It is worth bearing in mind that some of the early, fully speeded versions of the Compur, Copal and Seikosha shutters should never be set to 1/500th after winding on and cocking the shutter to avoid damaging the mechanism.

The Epsilon shutter of the period often receives a bad press, having a reputation for fragility and unreliability. I have had four folding Ensigns with Epsilon shutters which were all reliable and gave me no problems but it is worth checking out before buying if possible and maybe getting a CLA if in doubt. The advice is not to change any speed settings after the shutter is cocked to avoid problems which would apply to the early version of the MPP Microcord which used one of these shutters.
All these cameras were fitted with between lens leaf shutters and, apart from improvements in manufacturing standards, accuracy and the Light Value system, were largely unchanged throughout the TLRs history. So far as I am aware, electronic control never appeared in TLR shutters, which were always mechanically controlled. Flash synchronisation and light values were the only major innovations introduced over the period.
Accessories
Accessories generally consist of the usual lens hoods, filters and close up lenses, mostly using the Rollei bayonet fittings, size B1 being most common. Some makes use a push-on or screw-on fit but adapters are available these days to fit screw-in filters on bayonet mounts. The bayonet fit originals are most compact and convenient if you can find them but it is worth checking that there are no coating or lamination problems with early filters. Close up lenses usually come in pairs with a taking lens and a parallax-correcting viewing lens, in Rollei’s case called Rolleinar and Rolleipar in three dioptre strengths.


Minolta offered a polarising filter mounted as a pair and geared together so that the taking lens matched what the viewfinder showed. Other types had to be transferred between the finding and taking lenses without altering the setting.
Rollei produced panoramic devices to fit below the camera on a tripod and Mamiya’s Paramenders are particularly clever in overcoming the parallax between the viewing and taking lens for stationary subjects.

To get over the fixed lens limitation there are various wide-angle and telephoto supplementary lenses available. These give a slightly wider or slightly tighter image but generally tend to take the edge off the image.
To conclude
For me, the TLR is the standout as a practical, portable and versatile instrument. Granted, it cannot match 5×4 for out and out detail, or the parallax-free viewing and wide range of focal lengths 35mm and medium format SLRs can offer. It doesn’t slip in the pocket in the way my old Olympus XA did, but as a take-anywhere, tackle most things camera it takes some beating.


The Kalloflex would be my favoured choice if I could find one, with the Flexaret IV or the Autocord, metered or unmetered, the second choice. For maximum flexibility, the Mamiyaflex is unequalled but sacrifices lightness and compactness.
The Mamiya C220 could be a good compromise if you need the features offered. It is lighter than the “C3” series and takes most lenses and accessories apart from screens and the need to manually cock the shutter. If you just have to have the best, of course, the latest Rolleiflex can be the only choice, the precision and quality of manufacture and components lift these cameras to the highest level.
Certainly, if you want to dip your toe into medium format film photography, almost any TLR could be a very good starting point. They are generally well made and reliable cameras that can produce excellent results and there is a wide range to chose from on the market at quite reasonable prices apart from the more exotic, sought after models.
Give one a go. I doubt you will be disappointed.
~ Tony
Share your knowledge, story or project
The transfer of knowledge across the film photography community is the heart of EMULSIVE. You can add your support by contributing your thoughts, work, experiences and ideas to inspire the hundreds of thousands of people who read these pages each month. Check out the submission guide here.
If you like what you’re reading you can also help this passion project by heading over to the EMULSIVE Patreon page and contributing as little as a dollar a month. There’s also print and apparel over at Society 6, currently showcasing over two dozen t-shirt designs and over a dozen unique photographs available for purchase.


15 responses to “The TLR, a Goldilocks camera design”
What an excellent, comprehensive and highly informative article! Bookmarked it 🙂 Beautiful photos too, my favourites are the lady with the pigeon and the car outside the gate. I’ve just acquired an Autocord (my first TLR), can’t wait to try it out.
Thanks you for that and sorry for the late response. The Autocord was one of my favourites so I trust you have had lots of pleasure from using yours.
Great article! I’ve used a Rolleiflex and YashicaMat for many years and read a lot about them, but this was a lot of new material. The evolution from a stereo camera was interesting and completely new to me. Nicely done, sir. I gave my YashicaMat away, but I love my Rolleiflex. Took it canoeing this week, in fact! These are fun cameras.
Thanks David. As a user first and foremost I completely agree that they are a great camera to use. I am without one at the moment and waiting impatiently for a Flexaret IV to find its way to little old New Zealand to make me happy again. Sorry for the late reply – this last year has been quite eventful!
Great article! I’ve used a Rolleiflex and YashicaMat for many years and read a lot about them, but this was a lot of new material. The evolution from a stereo camera was interesting and completely new to me. Nicely done, sir. I gave my YashicaMat away, but I love my Rolleiflex. Took it canoeing this week, in fact! These are fun cameras.
Absolutely perfect article! I’m in love of my favorite Rolleiflex 2.8 GX, Flexaret VII, Yasicamat, Weltaflex, Mamiya C330 and the great Ikoflex! Thank you for perfect information!
I am green with envy Rosen – what a great collection.
Very well done summary! I hope more new photographers take up the TLR. I have been a Rolleiflex 3.5E and 3.5F user since 1981 and did my best work with one or the other of these precision gems. Any TLR is great for street photography. The general public does not seem intimidated by a photographer using a TLR, in contrast to a bulbous DSLR with its projecting penile he-man kit zoom. This may be of interest:
https://worldofdecay.blogspot.com/2014/08/photographing-decay-with-rolleiflex.html
Thanks for that and totally agree. The link is a really excellent and detailed article on the Rolleiflex and its system. Recommended read.
I have seen the Queen of England with a Bolex H16 and Leicas but this is the first with a Rollei.
Wonderful article. I’d say it will inspire many of the younger folks who are just discovering film photography to think about trying one.
I have one of the early Rolleiflex 2.8 cameras. 2.8 is pushing it a bit for the Tessar design. It softens a little at the edges when used wide open and I find it lovely for certain subjects, portraits for example. When out and about in the landscape I can stop it down and it is as sharp as I need it to be.
Thanks Conor. I appreciate that. The Tessar is an amazing design – I have lost count of the number of versions I have used in the past and still do.
Excellent article. And my Yashica likes it too. https://t.co/7fHfqlyvLG
Thanks Jamie. It means so much that your Yashica likes it. I really liked my Yashica too.
Tony.
I agree, which is why I dream of a Gowlandflex.
I guess the Gowland cameras are the ultimate TLR but I would need to get in training to use one! Gowland made so many versions, it makes fascinating reading learning about them all, but they were so big!
Tony.