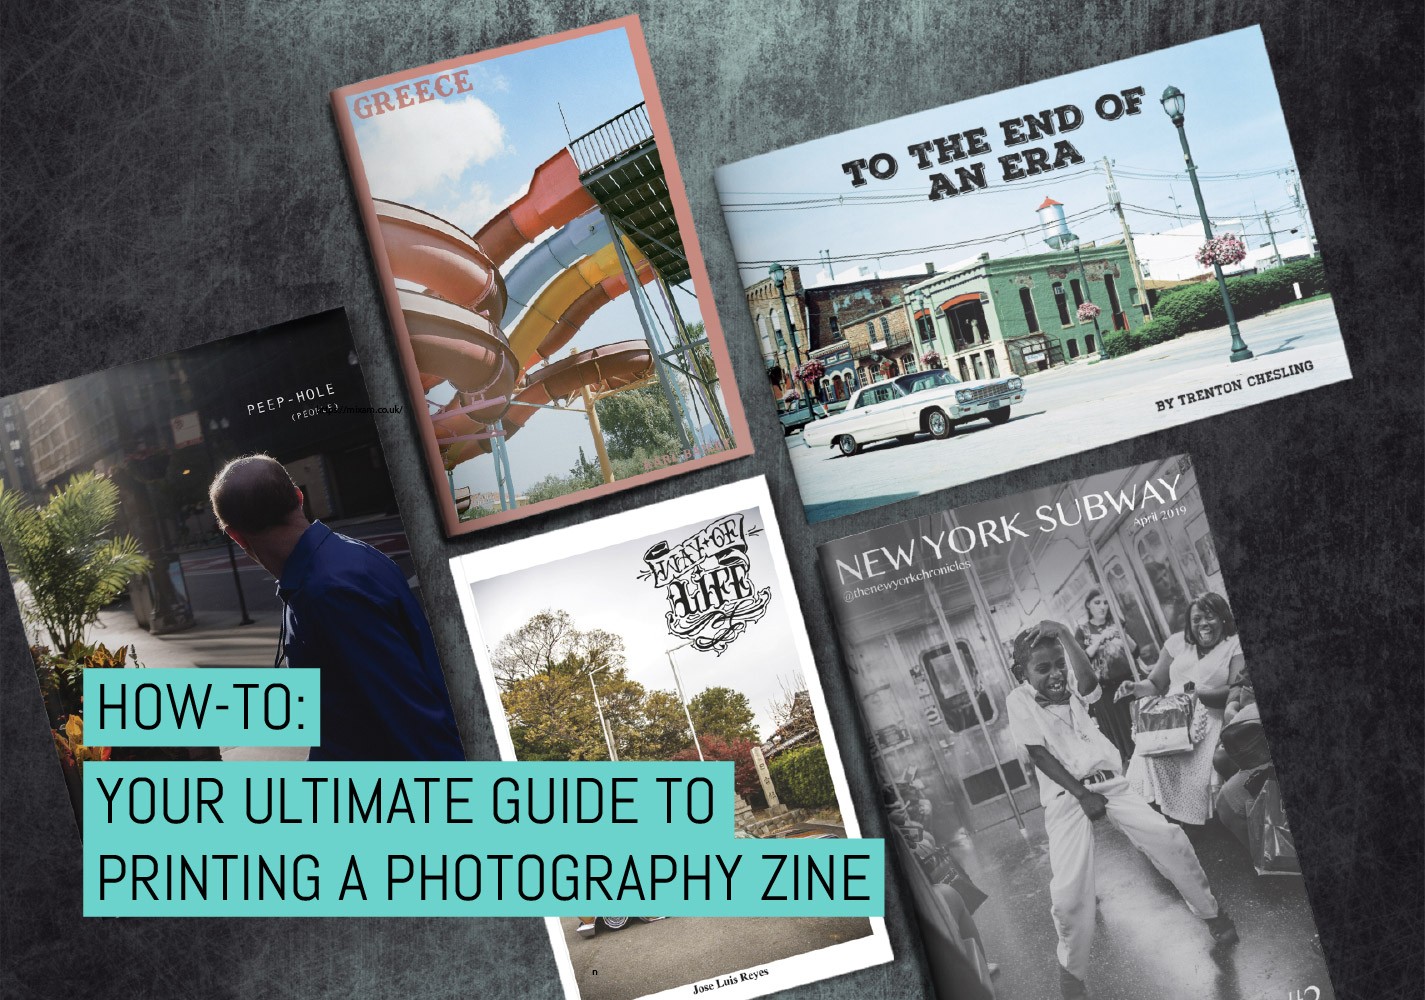
Photography zines are everywhere and on film photography Twitter at least, there’s one name that jumps out when you talk about getting them printed: Mixam Print. I’ve been in touch with the team there for a couple of years now and in late 2019, I asked if they’d be interested in writing a guide on the technical aspects of getting a photography book or zine printed
This is it.
This article covers everything you need to understand when it comes to printing your zine and owning the selection process for paper, binding, finishing and preparing your file(s) for print. If you’re looking on advice for layout, image selection, tone, theme or concept, Anil Mistry has you covered on his do’s and don’ts of creating a photobook.
With that, I’ll hand over to Mixam’s Adam Smith.
~ EM
Printing a zine of your photos is like learning to ride a bike. It’s simple in principle but it’s a lot easier if someone else shows you how to do it. This is because creating a printed collection of photography is both a technical process and an art form.
This guide explains the basics of zine printing, followed by an advanced section about CMYK color printing and ink saturation. It concludes with examples of popular zines to give you an idea of how all these technical specifications come together.

In short, I’ll be covering everything you need to know about photo zine printing. From choosing the right paper and binding to adding bleed to your print file and so much more. There’s also a lot of useful information over on the support section of the Mixam website.
Selecting your paper
One of your most important choices will be the paper your zine is printed on. You need to make four selections, size, type, weight and finish. Different combinations will swing the end result from a professional paperback/magazine feel to a more vintage feel.
Paper sizes
In the US, the most popular dimensions for zines are 5.5″ x 8.5″ and 8.5″ x 11″, which are similar to the European A5 and A4 equivalent sizes. Some commercial printers will also allow you to choose square and custom sizes.
When selecting a size from a commercial printer, this will be the final size of your zine when it is closed. It will be double this size when laid open.
Paper types
There are four main types of paper, each with their own unique appearance and texture. This will affect how your photos will look once printed.
- Satin is the recommended default paper choice. It has a nice smooth, matte finish.
- Gloss is a smooth, shiny paper that enriches color saturation. Popular for photo albums.
- Uncoated is like regular writing paper. It’s slightly rough to the touch and dulls colors a little.
- Recycled is a rougher version of uncoated paper that desaturates colors a little more.
For more accurate photo reproduction, we always recommend printing on Satin paper. However, uncoated and recycled papers are very popular when creating zines with a vintage look and feel. It can be difficult to get across the differences in these four paper types on-screen but our designers took a crack at it and the gallery below contains the best approximations we can give you for saturation/contrast and feel. Don’t forget that you can always request a sample pack from us to touch and feel the paper for yourself before committing.


Paper weights (thickness)
US paper thickness is measured in lb (pounds). When putting together your zine, there are to main things to remember about paper weight and terminology:
Text paper is used for the interior pages and can be 70, 80 or 100 lb.
Cover paper is used for the cover pages and can be 80, 100, 110 or 130 lb.
However, an 80 lb Text paper is not the same thickness as an 80 lb Cover paper. It would be approximately 44 lb Cover paper. For easy maths, Cover paper is 1.8 times thicker than Text paper.
Some creators choose not to apply a Cover to their zines. This is known as ‘self cover’, where the first and last pages of Text paper are used as the cover design instead.
You can mix different paper types for the Text pages and Cover pages. For example, a photographer may choose uncoated paper for their Text pages and select a Gloss Cover with a Gloss Lamination.
A cover is added for presentation and protection, which is why it is usually given a laminated finish.
Finishes
It is always recommended that you laminate the cover of your zine with a protective finish. This not only enhances its presentation but also helps to prevent scratches, marking and the ink rubbing off from being handled by hot and sweaty fingers.
Although some people prefer not to laminate their covers or may choose a ‘self cover’, letting their zine become well-worn for a more vintage look and feel. It also saves on costs.
Matte or Gloss laminates are the most common cover finishes. A Satin paper cover with a Matte lamination is the recommended default option. Applying a gloss lamination to a gloss paper will make your cover super shiny and increase the color vibrancy.
Uncoated and recycled papers cannot be laminated because the finish won’t adhere to them successfully. it also defeats the object of choosing these paper types in the first place.
There are more exotic cover finishes, such a Spot UV and Gold Foiling, which require a more advanced print file setup. Due to the expensive setup costs, these features are usually reserved for high volume offset print runs.
Choosing a binding

Most zines are staple bound because it’s a cheap and effective binding method (literally 2 staples hold the pages of your zine together). Perfect binding is very popular for creating a more premium looking product, which is also known as saddle-stitched.
If your zine is perfect bound, it means that your pages are glued against a square spine, making a paperback book. This is also known as PUR binding, named after Polyurethane Reactive adhesive used.
Staple bound zines have a maximum page count, because the staples can only hold so much paper together. Meanwhile, perfect bound zines have a minimum page count, otherwise there isn’t a large enough spine area to glue the paper in to. Sometimes a zine will have so many pages that it simply cannot be staple bound. In which case, your printing service will recommend perfect binding instead.
Your chosen binding will also affect the print file setup of your pages.
Getting ready for print: your print file setup


Many people call it the artwork file. Adobe InDesign is the package we recommend, but Photoshop or Illustrator will suffice.
For the best results, submit a multi-page PDF file containing all of your page designs in running order, exported using the ‘high quality print’ setting from your chosen Adobe package.
You will also need to adjust your settings to create the correct files for printing. Image resolution should be at least 300dpi, as anything lower will look grainy when printed.
Switch RGB colors to CMYK colors, using the CMYK profile Coated GRACoL 2006 (ISO 12647-2:2004) for the best results.
This is because your computer screen creates RGB colors using light, whereas printing machines create CMYK colors using ink, just like mixing paint. So if your print file is in RGB, the printing machine won’t be able to perfectly match the color values, although it will do its best!
You can then start to create a design for your chosen page size. We won’t cover how to do that here (see Anil’s how-to guide for that), but for the purposes of printing, be sure to add Trim Lines, a Quiet Area and Bleed to your design (more on that follows immediately below).
Alternatively, use one of Mixam’s zine templates.
Trim lines
In commercial printing, we print the pages of your zines on B1 (28” x 40”) and B2 (19” x 26”) presses. So if your designs are 8.5” x 11” we have to cut up these enormous sheets of paper before binding your pages together.
If you want a 8.5” x 11” size zine, start by creating a 8.5” x 11” page design. The edge around this area is the Trim Line. This is the line on which you expect your paper to be cut as the printing machine trims the edges of your paper to the correct size.
However, due to manufacturing variances, you also need to add a bleed area…
Bleed area
Regardless of the size of your page design, you always need to add a 0.125” bleed area to the outside of your trim lines. This is because the blade of the cutting machine may move very slightly away from your trim line.
Your design should extend into the bleed area. Otherwise you can be left with white lines of unprinted paper if the cutting blade falls outside of the trim line.
Quiet area
Similar to the bleed area, you always need a quiet area of 0.25” inside of your trim line. This is to keep all important design elements and text either away from the edge of your pages or to stop them from getting lost in the fold of your zine when someone is trying to read it.
It’s also possible for the cutting blade to fall inside of the trim line, into the quiet area, as it is to fall into the bleed area, which could result in an important part of your page design being chopped off.
Please note that if your zine is going to be perfect bound, you need to increase the quiet area on the spine facing edge to 0.5”. This is to accommodate the perfect binding area and prevent important details from being lost in the spine gutter. This applies to your cover design too.
Black and white printing considerations
Many photographers like taking black and white photos. However, black and white printing can be very technical. So what is the best way to print these types of photo zines?
You need to consider if you’re going to be printing in grayscale or in color, which type of paper you will be printing on and to be aware of ink saturation. But don’t worry, because we’re going to explain each of these in turn.
CMYK color printing uses four different colors – cyan, magenta, yellow and black – which can be combined to create a range of other shades. An intense black, made from all 4 CMYK colors is known as ‘Rich Black’.
Alternatively, you can print in grayscale, using black ink only. Black is the K in CMYK (it stands for ‘key’), so the others aren’t used at all. If you print in rich black, you get a deeper, more saturated color, while printing in black only is considerably cheaper.
The only danger with rich black printing is the additional ink used, which can cause saturation issues.

Ink saturation can be a common issue when printing in grayscale. Any values lower than 10% have a risk of not printing at all. While anything above 90% will simply look like solid color when printed.


The ideal saturation levels for printing in full CMYK color are slightly different, because you are choosing from a scale of 0% to 100% for each of the 4 colors. The more you add, the darker the color will be and the more ink you are using. You can have a total saturation level of 400%.
The blocks of color below show the range of blacks that can be achieved by increasing the saturation of all colors at the same rate, from 100% saturation to 400% saturation.

We recommend sticking to a saturation level between 150% and 250% in total for all four colors. You can achieve a good rich black with plenty of depth by using a saturation of less than 200%.
It’s also worth mentioning that some paper types absorb more ink than others. Satin and Gloss are good at holding ink, but Uncoated and Recycled paper will soak up a lot of ink. This can result in very dark colors and slight bleeding of the ink.
For these reasons, many photographers will do a small test run of up to 5 copies of their zine to help perfect their color values, before committing to a larger print run.
If your cover artwork is especially dark, we recommend applying a gloss lamination, as this is better at sealing in paper with greater tendencies of ink saturation.
Why aren’t I giving any specific colour printing considerations? Provided that the print files are created in CMYK, it’s not an issue. Black and white – especially for photographers – is a more complex issue. You could say there’s a bit of an art to it.
Finished zine examples
Here are three examples of photo zines with some annotations for your reference. Of course, there’s no harm in asking other photographers which specifications they chose for their zines. And don’t forget that the total number of sides must always be divisible by 4.
Example #1: Standard zine

- 5.5” x 8.5”
- 24 sides + 4 cover sides
- Staple bound
- Satin text paper 80lb
- Satin cover paper 80lb
- Matte lamination
- 0.125” bleed area on all sides
- 0.25” quiet area on all sides
If you’re unsure which papers to choose for your first zine, we recommend choosing satin papers for the best print reproduction with a matte laminated cover for protection to create a good quality zine.
Example #2: Premium zine

- 8.5” x 11”
- 56 sides + 4 cover sides
- Perfect bound
- Uncoated text paper 100lb
- Gloss cover paper 100lb
- Gloss lamination
- 0.125” bleed area on all sides
- 0.25” quiet area on all sides
- An additional quiet area totalling 0.5” on the spine side of each page including cover
A higher page count allows you to choose thicker paper, while ensuring your zine still has good ‘flex’ to be easily flipped through by your readers. It’s hard to turn the pages of zines with low page counts and thick papers.
More pages also allows you to access perfect binding, which makes your zine look more premium. We chose a gloss cover paper with gloss lamination to appear more luxurious.
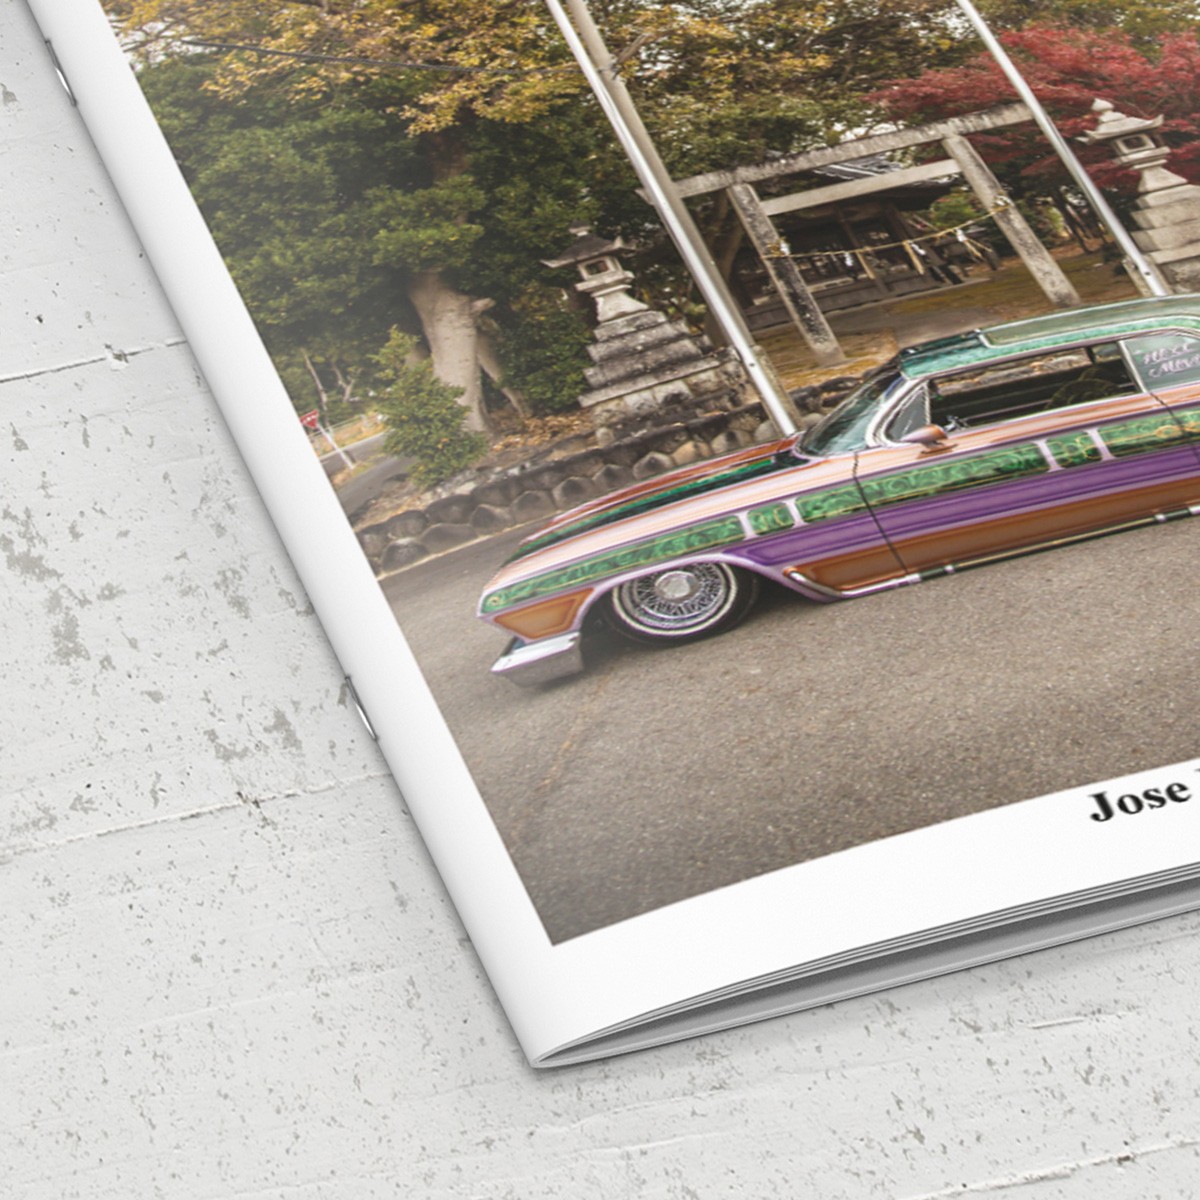
Example #3: Uncoated zine

- 8.5” x 11”
- 40 sides
- Staple bound
- Uncoated paper 80lb
- No cover paper
- No lamination
- 0.125” bleed area on all sides
- 0.25” quiet area on all sides
Printed in grayscale on uncoated text paper without a cover. This is the perfect example of an affordable photo zine that can become a little worn over time, which only adds to its charm.
Community-created zines
EM: I also reached out to the Twitter film photography community to ask for examples of their own zines printed by Mixam. Here re eight and you can see the full thread for yourself here. Don’t worry, I wasn’t picking on Barnaby Nutt 😉
Final thoughts
The printing of your zine is an artistic expression, just as much as the design of your pages and the skill of your photography. Holding a printed zine in your hands is an emotive experience, which is why the look and feel of the printed paper, even the binding, can be used to emphasise the mood of your photos and have a profound effect on the reader.
Until I worked with EM on this monster of an article, I had no idea how many folks from this amazing community had printed their zines with Mixam. It’s truly humbling. Thank you. It’s also a credit to our passionate team who go above and beyond to help people however they can.
So if you’re thinking about printing a photo zine, get a quote, download some templates and dive on in at mixam.com/zines. We’d love to work with you!
~ Adam
Share your knowledge, story or project
The transfer of knowledge across the film photography community is the heart of EMULSIVE. You can add your support by contributing your thoughts, work, experiences and ideas to inspire the hundreds of thousands of people who read these pages each month. Check out the submission guide here.
If you like what you’re reading you can also help this passion project by heading over to the EMULSIVE Patreon page and contributing as little as a dollar a month. There’s also print and apparel over at Society 6, currently showcasing over two dozen t-shirt designs and over a dozen unique photographs available for purchase.


4 responses to “How-to: Your ultimate guide to printing a photography zine”
You seem to have got saddle stitch (stapled) binding and perfect binding (glued spine) confused in the begining of the binding section.
@mixamprint I’ll have to try printing one.
@mixamprint Missed this somehow, or I would have listed my zine. Mixam did a first rate job on it!
This is the most detailed article I have ever written. But boy, was it worth it! I also cannot believ… https://t.co/oDgLC0vgTC