
Business closures, stay at home orders and the imperative for social distancing have probably cut you off from your normal sources of photographic inspiration. Your project Strangers Touching Each Other’s Faces in Dense Crowds is on hold for the foreseeable future.
So rather than capturing the wide world, here is a technique to explore the small world inexpensively, whether that’s in your living room or in the back yard. You don’t need a dedicated macro lens for this (although the technique works all the same).
It’s as simple as:
Reversing your lens
For example, you have a 50mm lens on your SLR. Take the lens off, turn it around back to front, so the mount side is facing outward and hold the front of the lens against the camera body. Next, focus by moving closer or farther from the subject.


This very basic “mod” is a bit awkward to hold, and if the lens isn’t completely flush against the body there can be light leaks, but the results can still be surprisingly good.


Improvement #1: Add some padding
It’s difficult to hold the camera steady and hold the lens in the right location while trying to focus and frame. Some lens mounts aren’t entirely flat: The Nikon mount, for example, has a tiny pin for locking the lens on that protrudes. You can see it better in a crop of the final image above:

A thin pad made of self-adhesive black craft foam or felt makes the coupling between lens and body more light tight and will smooth out small bumps in the mount. I’ve stuck the felt ring to the front of the lens and it works well at eliminating light leaks.

Improvement #2: A dedicated reverse mount ring
The reversed lens can be taped to the body for a more stable setup, but there’s a better solution if you’re willing to spend a little money: a lens reversing ring.
This adapter screws onto the filter thread of a lens and allows it to be mounted, reversed, like a regular lens. It eliminates light leaks and reduces the possibility of dropping your nifty 50.
Reversing rings can also be found inexpensively new, and very cheap used. Do a bit of research to find the right one. Nikon provides two current options: The BR-2 and BR-2A.

The BR-2 is for mounting any lens with a 52mm filter size on a manual focus Nikon camera. The BR-2A is for mounting the same lenses on Nikon’s autofocus cameras – it has a cutout for the electronic contacts in the camera body. The BR-2A can also be used on Nikon’s manual bodies.
Nikon also offer the BR-3, which has a female lens mount on one end with a 52mm thread on the other. It’s only purpose is to let you screw in a filter to protect your exposed rear element.
EM posted his on Twitter a while back:

EM: Yep! To add to this, you don’t need to limit yourself with only Nikon lenses. Any lens from any manufacturer with a 52mm filter thread can be reverse mounted. If you wanted to, you could go a little further and use step-up filter rings to create all sorts of reverse mounted abominations. Here’s an example of a Hasselblad lens reverse mounted to a Nikon body:
A word on Nikon G lenses: These autofocus lenses don’t allow any kind of manual aperture control, so you might think they’d be useless for this kind of macro photography. You’d be wrong. I use Fotodiox’s “52mm Reverse Mount Macro Filter with Aperture Control” adapter.
It’s not limited to only being used on G lenses, however. Here’s a photo of it mounted on one of my lenses:


Depth of field with reversed lenses
Depth of field decreases as magnification increases. This means it will be difficult to get more than a thin slice of your subject in focus. Use the lens wide open for a dreamy out of focus look. For maximum depth of field, the aperture should be set fairly small – at least f/8, and even as small as possible, f/16 or f/22.
Practically all the photos you see in this article were shot at f/11 but even then it will be quite shallow. In this photo, the staple (top right) is sharp, but the board from which it’s protruding a bit is out of focus.

Aperture control depends on your lens mount. All Nikon lenses with an aperture ring will allow you to “stop down” to your selected aperture. Just turn the ring. Nikon G lenses can use the Fotodiox adapter mentioned above or something similar. Some lens mounts, such as the Canon FD, have a pin that needs to be pushed in to get the aperture to stop down. Others have a lever that can be manually actioned.
With the lens set at small apertures, the image is going to be dim on the focusing screen. Camera shake is magnified at close range, so a fast shutter speed is desirable. All this means you should shoot in abundant light, either full sun or bright shade, use a tripod or if you can, use an external light source.
Exposure
The camera should support stop-down metering. This means that the meter will work with anything you can stick on the camera, whether or not it has a conventional aperture control. Most Nikon cameras support this.
For manual exposure, set the shutter speed as indicated by the meter. Aperture priority auto mode will work even when the lens is reversed. You’ll need to check your camera manual to see if it’s supported.
If the camera does not support stop down metering then experiment with exposure and take notes. I’ve found that my 50mm requires about 1 more stop when reversed, and the 24mm requires around 3 more stops.
Focal length, magnification and image quality
The longer the focal length, the less magnification there is when reversed. A 50mm lens gives close to 1:1 magnification, meaning the image on film is approximately the actual size of the object.
A 24mm lens will give 2:1 magnification – twice the actual size – but the lens will be very close to the subject. Even macro lenses can be reversed. Finally, the optical design of some lenses make them more suited for reversing than others. If you have several lenses try each. The only limitation is that the front ring can’t be larger than the lens mount or you’ll need to use a step-up ring or two like EM above.
Examples of reversed 50mm and 24mm Nikkor lenses follow. Note the difference between the focus distance (click/tap to view full screen).


Experiment!
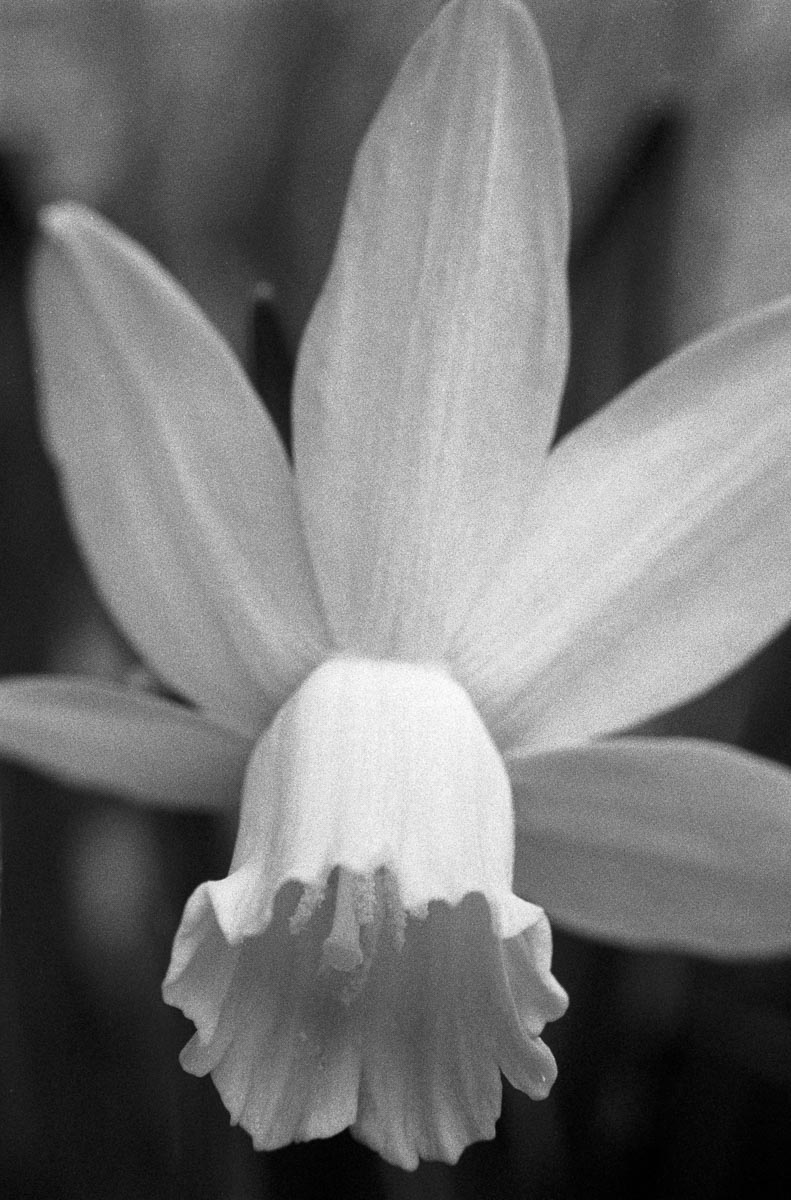
Set up a tiny still life. Stage an epic battle with Lego people. Shoot blooming flowers or sprouting seeds. Make abstract art from the dust balls under the couch. Now that you know how to get close, let’s see what you can do. Here are a few of mine.


Don’t tell EM but this will work with DSLRs and mirrorless digital cameras, too.
~ Neil
Share your knowledge, story or project
The transfer of knowledge across the film photography community is the heart of EMULSIVE. You can add your support by contributing your thoughts, work, experiences and ideas to inspire the hundreds of thousands of people who read these pages each month. Check out the submission guide here.
If you like what you’re reading you can also help this passion project by heading over to the EMULSIVE Patreon page and contributing as little as a dollar a month. There’s also print and apparel over at Society 6, currently showcasing over two dozen t-shirt designs and over a dozen unique photographs available for purchase.


3 responses to “A guide to Simple, effective and CHEAP macro photography”
Damn, how’d you find out about my face touching project? Joking of course. You’ve got to love Nikon for making all those goodies. But, unless I missed it, how about ‘close-up’ filters? I recall Nikon making a series of filters offering different magnifications. These weren’t limited to Nikon, B&W, Tiffen, Hoya, etc. made these in differing sizes.
Stay safe & healthy.
Diopter filters are a lot of fun – especially split diopters 😉
Perhaps a separate article on those?
I originally included them but cut the section because I wanted to describe a technique that can be done for free, with spending an option, not a requirement.
I carry a +2 with my basic filter kit, and sets of 3 different strengths can be purchase very cheaply. They are a great way to do closeups and easier than reversing because the camera can be used normally.
Most have a single element, but there are 2-element achromats, the Cadillacs of closeup lenses, that supposedly have very little effect on image quality.