I developed my first black and white film at school and have enjoyed developing black and white films ever since. However, whenever I looked at processing colour film it always looked too hard.
The general consensus was that colour development at home was much more difficult than black and white. Firstly, everything had to be done at 38ºC / 100ºF and the temperature had to be accurately maintained throughout the process. Timing was also much more critical. Colour kits were less popular, more expensive than black and white and harder to come by (this was before the internet).
Finally, what was the point? You could walk down any high street, pick any one of half a dozen places to drop your film off and, for a nominal fee, come back an hour later and get your negatives and 36 prints back. So why even bother doing it at home?
Of course, those days are no more and, whilst there are labs that will process C-41 films, you have to factor in postage costs and the fact that these are basically professional labs. The days when you used to pop your film in a Truprint or Bonusprint envelope (in the UK at least), send it off and get a free film back with your prints, are long gone. And they never did medium format film anyway.

So as I returned to film after my foray into digital I was basically in the position of having to spend quite a lot of money to get 12 colour shots from my medium format camera. I hardly ever bothered with 35mm colour film as I used a digital camera for colour. This limited the number of colour film shots I could take of my growing family, which was a shame; because I like shooting film, and especially medium format film, a lot.
It was then that I started to look a bit more closely at kits for developing colour negatives at home. I eventually decided to try the BelliniFoto Monopart 1lt C-41 kit from Nik and Trick Photo Services, who trumpeted it as “The best C-41 kit available anywhere!” Quite a claim, but I took them at their word and bought myself kit.
This article will walk you through the basic process of purchasing the kit, preparing the materials you’ll need, using it to develop film and some of my own results. In more detail, here’s what I cover:
Who is this guide for?
I am going to assume that you’ve never developed a film before, not even black and white. Do I think you need to have had some experience with developing films to use this kit?
Well, it’s easy for me to say “No” as I probably have a lot of accumulated know-how that I take for granted but, at the risk of giving away my conclusions about this kit, I really do think you can use this kit if you are a newcomer to developing your films at home.
All you need to learn first is how to load your film into a developing tank…which I covered here on EMULSIVE. And then follow the instructions as closely as you can and you’ll be fine.
What you need

I am going to assume that you have all the equipment and know-how to put your films into a tank film development tank such as those from Paterson, Jobo and others.
In addition, you will need:
- A C-41 development kit – in this case, we’re using the BelliniFoto Monopart 1lt C-41 kit from Nik and Trick Photo Services.
- Storage bottles – the bleach already comes in a storage bottle but you will need some 1-litre storage bottles for the other chemicals, and I recommend at least two bottles for the stabiliser (more on why later). These can be plastic or, if you can afford them, brown chemical bottles.
- Wide-mouthed bottles – storage bottles have very narrow mouths, so if you try and pour directly from them into your developing tank then it may take some time and this may mess up your timing. So I bought some 700 ml wide-mouthed bottles as well for storing chemicals while you are developing a film so that you can pour chemicals quickly.
- Funnels – small wide-stemmed plastic funnels for rapidly pouring chemicals back into the storage bottles once you are finished. Powder funnels are best. I have one per chemical.
- Marker pen or labels – whatever you do, label your bottles. I also number mine so that in the excitement of doing a film I don’t put the fixer in before the bleach (for instance). The chemicals will go all sorts of rich colours. Don’t worry about this, you haven’t ruined them, but the developer and fixer do go the same colour so you don’t want to mix them up.
- Glass marbles, lots of marbles – the C-41 kit will do 12-16 films and I’m sure it takes most of us a few months to develop 16 films. Therefore, you need to stop your chemicals from ageing. The three enemies of chemical storage are heat, light and oxygen. So keep your chemicals in a cool dark place when not in use (or use the brown bottles) and make sure that you keep as much oxygen out as possible, at least for the developer and fixer. If you are a wine lover then you could use the Vacu Vin system. Alternatively, Tetenal sell a protection spray, although it is quite expensive at about 20 GBP in the UK. Or if you’ve read the story of the crow in Aesop’s Fables you can do what I do and simply drop glass marbles into your storage bottles until the liquid rises to the top and there is virtually no air left. I now have more marbles than when I was eight! Use glass marbles as glass is inert and will not react with your chemicals.
- Thermometer – get a digital one that is accurate to 0.1º Celsius.
- Measuring Cylinder – for pouring the correct amount of chemicals.
- Stopwatch – for timing.
- Rubber gloves and goggles – the chemicals can be harmful if you splash them on your skin or ingest them, so you may want to take appropriate precautions. Personally, I don’t but I work in a sink so if I get a splash I simply wash it off straight away.
- De-ionised water – for mixing up your chemicals.


The Bellini C-41 kit
The kit comprises four bottles of different sizes containing the chemicals. The “monopart” part of the name comes from the bleach and stabiliser being to separate components, as opposed to a slinge “blix”, as with other kits.
Three of the four chemical components. I live in a hard water area so I use de-ionised water from the hardware shop:
- Developer (100ml) – dilute with 900ml water to make 1-litre
- Bleach (1 litre) – no dilution required
- Fixer (500ml) – dilute with 500ml to make 1-litre
- Stabiliser (100ml) – dilute 1:100 to make up to 10-litres of stabiliser
Carefully mix up all your chemicals in their respective 1-litre storage bottles in a sink, so that you can deal with any splashes. Make sure you have two stabiliser bottles. Number and name your storage bottles, wide-mouthed bottles and funnels.
You will see that my developer is marked No. 2 instead of No. 1. I had No. 1 as a pre-soak but got rid of that step as it is unnecessary. So your developer bottle should be No. 1.
Understanding the film and the process
First, a few general thoughts on chemistry. If you read the internet for long enough you will find that some people have some rather weird and wonderful ideas about the ‘knack’ of developing films, especially when it comes to agitation.
I think it is important to remember that developing a film is simply a chemistry experiment, or rather, a series of four simple chemical reactions, just like those you did at school. It is basic science that obeys the laws of physics, not a black art that only analogue superheroes with years of mystical experience can perform with their only-they-know-how magical flick of the wrist.
In short: there is no need to be intimidated, just follow the instructions.
In simple terms, your film is made up of several layers of silver bromide that are sensitive to different wavelengths of light. Each layer also contains dye couplers that give the final colour for that layer (for colour films, obviously!)
When you expose your film to light the silver bromide reacts to form metallic silver particles, known as the latent image. Processing your film creates a real image from this invisible latent image.
In a nutshell, this is how it works:
- Developer – this intensifies or amplifies the latent image and produces lumps of metallic silver that correspond to your image. As the silver is developing the oxidized developer reacts with the dye coupler for that layer to give the final colour. This step is the most sensitive to timing, temperature and concentration.
- Bleach – this turns the metallic silver generated by development into a silver halide salt.
- Fixer – this absorbs the silver halide salt and so removes any remnant of metallic silver from your film.
- Stabiliser – this acts as a wash to dissolve any unwanted residue and has some preservative properties so that, hopefully, your negatives will still look great in twenty years time.
So if we look at the timing of these stages the most important one to get right is the developer. Whilst you can over or under-develop to pull or push a C-41 film just as you can with black and white, there is much less information about this on the internet and I think the results are less predictable.

I personally feel that the latitude of C-41 film, especially for overexposure, is great enough that you don’t need to compensate in development for, say exposing ISO 400 film at EI 200. My advice is to stick with the instructions, learn to walk before you try and run.
Bleach and fixer are less critical on timing as the reactions just go to completion. I’m not suggesting that you leave them in for minutes at a time but if you’re ten seconds over then don’t sweat it.
Setting up
After you have loaded your film decide how much chemistry you need to cover your film inside your tank. Pour at least this much from each storage bottle to the wide-mouthed bottle.
Water bath
The first step is to set up a water bath. Rather than have a heater, I started off by having just a sink full of hot water to get my chemicals up to temperature. Basically, you leave your chemicals in the sink for about half an hour and then check the temperature of your developer, which is the most critical component.
This method is ok, but water baths do not change temperature quickly so if at the end of half an hour your developer is too cold or too hot, you have to add some boiling water or leave it longer to cool down and then wait again. Or do what I did when I found my developer was stuck at 36ºC and put it in the microwave for ten seconds at a time until you get up to temperature. It works but it is a bit laborious.
Then I remembered I had a very old Jobo CPA processor in the shed that I had bought off eBay for 99p, had stored in the shed ever since and never even turned on. So I dragged it out, cleared off the spiders, wired it up and turned it on. It worked fine! So now I use that as my water bath as it is much more accurate.

If you can’t find a bargain processor then you could try to find a heater of some kind. I looked at fish tank heaters but they don’t go high enough. However, the latest fad in kitchen equipment is the sous vide cooker. Basically, you get a very accurate water heater and a water tank. These are quite expensive at about 70 GBP but it will do the job and does have the added bonus that you can cook your dinner with it as well! CineStill just released a dedicated water heater/circulation system – their TCS-1000.
One thing to be wary of with water baths is that the water level rises and falls as you put bottles in and take them out. If you are like me you will have the water bath at the same level as the water in the bottles. So far so good. However, when you take the chemical from one bottle and place it in your tank, then put your tank in the bath the water level will rise and your other bottles will start to float – horizontally. If you’ve decided to leave the lids off you will lose all your chemicals. Top tip – always leave the lids on your bottles in the water bath!
Starting
Assuming all your chemicals are up to temperature you can start pouring as per the instructions. As for timing, I start my stopwatch when all of the chemicals are in the tank, and start to pour it out again once the time is up. I don’t think five seconds either way is going to make a lot of difference to the developer and no difference to the bleach and fix.
I agitate by gently inverting my tank for the required period – 15 seconds at the start and then 5 seconds every 30 seconds thereafter – and then tapping the base on the sink to dislodge any air bubbles that might have formed on the film. I then place the tank back in the water bath to ensure temperature consistency. My watchword on agitation is simple: do it gently. If you are too vigorous you will adversely increase the rate of development which can lead to overdevelopment and increased grain.
When time is up for each reaction I pour the chemical from the tank back into its storage bottle using the funnel for that chemical. I use my wide-stemmed powder funnels to ensure fast pouring. If you haven’t got these then pour directly back into the wide-mouthed storage bottle and return to the storage bottle later.
I make sure I completely invert my tank for a few seconds to drain off any excess, then pour in the next chemical and start timing again. So chemical changes take about 15-20 seconds. I don’t think you need to panic about making it any faster.
Finishing
There is a principle in chemistry that if you dilute something by 1:1000 and then dilute again by 1:1000 then the overall dilution is not 1:2000 but 1:1000000 (1 million). This is important to remember when using the stabiliser, as it shows how using multiple stabiliser rinses results in cleaner film. Basically, I have two bottles mixed up with identical dilutions: stabiliser No.1 and stabiliser No.2. You could have more if you wanted.
Straight after the fixer, I let the tank drain for a few seconds then add in stabiliser No.1. This soaks up the worst of the chemical residue inside the tank. I do that for three minutes, with some agitation, then I remove stabiliser No.1, drain the tank again and add stabiliser No.2 and repeat.
This way, I end up with stabiliser No.1 getting rid of the worst of the chemical dregs and stabiliser No.2 is mopping up whatever is left. Once stabiliser No.1 has been used enough I throw it away, re-label stabiliser No.2 stabiliser as No.1 and make some fresh stabiliser No.2.
There is plenty of stabiliser in the kit, you won’t run out. I used two stabiliser rinses; you could use more if you wanted to.
With stabilisation out of the way, I then open the tank, pull my film off the reel and voila! 12, 24 or 36 wonderful negatives to dry, scan and enjoy.
The whole process from first pour to viewing the film takes less than 15 minutes.
My first film
In order to test the kit I shot a roll of medium format ILFORD XP2 Super. This was the film I was prepared to sacrifice to the gods of making mistakes.
I set up my water bath in the sink and placed all my chemicals in the wide-mouthed bottles. I ran through the process as per the instructions and opened up my tank to see what had happened. I was quite prepared to have messed things up, but the fact that a couple of the shots from that film have been printed and are hanging up on my wall at home is a testament to the fact that I made no mistakes and my negatives came out beautifully. I was really very pleased!


I initially misinterpreted the version of the Bellini instructions that I had and I put warmed water in before the developer for three minutes to bring things up to temperature (this explains why my developer bottle says No. 2 instead of No. 1). This removed the anti-halation backing. After I’d completed the film I rang Nik at Nik and Trick and them if this was necessary. The reply was, “No, there is no need to use just water in any part of the process”.
I have recently checked online and the instructions are now clearer, which is great. So just to confirm, there is no need to use water alone to pre- or post-wash your film.
My thoughts
So what do I think? I have developed about eight rolls of film now, and I should get another eight done with this kit. I’ve developed several Kodak and Fuji colour emulsions, as well as ILFORD XP2 Super (black and white chromogenic film), and they’ve all come out absolutely perfectly. It really is a very rewarding process. And as with any skill, the more you practise the better you get and the easier things become.
Fuji Fujicolor C200


ILFORD XP2 Super


Kodak ColorPlus 200


Kodak Portra 400


Are Nik and Trick right when they say it’s the best C-41 kit available anywhere? I can’t say for certain, as I’ve never tried the others. What I can say is that I have no intention of trying the rest of them, partly because I hear that they require constant agitation and take longer, but mostly because I can now develop my colour films at home without any fuss or bother for about 2 GBP a roll.
If it ain’t broke don’t fix it!
One of the things that put me off trying colour development was the thought that it was much more difficult than black and white. In terms of decisions to be made this is easier; there are no decisions to be made! Just follow the instructions and you’ll be fine. In terms of the mechanics of timings and of filling and emptying tanks then I think that this Bellini kit is no more complicated than doing a black and white film. Which is great, because I rather like ILFORD XP2 Super!
Conclusions
This really is a great kit. There are no decisions to make. Just get your equipment, work out your own method of creating a reliable water bath and of filling and emptying your tank of chemicals, follow the instructions on temperature and timings and I’m sure you will have no problems.
It really is very straightforward and satisfying. If you’ve ever wanted to have a go at doing C-41 development at home, or you’re doing a lot of C-41 film photography and need to save some money, then I can highly recommend this kit. And most importantly of all, it’s allowed me to take more photographs and that, at the end of the day, is what it is all about.
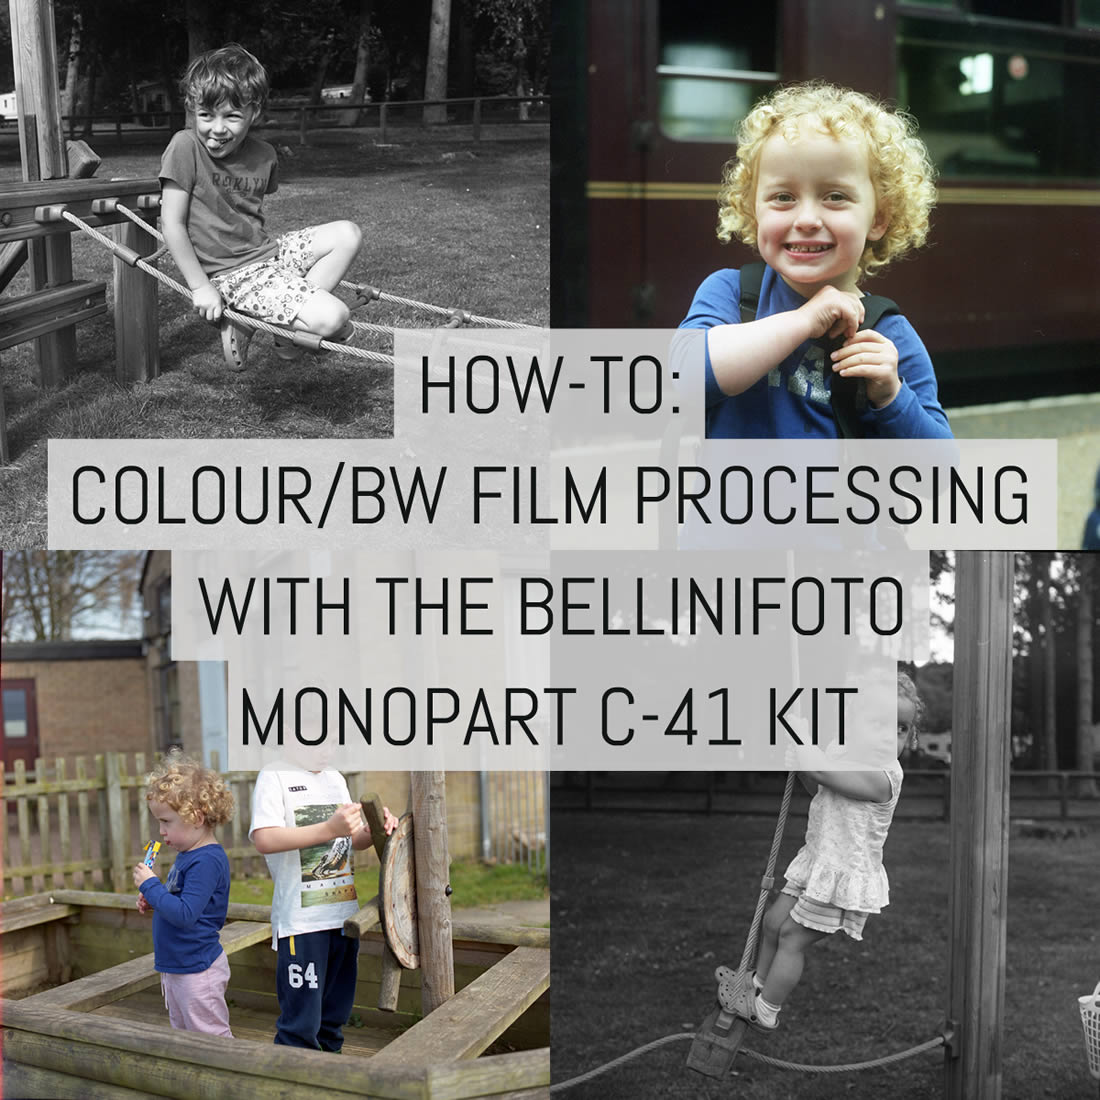
The developed shots are from a variety of films and multiple cameras both 35mm and medium format. All were scanned on my Epson 4870 scanner with next to no post-processing.
~ Malcolm
A word from Nik and Trick
EM: I dropped Nik and Trick a line asking for permission to use the product shot at the top of this article and managed to get a few words from them about the BelliniFoto C-41 kit:
“We came across Bellini at Photokina in 2016. Our business relationships sprouted from that meeting and we have been working with them ever since. They are now like family to us and we are very proud of our association.
It was on our first test of their Monopart C-41 kit that we noticed it was something a bit special. Since then, we have persuaded more and more people to try it and find out for themselves. Almost all agree that this is the best C-41 kit around and none have returned to any previous products as far as we know!
Thanks to Malcolm for getting in touch about the water bath. We used to use a Jobo for temp control but to be honest, when I hand dev C-41 with this kit, it’s not even worth bothering to warm one up! I just temper everything in a tray and if you can keep that tray water at 38c for 3 to 4 mins – easy to do as it doesn’t cool that quick – you’re giggling! Saves buying an expensive Jobo for some!
Bellini chemistry in general is the best. SO good in fact, that our minilab now runs on Bellini C-41 chemistry and for the home developer, we no longer stock any other brands of C41 kit. On storage, we both offer and recommend vacuum storage for the developer on this kit and also for fragile chems like E6. We have had people reporting that their Tetenal kits have gone a year by this method….an improvement over what could be as low as two weeks!
We know that international restrictions on shipping the kit are tight….but air freight regulations and EU regs make it almost impossible. We are always asking for people to help us find a solution….DHL, UPS and many others but nothing to report yet. We have customers in Taiwan, Korea, OZ, NZ, US and South Africa crying out for chemistry…the latter almost prepared to sacrifice a virgin and sell his mother in order to get some but our hand are pretty much tied right now. If anyone reading this has thoughts on a solution, we’re always willing to listen.”
~ Nik & Trick
Share your knowledge, story or project
The transfer of knowledge across the film photography community is the heart of EMULSIVE. You can add your support by contributing your thoughts, work, experiences and ideas to inspire the hundreds of thousands of people who read these pages each month. Check out the submission guide here.
If you like what you’re reading you can also help this passion project by heading over to the EMULSIVE Patreon page and contributing as little as a dollar a month. There’s also print and apparel over at Society 6, currently showcasing over two dozen t-shirt designs and over a dozen unique photographs available for purchase.


6 responses to “How-to: Colour/BW film processing with the BelliniFoto Monopart C-41 kit”
Very late to the party here, but thats normal for me.
I had a C41 Bellini kit and it was, as you described, amazing. Yes, there’s an extra bath compared to the tetenal kit, but I found this one so much more forgiving of slight temp variations.
With the tetenal the only way I got decent results was with constant, rolling agitation… I used to lean over the side of the bath and spin the tank in the water by hand for the entire time.
The bellini kit is so much easier, I agitate very similarly to when I process black and white.
Aside from the temperature control (which I do with a coolbox full of hot water), and a couple more steps, I don’t find it any harder than black and white.
I wasn’t particularly keen on not having any washes between steps, primarily because I managed to do a woeful job of emptying the tank and contaminated the next step, so I’m extra careful with that and do tend to wash between bleach and fix.
I’ve just taken delivery of the new style kit, and it looks really cool, the instructions for mixing are so much easier to read than kits I’ve used in the past.
Hello , what is the limit of water amount it can keep hot ? thank you
Thanks to Stephen, Tim and Edmund for their comments, I’m glad you all enjoyed the review. And thank you for the adding the benefit of your experiences as well!
I’d agree that the Bellini C41 kit is excellent, I get great results every time. This weekend was the 15th roll processed in a batch I mixed around 3 months ago, and the chemicals still look good for a few more films. Temperature and time are critically important however, as with all C41 processing. I use a Nova film processor, which is basically a purpose-made thermostatic water bath to accommodate chemical bottles and a Paterson tank .
Bellini does seem to have some great products, but alas, they’re not available in the US. Hopefully someone can change that one of these days. As I understand it from the Nik & Trick website, it’s EU law that prevents shipment to outside the EU. But I’ve been able to buy other products from Nik & Trick, and applaud their efforts to keep film going strong.
I think that I am on my fourth Bellini kit now, and I agree with Malcolm that it is first class.
Before this, I had tried Tetenal, Rollei and one that came in Softpacks from Germany (forget the name), Bellini eclipses them all for mixing, using, storing and for the results. I store when not in use in an opaque square storage box made from recycled plastic, and keep it cool.
One thing to watch out for with all colour kits though, and I have been caught out several times (will I never learn?) is that the fix, (or in other makes, blix) produces gas when in use and tends to expand in the development tank. This will cause much leakage around the threads of some tanks, and will cause a Jobo tank lid to pop off completely.
Until my Jobo CPE2 automatic bath stopped working effectively, I used to use tank rotation during development. This can be a bit hazardous, since if the lid pops off during fixing, the fix ends up in the bathwater, and what was a relaxed operation suddenly becomes a panic. Also, as Malcolm explains above, it is best not to be too vigorous with the agitation, and I found that even on slow rotation, one could get fine streaks on the finished negatives… not good.
Be gentle.
In my view, the best way to do home c41 is to use the kitchen sink, plenty of water, maintain 102 degrees Fahrenheit, and do it by hand, everything else above is excellent advice. As long as you keep the lids on securely, one can fill and refill the sink with hot water in order to get the chemicals up to 102f/38c and hold for enough time to get a 120, or two 135 rolls developed.
Many thanks to Nik and Trick for finding Bellini, I haven’t tried their other products yet, but they do E6 and some interesting B&W kits for slide/reversal development.