I’ve had my Mamiya C22 TLR for a few months now and run a few rolls through it. It occurred to me the other day though that I’d only used it in the studio, and mostly at minimum focusing distance. After macro photography, my second favourite thing to take pictures of is probably knobbly twisted trees. I like the blobby organic forms and contrasting textures. I like the challenge of arranging “branches poking out all over the place” into something balanced.

These are all scans of silver gelatin prints I made in the darkroom. If you look closely at the borders you might notice that they aren’t quite square — I must be doing something wrong with the printing easel. With the picture above I was torn between a lighter print and this one. I went with this darker version because the trees in the background stood out more in the lighter print. I would have liked to get the tree fork on the right in focus, but I thought the background would be too distracting at a smaller aperture.

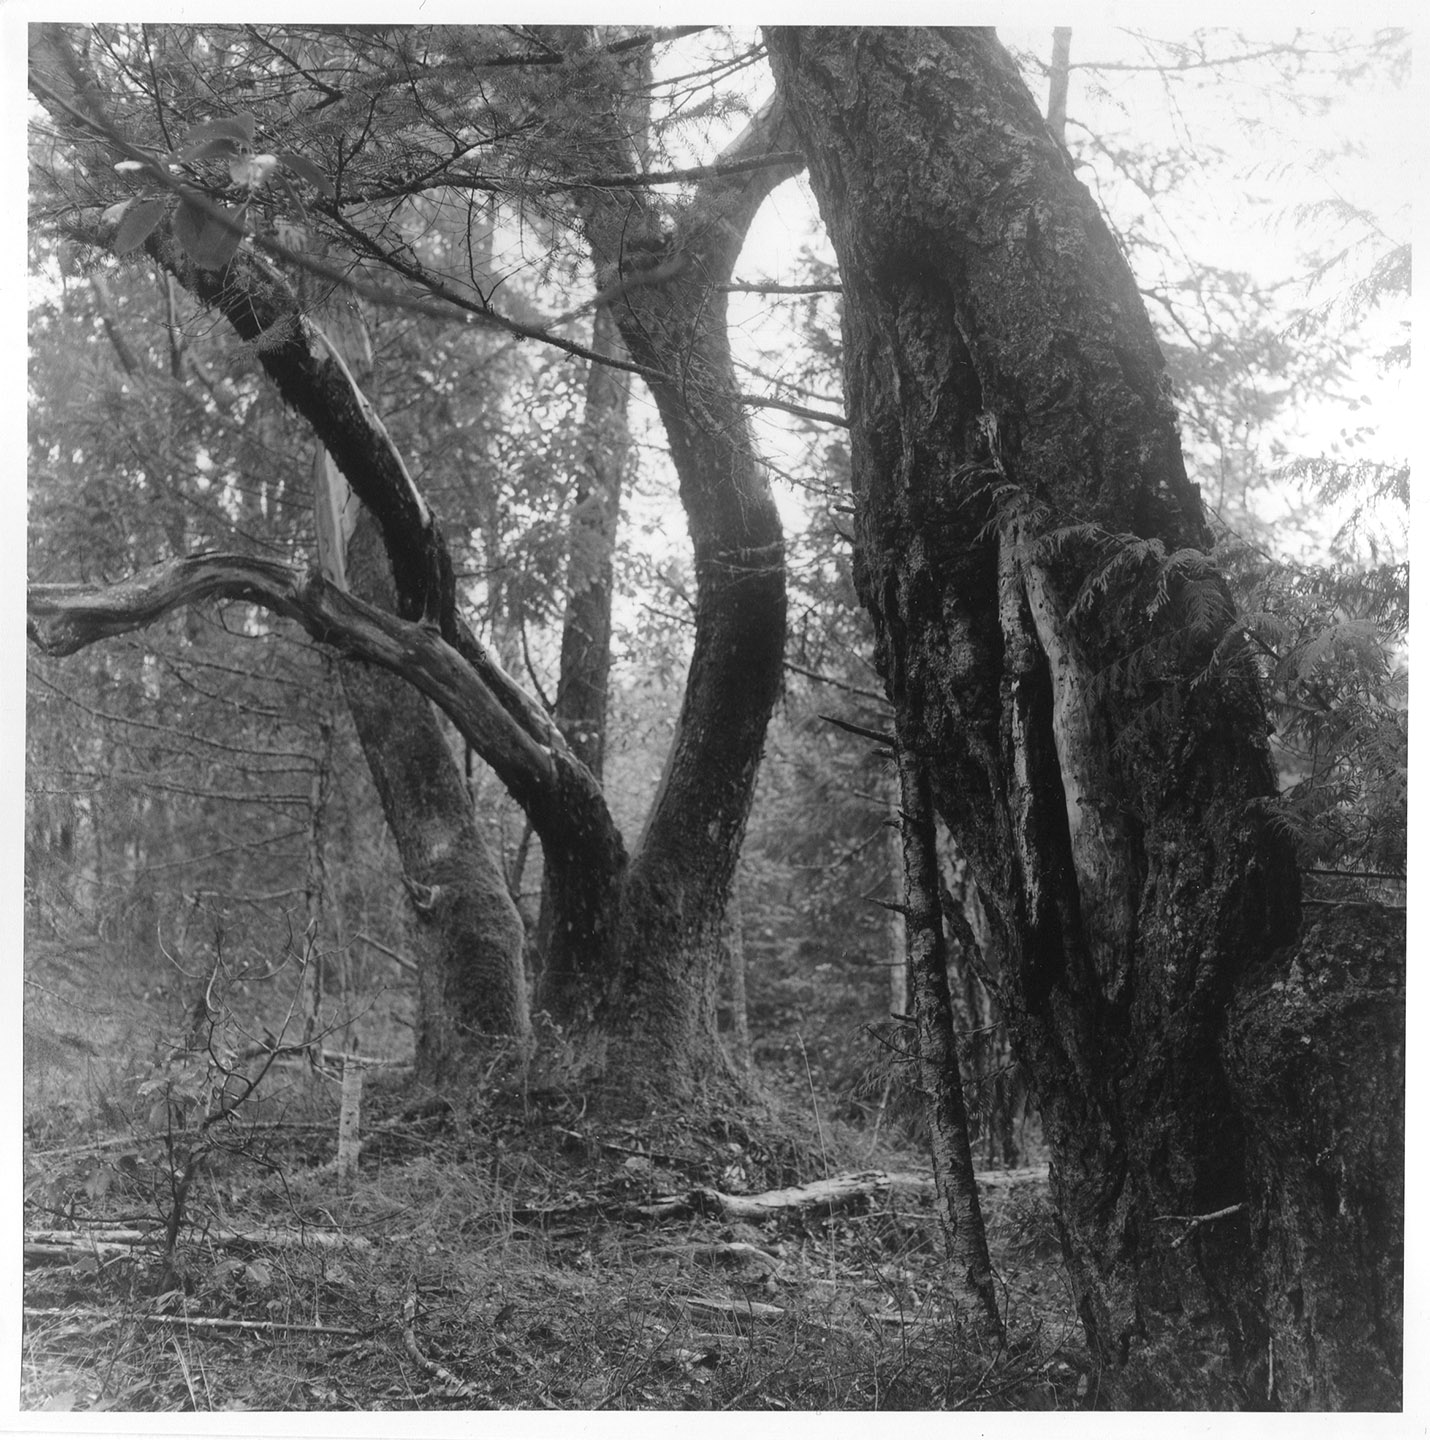
These were all taken in the evening, just before sundown on a misty day. You can see by the haze in the top left of this shot from the sun poking through. I would have liked the haziness just over the background, and not the trunk or leaves, but I can’t do much about that. I had to do quite a lot of burning on the lower right of the thick trunk to bring it down to the same value.
It made no sense to me that the right of the tree was the lighter side when the light source was on the left until I took another walk past this tree and saw that the right of the tree is covered in bright white lichen on top of the bark. It does make the trunk look flat, but that makes the texture more prominent.

This shot doesn’t feel balanced. I think I could remedy this with a bit of burning on the bottom right to make more of a “base”. When I took the photo I should have taken a step to the left to make a bigger negative shape between the two dark branches, but I vaguely remember there being something in the background I was trying not to get in.

This tree looks way bigger than it actually is. It’s barely 3″ and the widest bit. This shot needed quite a bit of dodging and burning. The bark above and below the craggly bit was bright white, so that needed burning in, and the black tree in the background needed dodging to get it to this point. It’s still distracting, but any more dodging and I ended up with a halo of light around the dark bit which looked much worse. I really like pictures like these though — ones that focus in on an interesting piece of a bigger thing. I always find myself creeping towards macro.
It would be interesting to try photographing some trees like this with artificial light to separate them from the background and try to describe the form better with directional light. I’ve used flashlights for fill-light on close-ups of mushrooms and small stuff, but I’m not sure how much light I’d need to light tree?

5 Frames… Of twisty trees on Fomapan 200 Creative and a Mamiya C22 (Mamiya-Sekor 80mm f/2.8)
This last one is probably my favourite of the five. It was the last on the roll, and it had full-on started raining by this point (it took me 2.5 hours to take 12 shots), which makes for a nice misty atmosphere. All these were done with a tripod, but this one was the longest exposure at 8 seconds I think. I don’t like the thin tree next to the big tree in the foreground. My high school photography teacher used to say <prepare for dad joke>, “The best tool a photographer can have in his bag is a chainsaw.”
I’m really happy with how this roll came out. The only film I’ve shot so far has been Fomapan 200 Creative (except for a few rolls of HP5 PLUS at the beginning), so I can’t compare it to other films, but every shot on this roll came out fine and looks (from a contact sheet) to be printable. I’ve only been shooting one film stock as there have been so many other variables that I didn’t think I’d be able to tell what was causing changes if I was to jump between films. I chose Fomapan 200 Creative as it’s cheap and comes in all formats (35mm bulk rolls, 120, and sheets). I’ve heard some people say the emulsion is delicate, but I dropped this film on the floor three times while trying to get it on the roll and I can’t see any evidence of it.
I developed it in D-23, diluted 1:1, for 8 mins (roll was metered at ISO 200). I’ve been using D-23 because I can mix it up when I need it (just need metol and sodium sulfite, which keeps forever in powder form), use once and throw out, and it’s cheap. I’d like to see how these negatives look printed bigger (these are all scans from 7.5 x 7.5″ prints), but so far I don’t see any reason to switch to a more expensive film stock.
~ Sarah
Share your knowledge, story or project
The transfer of knowledge across the film photography community is the heart of EMULSIVE. You can add your support by contributing your thoughts, work, experiences and ideas to inspire the hundreds of thousands of people who read these pages each month. Check out the submission guide here.
If you like what you’re reading you can also help this passion project by heading over to the EMULSIVE Patreon page and contributing as little as a dollar a month. There’s also print and apparel over at Society 6, currently showcasing over two dozen t-shirt designs and over a dozen unique photographs available for purchase.


One response to “5 Frames… Of twisty trees on Fomapan 200 Creative and a Mamiya C22 (Mamiya-Sekor 80mm f/2.8)”
“My high school photography teacher used to say , “The best tool a photographer can have in his bag is a chainsaw.” ”
I recall Ansel Adams writing (disparagingly) of one old-time photographer who did just that.