Linking a relatively simple and intuitive method for photographic exposure determination to a highly complicated and comprehensive system for analysing every step for making a high-quality photographic print may seem to be stretching things a bit. But the fact is there are a couple of features of the Zone System that are are very useful when estimating exposure with the Sunny 16 method.
The Zone System
The Zone System was developed as a teaching aid by Ansel Adams and Fred Archer in the 1940s at the Art Centre School in Los Angeles. It is based on 11 stops of brightness, from the deepest black as Zone 0 to brilliant white as Zone X, with 18% grey placed on the mid-point of Zone V. Roman numerals are used for the zones. These 11 zones effectively cover the range of tones available in “standard” lighting, i.e an average, normal toned, front-lit subject.

In practice, only nine steps will be recorded on monochrome film because of the S-curve response of the medium and the base density and dichroic fog development produces. Only six of these will show useable detail in the negative. Colour negative film is similar but transparency film has a narrower range of tones as a rule.
Why link the two?
The useful thing is, both Sunny 16 and the Zone system work from the same base, namely a known value of reflectance: the 18% grey card.
If a grey card is measured and an exposure made from the reading all the tones in an image will be equally disposed either side of this point. In Zone System terms, this is the mid-point value, given the Roman numeral “V”.
Between 10am and 4pm in summer and in sunny conditions with the sun behind the camera, a negative will result that can be printed on standard grade paper showing all of the subject accurately.
The Sunny 16 method cuts out the grey card and is based on using the reciprocal of the film speed — the shutter is set to a value closest to the film speed, so ISO 125 = 1/125, etc — and an aperture of f/16 to obtain the same result in the same conditions.
Unfortunately, life, the weather and photographic subject matter don’t know about this. Quite often, the range of tones in a scene can cover as many as 15 or even more stops, way more than photographic film can record and so adjustments have to be made.
With the full Zone System, this involves testing every stage of the process, from picking up the camera to taking the final print out of the drier. The system covers everything from the camera, lens and shutter in use; the way an individual uses a meter; the ideal film speed rating to use given your own exposure and processing methods; the enlarger and paper used, and the processing of the print. Phew!
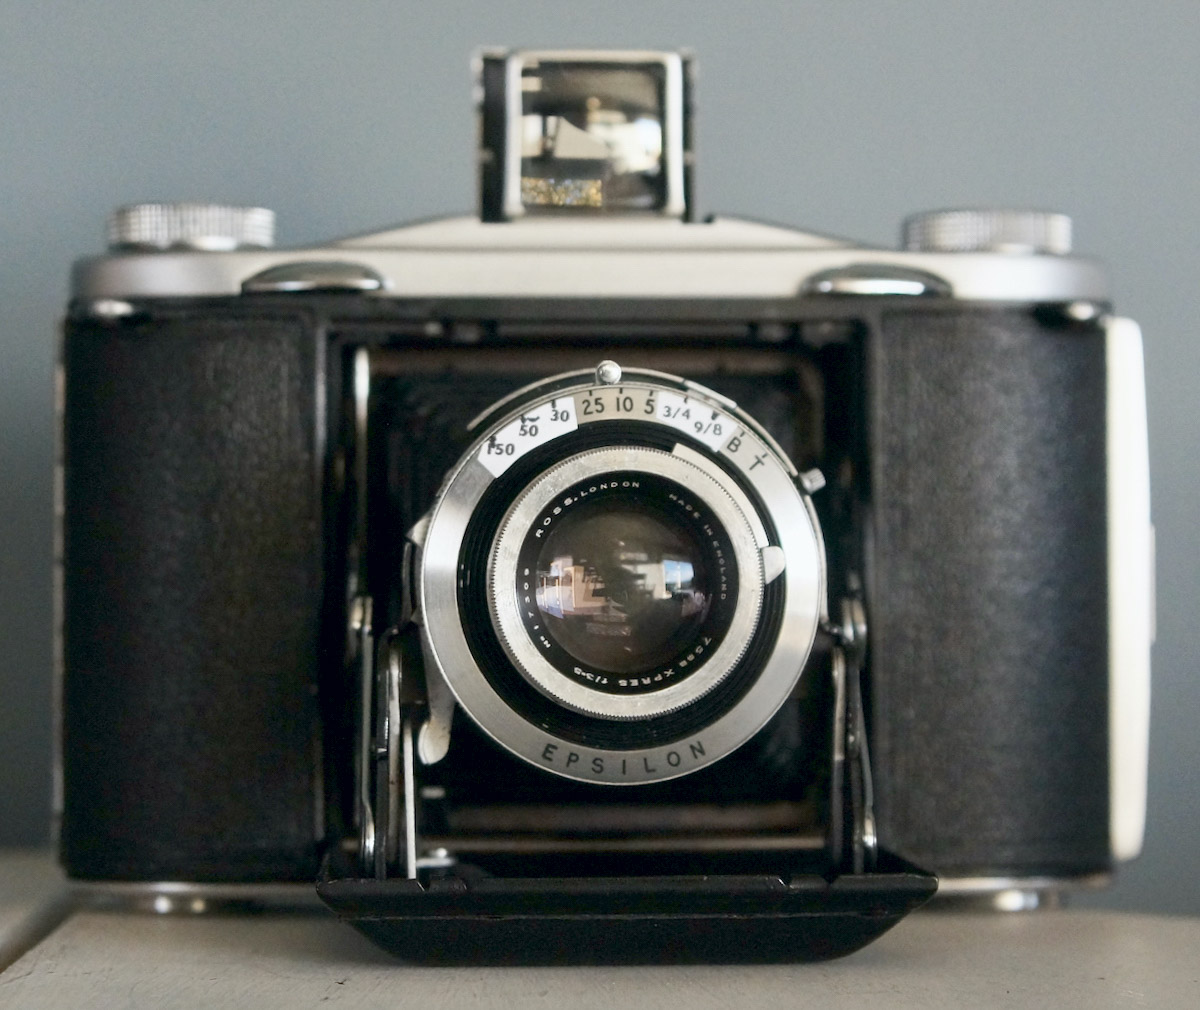
Fortunately, we are not looking at all these aspects, except perhaps to check that shutter speeds are not too far out. (I have a sticker on my Selfix 12-20 shutter to remind me – there can be quite large variations!).
The important aspects….
Two important things that can be taken from the Zone System are of interest which can improve results quite a bit, especially in non-standard lighting or creatively. These are firstly “Placing the exposure” and, secondly, “Visualisation”.
Placing the exposure
When the light is strong and subject values exceed the film’s latitude, it will often be essential to adjust exposure so that important details are rendered well. In other words “placing” the exposure in relation to the base Zone V and the film’s latitude.
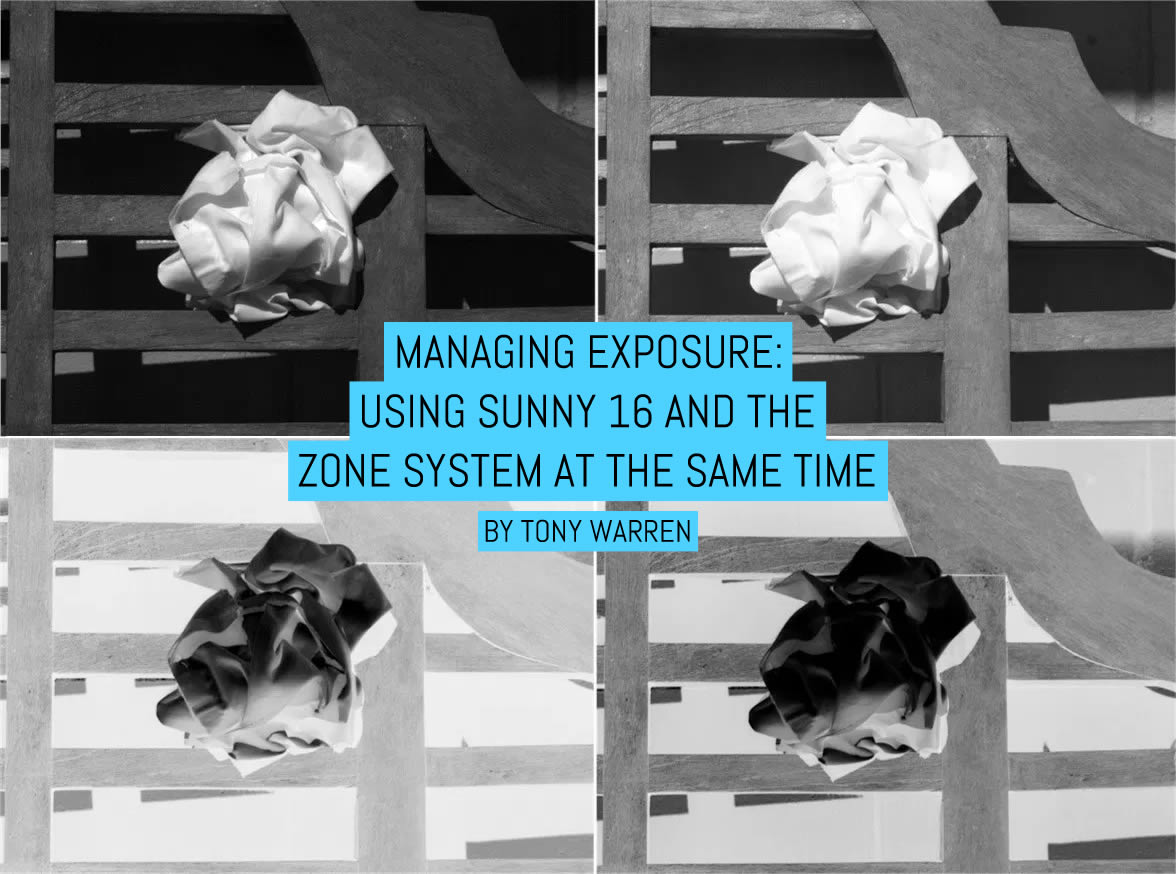
The examples from my earlier article on exposure demonstrates this where a straight Sunny 16 exposure produces burnt out highlights in the flower head and blocked up shadows because the film is unable to record the full range of brightness in the scene. Reducing the exposure in the second example brings the higher values down into the film’s range and ensures that important detail, in the flower head in this case, is retained allowing the less important shadows to block up even more.


These two further examples may also help with understanding what is going on. The range of tones exceeds the film’s ability to record them all in both cases but the respective lightest and darkest values are what we want to record.


You can see in the negatives how the unadjusted versions cannot record all the tones and how adjusting exposure corrects things where specific tones are important.
Visualisation
“Visualisation” is less precise and is more to do with creativity. These two examples that follow may give an idea of what I mean, where an average exposure would not have produced the result I wanted.
The first, the top of Steep Hill, Lincoln, UK taken on a Mamiya C33 with 55mm Sekor lens, relies on good reproduction of the shadows and mid tones so exposure was increased, sacrificing the less important highlight detail.

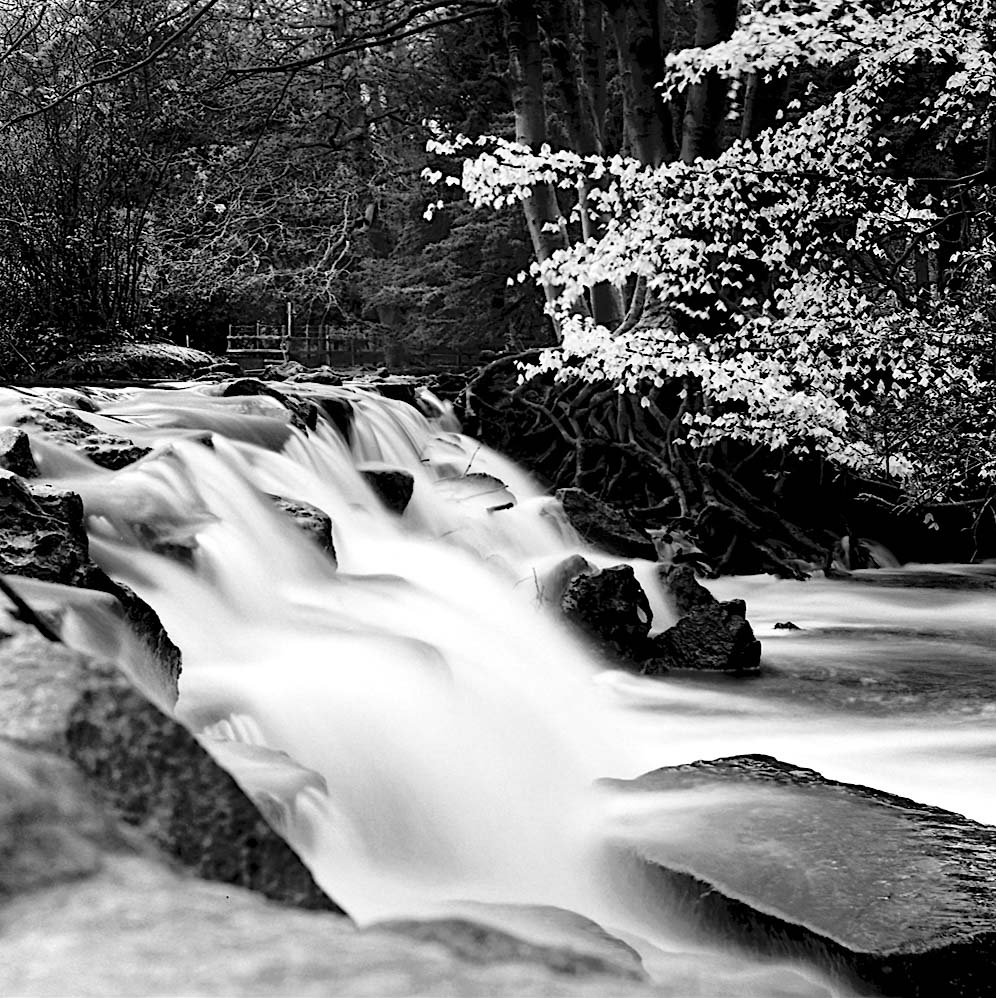
In the second, taken with the same camera/lens, it was important to retain the delicate detail in the light coloured leaves and the water so exposure was reduced, sacrificing shadow detail.
A bit of nitty gritty.
To make best use of these techniques it is important to become familiar with the appearance of the various zones as they will appear on film. Ansel Adams’ book “The Negative” Zones describe the zone values in some detail. A summary is as follows:
- Zone 0: Total black with no detail whatsoever.
- Zone I: Effective threshold with slight tonality but no texture.
- Zone II: First suggestion of texture representing the darkest part of the image in which some slight detail is required.
- Zone III: Average dark materials and low values showing adequate texture.
- Zone IV: Landscape shadow and shadow value for light skin in sunlight.
- Zone V: Middle grey (18% reflectance), dark skin, grey stone, average weathered wood in sunlight.
- Zone VI: Average light skin value in sunlight, diffuse skylight or artificial light, shadows on snow in sunlight.
- Zone VII: Light grey objects and average snow with acute side lighting.
- Zone VIII: Whites with texture and delicate values.
- Zone IX: White without texture approaching pure white, snow in flat sunlight.
- Zone X: Pure white.
For our purposes, the important zones are III to VIII and the most important to recognise are likely to be zone IV, V and VI, because these will influence portraits depending on location — whether in shade or fully lit — and landscapes and architecture depending on lighting also.
Out of interest, in The Negative, Adams also mentions exposing at the reciprocal of the film speed at f/16 in good light. Nothing new under the sun.
Mixing Sunny 16 and the Zone system in practice
So how do we apply this knowledge? It is important to appreciate that the descriptions above represent what these objects and materials will look like if Zone V or Sunny 16 exposure is given without adjustment in “standard” lighting. What “placing” and “visualisation” mean is adjusting that exposure to record things at the value you need for your desired result, either factually or creatively, when the subject tones and film’s recording range don’t mesh.
This aide memoire may help in establishing the base exposure before applying any adjustment.

Note: the time of year must be allowed for if the method is used any time other than in the summer months. The sun is less strong as winter approaches so autumn, winter and spring will require a little more exposure to compensate.
In these circumstances I would simply adjust the base exposure and use “Sunny 11” in autumn/spring or “Sunny 8” in winter.
By this, I mean setting the film speed reciprocal against f/11 or f/8 instead of f/16 to suit the season you are working in, e.g. 1/125 at f/8 in winter for ISO 125 film as the base point.
The following examples with comments try to show how all this could be applied in some situations:

In the photograph above, I wanted to bring out the shape of the hunched figure and the fine detail in the net, so my exposure was reduced to turn these objects into silhouette. Normal exposure would have placed these around Zone III so a two-stop reduction takes them down to Zone I and brings out more detail in the higher values.

Above, the view through the far window showing the dockyard cranes is important to set the scene but the interior of the cafe would be too dark if this was rendered strictly as Sunny 16, averaging out as Zone V. The exposure was increased to retain just enough detail outside to identify the location but still render the interior clearly. This was an adjustment of 2 to 3-stops. Moving the exterior onto Zone VII or VIII achieved this result.

This third example presents a similar situation to the previous example but here the desire was to emphasise depth. Only a two-stop increase was needed to lift the foliage from Zone II to IV and lightened the doorway enough.

In this final example, against the light or contre–jour shots, contrast will almost always be too high for the film even though Sunny 16 still applies. Bear in mind the strength of light is the same whatever direction it comes from. It is how it reflects and from what that influences its intensity.
In contre-jour there is a lot of silhouetting and specular reflection involved, which increases the contrast and the range of brightness. This makes it even more important to make a decision as to what is important to record. Here, the pavement would come out as Zone V or maybe VI but the figure would be Zone I or II. Because I wanted some detail in the figure, an increase of a couple of stops of exposure made sure it was there and the pavement would then increase in brightness to Zone VII.
But really – why?
I accept that all this may seem over the top and totally unnecessary. I must say, though, I have found it is useful background knowledge which has served me well over the years. I even boosted ILFORD’s profits for a while working through all the steps of the full Zone System.
The thing is, a one, two or more -stop adjustment in exposure can improve results out of all proportion. So even if you don’t consciously think through all of this, just pausing to decide what it is in the scene in front of you that is important and adjusting exposure in line with the above will give you much more satisfaction.
Initially, I would advise you to take two shots where you can, one at straight-up Sunny 16 — or metered — and another adjusted to the actual subject and see how the results match what you expected to achieve.
Eventually, it will become second nature. Even Ansel Adams admitted that his famous image “Moonrise” was made without metering because it was so fleeting and had to be a lucky “grabbed” shot. Only his experience carried it off.
To paraphrase what someone else once said, “the more you practice, the luckier you get!”
~ Tony
Share your knowledge, story or project
The transfer of knowledge across the film photography community is the heart of EMULSIVE. You can add your support by contributing your thoughts, work, experiences and ideas to inspire the hundreds of thousands of people who read these pages each month. Check out the submission guide here.
If you like what you’re reading you can also help this passion project by heading over to the EMULSIVE Patreon page and contributing as little as a dollar a month. There’s also print and apparel over at Society 6, currently showcasing over two dozen t-shirt designs and over a dozen unique photographs available for purchase.


10 responses to “Managing exposure: Using Sunny 16 and the Zone System at the same time”
Hello. If I apply the sunny sixteen rule to a dark subject, example- Dark tree stump in low light and a coiled light toned rope draped over it, would i estimate the brightness of light hitting the stump to give me an idea of the sunny sixteen or sunny f8 in winter exposure say f4 at 125 on iso 125 film. If i wanted the rope to pop would i reduce exposure from my guesstimated sunny sixteen exposure to render the dark stump in zone 2-3 say and the rope in zone 6-7. So basically the sunny sixteen is in fact a grey card average reading. Further example if i want texture in the shadows i increase the average reading and if i want texture in the highlights reduce the average reading, Hope this makes sense look forward to your reply
You are bang on Jonathan. Sunny 16 is equivalent to a reflected grey card reading and so your adjustments will have the effect you describe assuming the full range of tones are available to work with.
Hi Tony.. Great how to guide! just what i was looking for, very informative. I will keep working with the sunny 16, zone system technique. I’ve always struggled with spot metering and reflective meter readings. I like to work intuitively with no automation I find it gets in the way of my photography. Thank you.
Thank you Jonathan, very happy it helps.
Tony thank you for the article, it’s a very interesting idea.
Although, I am still confused re how to use it in practice. Are you saying that by using sunny 16 over a scene every part of the scene is being looked at as if it was 18% grey? For example, the fisherman example above, sunny 16 would’ve lighten up the figure of the fisherman and made it zone 5 (cause it’s very dark) so we decrease exposure to place it two zones down to zone 3.
But what if we said that the overall sunny weather and the reflections of the water are dominant in the pic (and they are), so our avg 18% grey exposure for those elements would be much much shorter, so then we would need to overexpose by 2-3 stops to get them to zone 6-7.
So my questions is, I guess, how can we “adjust for the subject” if we have a starting point that basically takes a whole scene into consideration (sunny 16 rule over a scene during specific weather conditions)? If I place an emphasis on one subject, I still start from the sunny16 point.
Or in your example with the flowers (Placing the exposure) – how can I know that the sunny 16 rule would burn the petals of the flower? And how can I know how much to alter what sunny 16 i saying to me in that situation?
Thank you
Hi Marko,
Sorry I have taken so long to repond to your interesting comments.
The thing to keep in mind is that Sunny 16 will give an average exposure, whatever the range of lighting and contrast conditions. It doesn’t try to bring everything in the image to 18% grey, what it is giving is an exposure that produces an overall average of an 18% grey, as though you were looking at the subject through frosted glass. It doesn’t matter how wide the range of tones in the subject, they will all be exposed to accurately render anything in the image that actually is 18% grey as just that. If the range of brightness is wider than the film can record, the film will not accurately record any tones that fall outside the film’s brigtness range. In the fisherman shot an average exposure would not capture either the brightest or the darkest tones so we have to decide which tones are important and which are not. In this case it is the highlights I wanted to preserve which is why I reduced exposure. A straight Sunny 16 would give a lighter figure, much more open shadows and much brighter highlights which would have lost a lot of detail as a result and reduced the silhouette’s effectiveness.
I hope this clarifies thing a bit.
Tony.
Very helpful article Tony, thank you. I don’t fully understand the zone system and only recently got back into film photography. But I always try to expose for the subject, whether using film or digital. I believe that is what you’re teaching here. I’m going to try to keep the zone system in mind when I’m out shooting.
Absolutely Donna. The Zone System is a mind bogglingly comprehensive beast and probably is only relevant to very few but you have it in one about exposing for the subject. Glad it helps.
Tony
Really enjoyed reading this and it’s helped me in my understanding of the zone system too. Thanks very much indeed.
Pleased it is of some help, Meredith. I have always admired Ansel Adams and his work. The Zone System was intrinsic to the superb quality he always produced. The proof of the pudding is in the eating as they say.
Tony.