A few months ago I was catching up with CAMERADACTYL’s Ethan Moses when we got to talking about projects that would have the most impact on the film photography community. I happened to mention my pet peeve: the lack of a modern equivalent to the Kodak Pakon, an automated full-roll film scanner.
Fast forward to a month or so and Ethan let it be known that he’d not only built a prototype but was also quite far along the way with it and was expecting to launch a Kickstarter “imminently”.
“Imminently” turned out to be about two months later and at the time of writing, there’s a little under 2 days left for you to support it there.

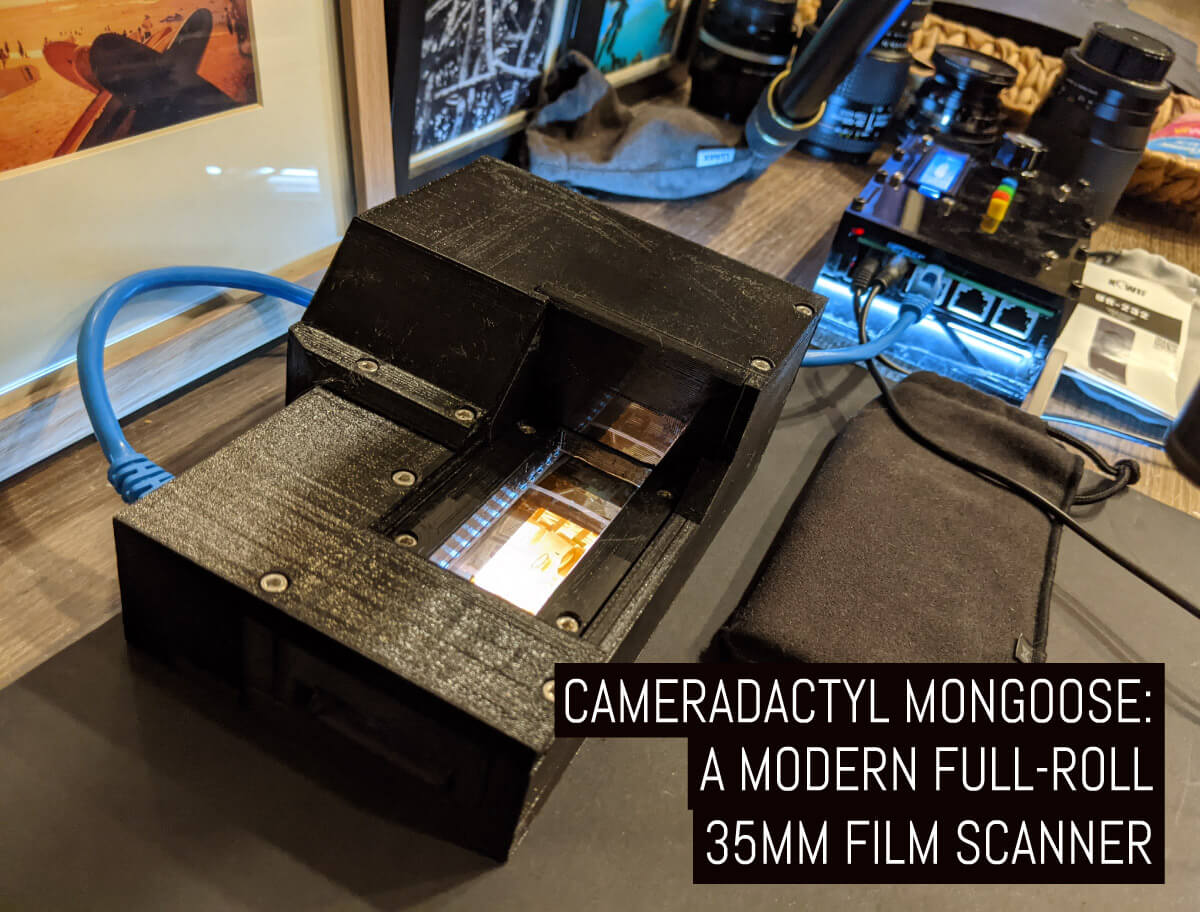
As you may have guessed from the title, the project — to create a device that can scan a full roll of 35mm film — is called the CAMERADACTYL Mongoose (because it eats snakes of film, get it?) It’s designed to speed up the process of 35mm film digitisation by adding a clever automated film advance system to the mix. Something I should say that is both imminently upgradeable and expandable.
I’ve had the pleasure of being able to call Ethan friend for several years now and while the relationship is uncomfortably close to Bugs Bunny and Gossamer, I gladly accept his (virtual) bearhugs…and access to things he’s planning, working on or actively producing. I’ve had the pleasure of featuring more than a few over the years:
This article covers my experiences with the CAMERADACTYL Mongoose so far and complements what you’ll have already seen from Hamish Gill on the subject. Here’s what I cover in full:
Confession: I’m a “camera scanning” noob
I’ll say very clearly up front that I have extremely limited experience digitising film with anything other than scanners – I don’t even own a suitable camera for the task. The manual digitisation workflow is something that has a limited appeal for me, although I apprecaite many, many people out there love it.
I’ve stuck to using a dedicated 35mm film scanner (Nikon Coolscan 4000ED), which I modified to take scan full-length rolls of film. I don’t want to be sat there scanning film, so much so that I’ve been known to develop my film and then have it sent out for scanning to three trusted labs. Still, the Nikon is getting old (it’s already old enough to drink alcohol in most of the world) and digital camera technology is quite frankly, alarmingly good, both in terms of speed and resolution. I might not care about either when taking photographs but those two terms ring my bell for scanning.

So, for the past 3 weeks or so, I’ve been getting to grips with the Mongoose at its new home by my front door. That’s trying it out before reading the manual, realising I REALLY needed to read the manual and then trying it out some more.
I’ve used it for 35mm full-frame and half-frame film with colour negatives, colour slides, and black and white negative film. The version I have is an early beta — superseded twice already since I received it — and the flaws I’ve found thus far have been fixed by updates that have been rolled into the public release once the Kickstarter ends.
A quick word on that. There are several beta testers like me out there and everyone has been feeding back their findings to help improve the product. Coming from a professional software development background, watching the process of feedback, bug notifications, and fix notes reminds me of a focused start-up. It’s wonderful to see and something I did not expect to find. I love it.
Digitising film is tedious
Actually, it’s tedious, problematic, and covered with a layer of smoke and mirrors (in my humble opinion). Those who have navigated the pitfalls and perils of perfecting their set-ups proclaim it as “easy”, “quick”, “better than scanning” and I’m likely to agree with them if it wasn’t utter tosh.
Scanning 35mm film is a pain and not as simple as “putting light under a nagative and a camera on a box”. No, if you want to get it right, you need to invest time and money but get it right:
- The camera.
- A lens (or three).
- Extension tubes or macro bellows.
- A copy stand.
- A suitable light source.
- A negative carrier.
“Hey, that’s all cheap and easy to buy”, I hear you say. No, not really. A “cheap” but suitably stable copy stand here outside of Europe and the US will set me back about US$150, a good light source about the same, good negative carriers between $50 and $300 (hello Negative Supply), and then there’s the camera.
I own the lens and macro kit, which is great but for the purposes of this testing I ended up borrowing my friend’s Sony A7 (1st gen). If it sounds like I’m whinging, I’m not, I just want to make it clear that even if you have the kit needed to set-up a scanning rig, connecting everything together in a way that works is also going to take time.

The software is getting better all the time. Ludwig featured a great piece here on Negative Lab Pro earlier this year, which is now on version 2.3. but the process is still very manual. Set up and square off the rig, shoot a frame or two if you’re stacking, advance the frame, repeat.
The Mongoose eats snakes…of 35mm film
The first thing you realise once you have the Mongoose setup is how utterly, ridiculously fast it is. Start it, fill up a kettle and before it’s warmed your tapwater past tepid, the Mongoose has finished scanning a roll. WHAT? Allow me to backtrack.
The CAMERADACTYL Mongoose has three modes. The third (and most important for me), is the one which uses the most processing power and intelligence. It’s also the one I’m going to focus on first:
Automatic scanning mode
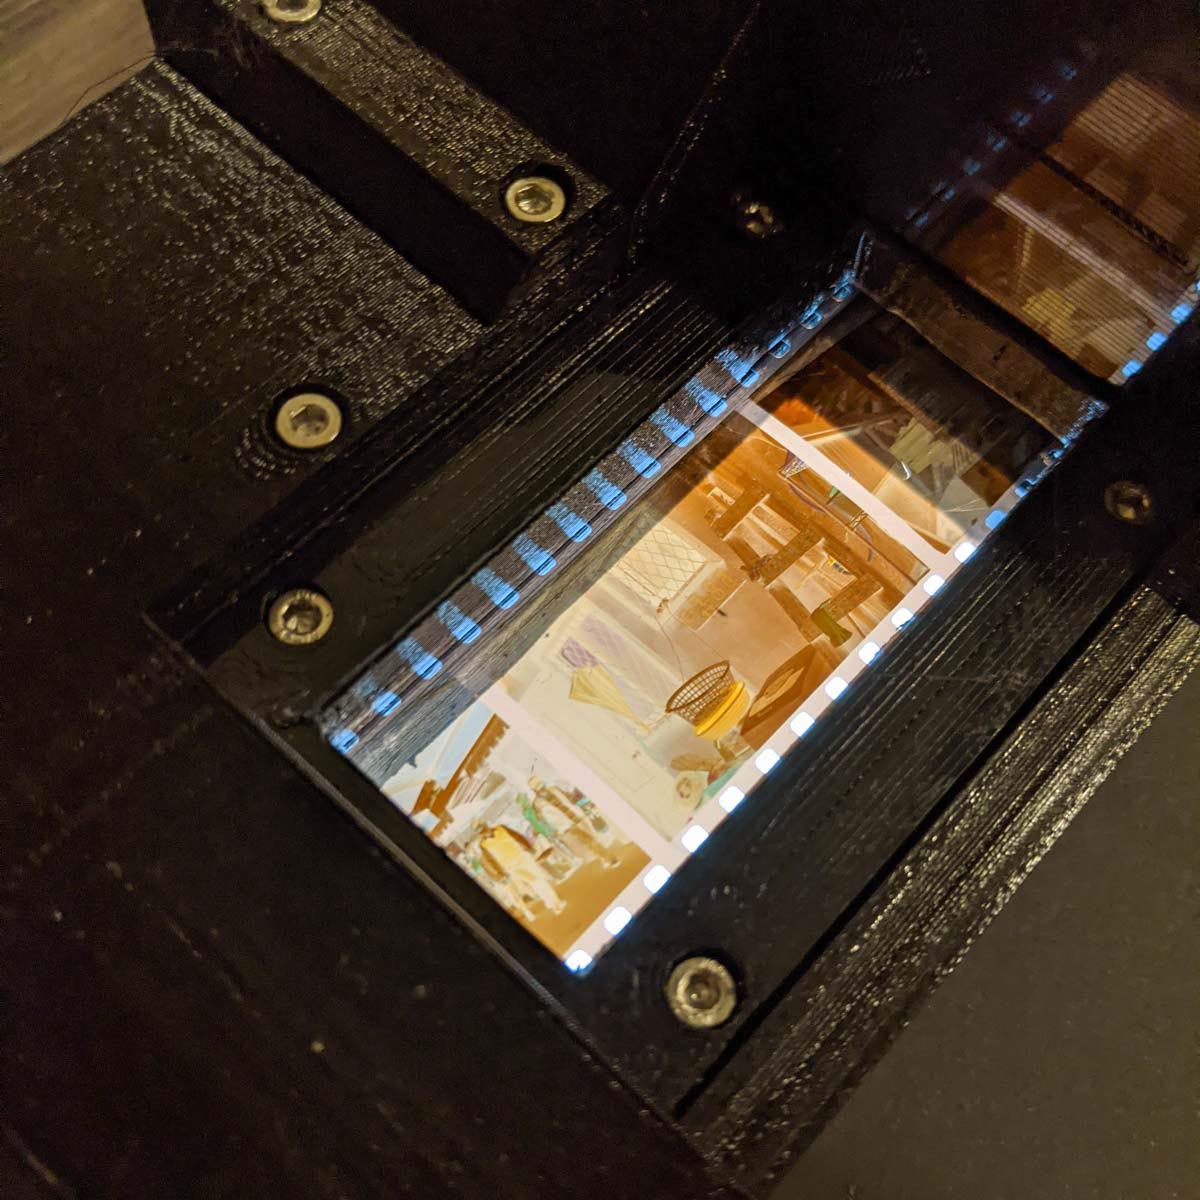
It does this by automatically feeding the film so each frame lines up underneath the camera, at which point it then triggers the camera’s shutter and advances to the next frame.

There’s also a “Manual” mode and a “Fast” mode. Manual mode lets you manually advance your film to the next frame, capture, and move on. “Fast” gets rid of any intelligence and simply forwards the film, fires the camera, and repeats the process. It sounds risky but if you have a camera or two that has impeccable frame spacing, it’ll help you save some time if you have a few Mongooses chained together as part of a small lab scanning rig but more on that later.
The focus of this article is going to be on the automatic mode and to be brutally honest, it’s a game changer.
But to my mind, the real genius is in the automatic mode which detects frame edges itself so it can be left to work its magic with very little human interaction – at least beyond the initial setup.
Using The CAMERADACTYL Mongoose
The basic CAMERADACTYL Mongoose configuration consists of two black boxes: The Control Module and the Scan Module. The scan module is a 3D printedbox with a film guide and track, plus motor and film advance mechanism. It has a single RJ45 jack and connect to…
…the Control Module. This is the brains. the Control Module has connections for power, shutter relase and three modules (only one being used for the moment). It also has an OLED screen, 4 buttons and a dial for human interaction (mode selection and configuration).
The CAMERADACTYL Mongoose does not come with a light source for the scan module and it can be used in a top-down (vertical, camera above, scan module below), or a horizontal configuration. Whatever works for you.
Setting it up
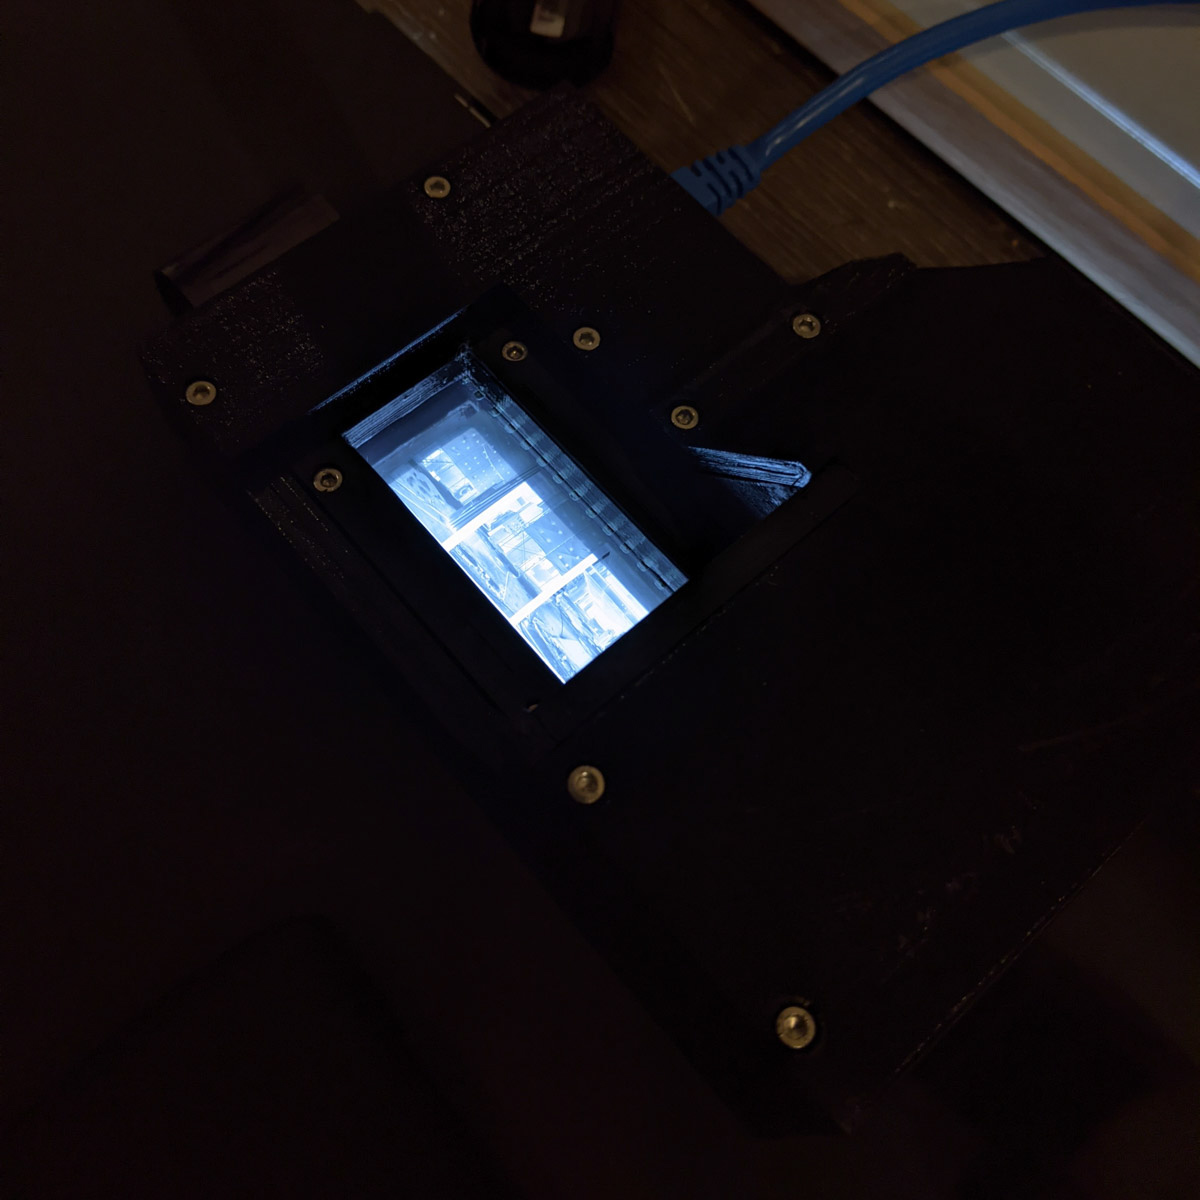
I set mine up (as I mentioned) on a low shelf/cabinet next to my front door with the camera pointing down at the Scan Module. For a light source, I used a cheap, cold LED A3 tracing pad, which doubles up as a constant portable light source for large format macros AND a slide film viewer. It runs off USB, so a small external battery works perfectly.
The Control and Scan Modules looks simple enough and being a technical person, I put the manual aside and got cracking.
This was a mistake. Do not do this.
The setup process is not complicated but takes a little time to complete. It’s time well spent and once you’ve covered the basics, there are really only four settings that matter:
- Calibrate Stop
- Trigger Interval
- Frame Delay
- Edge Detect Sensitivity
Calibrate Stop allows you to set the Scan Module’s end of roll detection. It’s as simple as pressing a button when the module is empty and only needs to be done once.
Trigger Interval is only really used during “Fast” and “Automatic” modes but is useful if you are playing with shutter speeds and/or have a camera that needs more time to recover — pause — after shooting a frame at super-ultra-mega high resolution. The setting is measured in milliseconds and after messing with mine for a while, I set it back to the very sensible default 440ms.
The Mongoose effectively presses your camera’s shutter button just like a cable release. Some cameras need longer to trigger a shutter actuation and some will take multiple shots if a cable release is pressed for too long. With the Frame Delay setting, you can dry-run the Mongoose and find the best setting for your gear. As with the delay, I left this to 90ms — the default set by Ethan. It worked perfectly for my borrowed Sony A7.
The Edge Detect Sensitivity setting is the most important for me. It’s something that can be a problem with the Nikon 4000ED I normally use to scan my film, especially if I’ve been pushing film, which covered 75% of the film I shoot. The Edge Detect Sensitivity setting lets you tell the Mongoose to be more careful when finding the edges of frames. By default, it’s set to 50/100. Increase it for underexposed film, decrease it for overexposed film.
Once you’ve got the settings fixed, it’s time to…
Load the Mongoose with film
The first time you load film with the intent of using the Fast or Automatic modes, you need to let the Mongoose test out a few frames. It does this so that (in Auto mode), you can make sure it’s understood the edges of your film, and forth both Fast/Auto, that your camera’s frame delay/trigger intervals are set ok.
The process is quite simple but can take a few tries to get right:
- Load the film making sure the Scan Module has grabbed it.
- Let the Mongoose assess a few frames.
- Rewind/fine-tune the film’s alignment.
- Go.
The final step I want to cover is the Mongoose’s…
Digitisation process
This really is where the magic happens. With everything set, give the red button a tap and the CAMERADACTYL Mongoose chirps and whirrs into action. It’s not what anyone would call quiet but the foamcore board I used to create a mask for the LED tracing board light source I mentioned above did a good job of damping the sound and vibration. I suspect that keeping it in a locked soundproofed room would make it event better.
That’s not to say the sound is brutally obnoxious. It’s loud-ish but the process is so fast, I’ll liken it to the first dot-matrix printers appearing in offices. People were definitely annoyed (I’m guessing) but the sound became part of the background nosie.

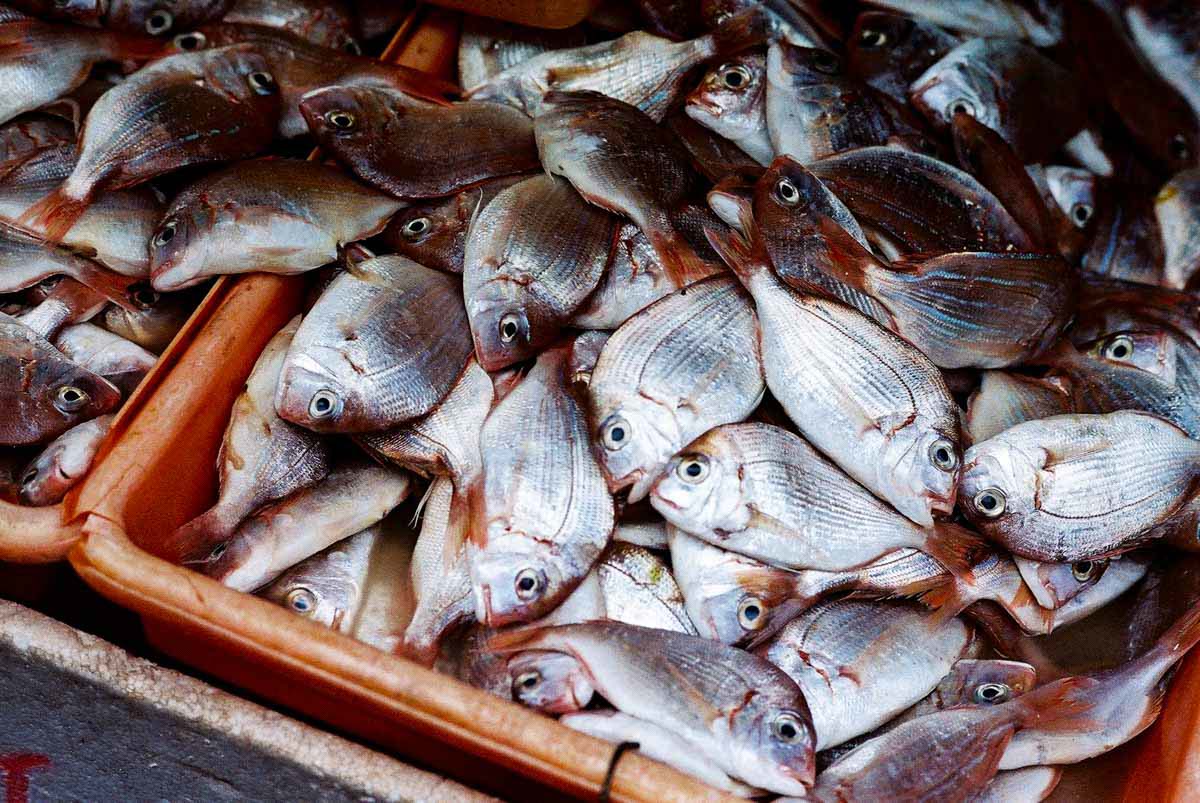
Another thing why the noise is a non-issue for me: the CAMERADACTYL Mongoose is QUICK. ~90 seconds for a full 36 exposure roll of full frame photos, 120 seconds with a longer delay set and about 180 seconds for a roll of half frame. I used a Nikkor 105mm f/2.8 at f/11 for the sample shots below, although I also tested it with a (Contax) Carl Zeiss 135mm f/2.8 Sonnar and a (Hasselblad) Carl Zeiss Planar F 80mm f/2.8.
At the time of writing, I’ve taken it upon myself to also test scan a roll of NEOPAN 100 ACROS with my Nikon F6 and Fomapan R100. Scanning film with more film…isn’t that the motion picture duplication process anyway? More on that sometime soon. As a slight aside, I’m tempted to “scan” one frame of film on film over and over again on successive rolls to investigate image degradation. It has zero value to anyone but it’d be fun to do.
Results and closing thoughts
I originally began this section saying, “The CAMERADACTYL Mongoose is an impressive effort to improve film digitisation.” This was wrong.
The CAMERADACTYL Mongoose is an impressive device, period.
Ethan through CAMERADACTYL, like Steve Lloyd through Chroma Camera, Max at Intrepid, Nathan at Negative Supply, Elvis at ONDU, Matt at Reveni Labs and numerous others ARE our film photography hardware manufacturing industry.
The beta version Mongoose I have — dated September 3rd — was one of the first off Ethan’s production line and if put in a brushed aluminium shell designed by some ageing Englishman, would probably sell for twice the price it is on Kickstarter today.
Before I leave you, it’s probably a good idea to show you some of the photos I’ve scanned using my Mongoose and the Sony A7. Here’s some Kodak Tri-X 400, Portra 416, ColorPlus 200 and Lomography Metropolis shot over the past 3 years or so.


Even if, like me, you’re starting your digitisation setup from scratch, The Mongoose is still likely to be cheaper than a Kodak Pakon in today’s market AND offer you more flexibility for frame size, resolution, speed plus the ability to “swap out the sensor” when needed.
As a camera scanning noob, I love it and although it might look a little like the mutated love child of Kryten and ED209, this little beta has a place in my home and might even convince me to set-up a dedicated camera scanning rig of my own.
To sum up, the CAMERADACTYL Mongoose is compact, quirky, incredibly competent and 10/10 feels to me like a line in the sand marking the end of the beginning of our film photography renaissance — that’s a good thing, too.
Things are about to get a lot more interesting here on in.
Thanks for reading and don’t forget that there’s still time to back the Cameradactyl on Kickstarter!
~ EM
Share your knowledge, story or project
The transfer of knowledge across the film photography community is the heart of EMULSIVE. You can add your support by contributing your thoughts, work, experiences and ideas to inspire the hundreds of thousands of people who read these pages each month. Check out the submission guide here.
If you like what you’re reading you can also help this passion project by heading over to the EMULSIVE Patreon page and contributing as little as a dollar a month. There’s also print and apparel over at Society 6, currently showcasing over two dozen t-shirt designs and over a dozen unique photographs available for purchase.


6 responses to “The CAMERADACTYL Mongoose: A modern full-roll 35mm film scanner”
I use an old Contax bellows with slide copier attached. No delicate aligning of the camera necessary and the slide copier can hold a whole roll of film. I can scan 36 frames in about 5 minutes with it and the quality is superb. Cost: about $100 for a bellows and slide copier if you own camera and lens (I use an old Sony alpha 7). Another easy and cheap, but excellent alternative is the Nikon slide copier, but it‘s a bit fiddly if you want to do a complete film.
Hi, what about those of us with thousands of rolls of negatives cut into strips of 4, 5 or 6? I’m not shooting any new film, but I’d like access to a good automated solution for strips.
It’s not a scanner. Stop misleading people.
I am a big fan of this site because I’ve always got excellent and adequate information from this site. But I have to say I am a bit disappointed to see an article on this great site using such egregious misnomer! I know it’s popular to call copying film with a digital camera “scanning”. I believe this misnomer is started by product manufacturers who are pushing cheap devices to uninformed home users trying to digitize their negs/slides on the cheap. But why is emulsive doing it?
Would you call a scanner a camera? Of course not.
Would you call taking a photography with a camera scanning a photograph? Of course not.
So why is it Ok to call shooting a negative with a digital camera scanning?
Words have meanings.
I wonder if it has rubber feet or something to prevent it from sliding on the light table (or whatever)? Some kind of roll holder would also be nice. I don’t have a 3D printer to make one myself.
Great article, be a backer to the Mongoose, I am, can’t wait to get my hands on it.