Made for only four years between 1998 and 2002, the Leica M6 TTL was the successor the 1984-98 Leica M6 and brought with it a couple of new party tricks: an ergonomically designed shutter speed dial and TTL flash metering. That huge shutter dial might not seem like a big deal today, in fact, you could easily walk away from this article right now thinking that the M6 TTL offers little over and above the M6 it replaced.
You’d be wrong.

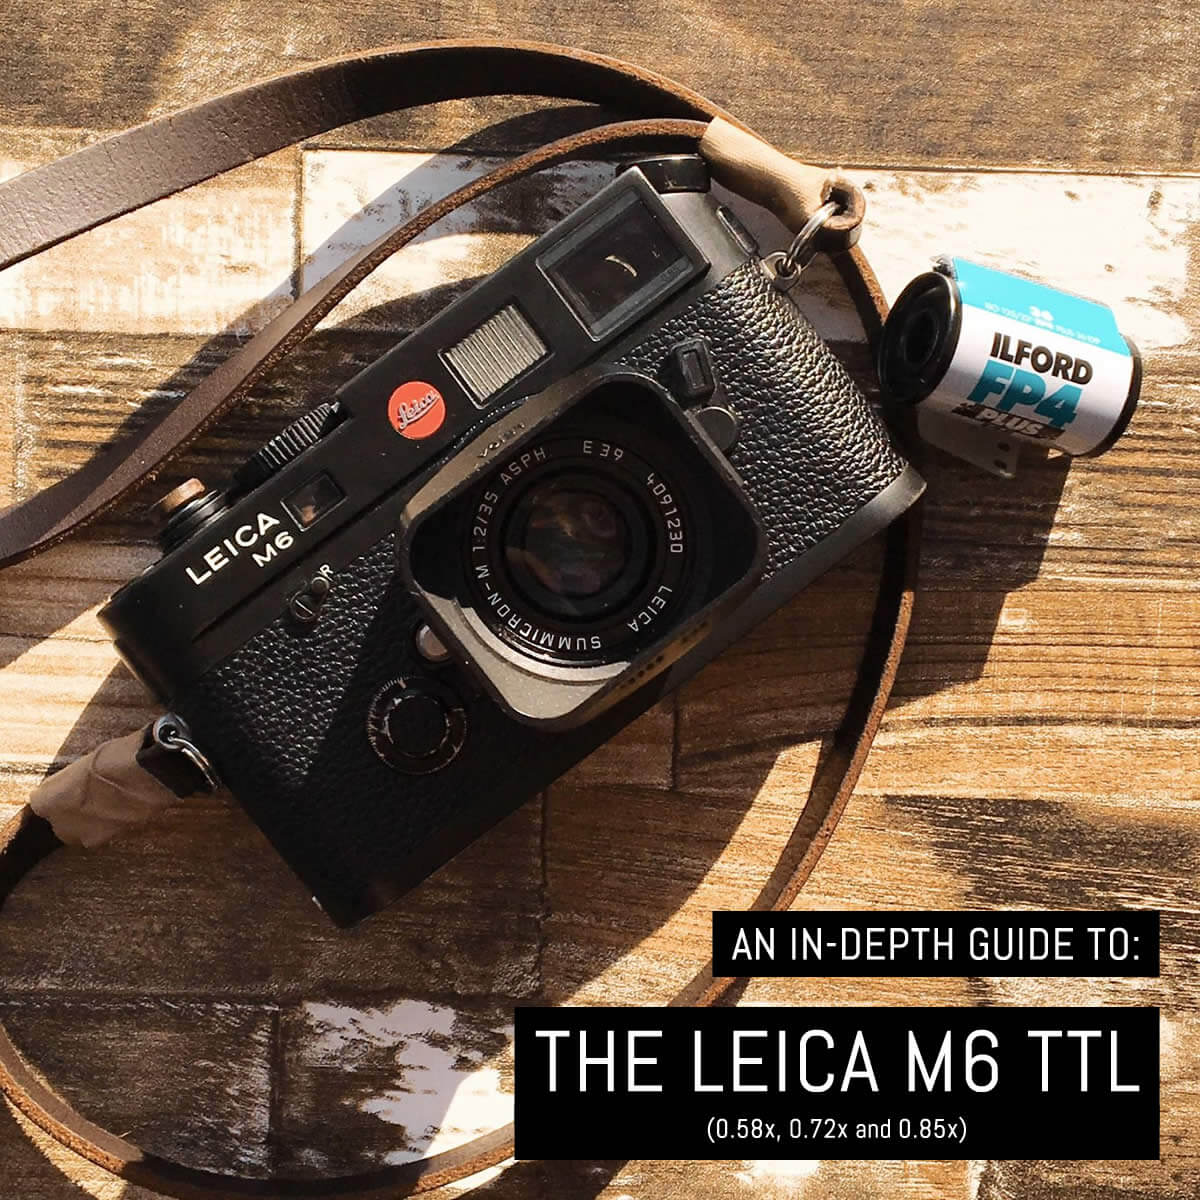
Image credit: Damien A Weidner
While the TTL flash metering update was something of an outlier — only really important to a niche within a niche of photographers at the time — that huge shutter speed dial brought with it better ergonomics and because it moves in the same direction as the light meter’s indicators, better usability. In short, a faster less fiddly experience. The camera itself came in black or silver chrome or a titanium-plated finish on release (along with three Ti finish lenses).
The name rather understandably caused more than a little confusion when the camera was first released and has led more than a few puzzled photographers to wonder if the original M6 came with a light meter at all. It did.
Like the original M6 — which I’ll be referring to as the “M6 Classic” and “original M6” interchangeably throughout this article — the M6 TTL came with two viewfinder magnification options on its release. These were eventually supplemented by a 0.58x magnification version in 2000 — Leica’s first sub-0.72x magnification viewfinder. The M6 TTL 0.58 was designed to be an ideal pairing with wide-angle lenses and could be used to frame lenses as wide as 24mm without an external viewfinder…if you don’t wear glasses that is. For those of us who do, the new Leica M6 TTL 0.58 still provided excellent visibility of both its 28mm and 35mm framelines: something no Leica had done through the viewfinder up until that point.
Each of the three finder options can be identified by way of a marking on the bottom-right of the viewfinder window (as you look at the front of the camera. That metallic strip at the bottom of the finder window? It provides a surface for the light meter’s LED indicators to be reflected onto. Smart.

Image credit: Francis Pullen
Prices for the M6 TTL today can reach as much as 25-35% more than the original M6 on the secondhand market. However, if you can find a good deal — and there are more than a few out there — it’s very much worth the additional investment. At the very least, I thought so when I eventually took the leap into the M-System. Like its predecessor, the M6 TTL not dependent on batteries to function and is both repairable and upgradeable…with the exception of the light meter, which is no longer repaired either by third party technicians or Leica themselves. Further details can be found in the “Reliability, repairability and upgradeability” section below.
This article follows the same format as my extensive M6 Classic guide: I’ll be breaking the Leica M6 TTL down into its constituent parts, providing you with operational details, a few tips and tricks; and of course, how it stacks up against the other models in the range.
If you’re in the market for a Leica M rangefinder, this article provides the information you need to make your decision.
Here’s what I cover:
Let’s start with some Leica M6 TTL history.
History
The Leica M6 was the first Leica M 35mm film rangefinder to be produced with three viewfinder magnification options. Two were available upon release — a standard 0.72x and a high-magnification 0.85x. These were supplemented by a new 0.58x magnification viewfinder in 2000, ideal for use with wide-angle lenses. This new tradition was continued with the M7 and through Leica’s now-defunct a la carte service.
Like the M6 which preceded it, production for the M6 TTL was exclusively in Germany. Where the M6 Classic is essentially a Leica M4-P with a built-in TTL light meter, the M6 TTL is an M6 Classic with TTL flash capability. It continued to utilise many of the same M4-P materials and processes in its construction.
As noted above, the M6 TTL can be found in three standard finishes: black or silver chrome or titanium plating over a nickel-plated zinc top plate and colour-matched brass bottom plate. The 0.58 and 0.72 versions are available in both black and silver chrome, the 0.85 is only available in black chrome and it’s worth saying that the titanium-plated M6 TTL was only available with the 0.72 magnification finder.
All versions of the Leica M6 TTL require batteries to operate their light meters and TTL flash metering, however, the shutter, like every Leica which preceded it, is entirely mechanical and does not require power to function.

Image credit: Christian Napolitano
On its release in 1998, the basic Leica M6 TTL (0.72x magnification finder) cost approximately US$2,195 – just US$100 more than the original M6. Adjusted for inflation, that translates to a little over US$3,450 in 2020 money – effectively ~US$500 cheaper than the original M6 in 1984. How’s that for progress? Including the M6 TTL 0.85 and Titanium versions, here’s how the release prices break down:
- M6 TTL 0.72: US$2,195.00 / US$3,450 (in 2020)
- M6 TTL 0.85: US$2,295.00 / US$3,600 (in 2020)
- M6 TTL Titanium: US$2,495.00 / US$3,925 (in 2020)
Source: Popular Photography August 1999
Buying a Leica M6 TTL today
On today’s secondhand market, you can expect to pay on average US$2,200 for an M6 TTL 0.72 in good condition. You’ll pay less for a private sale but more if you’re expecting a box, are aiming to buy new old stock or one of the special editions.
For the 0.85 high magnification version, expect to add US$400-600 to your budget and an extra US$500-800 for the 0.58x version. There are a few reasons you might want to spend the extra money on the M6 TTL 0.85 and 0.58. The M6 TTL 0.58x specifically still remains the least expensive wide-angle lens viewfinder film Leica M cameras on the market today. The only other two options which exist are the M7 0.58 and the A la carte Leica MP (discontinued in mid-2019).
I covered my journey with learning to love rangefinder cameras and finding my own Leica M6 TTL 0.85 recently. Please check out the article if you’re interested in my personal selection/decision-making process. I also highly recommend that you try my interactive Leica configuration tool to find the perfect Leica M-mount film camera for you — whether made by Leica or another manufacturer. The tool covers every M-mount film camera made since 1954 from Leica, Voigtlander, Zeiss and others.
Design/looks

Image credit: Jeff Greenstein
The Leica M6 TTL is built around the same classic design as its predecessor, the M6, with one main difference: the TTL flash circuitry requires the top plate to be 2mm taller than its predecessors. You won’t notice it in everyday use but if you use the 50mm Dual Range Summicron with “Goggles”, you’ll come unstuck. More follows in the section, “Lenses, use with“.
The M6 TTL features the quick loading system of the M2R, M4, M6 and later cameras. Further details follow in the section “Loading and unloading film“. Like the earlier M6, the M6 TTL also uses an angled flip-out film rewind crank. The rewind crank provides much better ergonomics than the “pull-up” knurled knob of early Leica rangefinders.
Viewfinder, framelines and parallax correction
Framelines
The “base” 0.72 M6 TTL features the same parallax-corrected 0.72x magnification finder of the M4-P, and is capable of displaying three pairs of 6 framelines depending which lens is mounted. The like the short-lived classic M6 0.85, the M6 TTL 0.85 dropped the 28mm framelines from the 28/90mm pair, which at the time made it one of the only Leicas with a single 90mm frameline option.
In 2000, a new M6 TTL 0.58 was released, which kept the same framelines of the 0.72 but dropped the 135mm set. This made it the first Leica since the M2 to feature single 35mm framelines.
Frameline combinations for the three models follow in the table below.
| Camera name | Viewfinder frameline options |
|---|---|
| Leica M6 TTL 0.58 | 28mm + 90mm (paired) 35mm (single) 50mm + 75mm (paired) |
| Leica M6 TTL 0.72 | 28mm + 90mm (paired) 35mm + 135mm (paired) 50mm + 75mm (paired) |
| Leica M6 TTL 0.85 | 35mm + 135mm (paired) 50mm + 75mm (paired) 90mm (single) |
The viewfinder magnification numbers above represent the view you see through the viewfinder as a decimal compared to 1-to-1 (zero magnification compared to how your eyes perceive the world).
The 0.58, 0.72 and 0.85 magnifications of the three Leica M6 TTL options tell us the real world is shrunk when seen through the viewfinder. A lower number means you can observe a wider view. In practical terms, the difference between higher and lower magnification viewfinders is how they allow easier focusing or framing on longer and wider lenses respectively.
Here’s how the M6 TTL’ three viewfinder options see the world in real life:

Illustration credit: EMULSIVE
The illustration above also shows the Leica M6 TTL’s light meter’s red LED indicators (center bottom). These provide guidance on exposure and only appear when the meter is triggered by a light press of the shutter button. The M6 TTL’s light meter is powered by one 3v or two 1.5v batteries (e.g. 1xDuracell DL 1/3 or 2x LR or SR44 cells). Further details can be found in the “Power” section of this article.
As with all Leica M film cameras, each set of framelines is automatically shown when an appropriate lens is mounted to the camera. Other framelines can be manually triggered into view by moving the frameline selection lever — it falls under your left hand when you bring the camera to your eye to shoot.
If you wear glasses like me, the 28mm and 35mm framelines can be a challenge to see all in one go on the 0.72 finder — the same goes for the 35mm framelines on the 0.85 finder. With the 0.58 viewfinder, all framelines are easily visible, glasses or not.
The M6 TTL’s viewfinder does not have coated glass as later models do but can be upgraded. See the “Reliability, repairability and upgradeability” section for further details.
Parallax correction
As with all Leica M cameras, the viewfinder is fully parallax corrected by way of the rangefinder cam you see circled in the image below.

Image credit: EMULSIVE
The main purpose of the rangefinder cam is to move the rangefinder focusing patch for focus (see next section). As part of this function, the cam also provides parallax correction: adjusting the viewfinder’s framelines so that they correspond with what the lens will capture.
If you have a Leica M camera on hand you can see an exaggerated version of this effect by removing your lens, looking through the viewfinder and lightly pressing on the rangefinder cam. With the lens off, the cam sets your framelines and focusing patch for closest focus. Pushed in, it moves up and to the left, where it would normally be with your lens at infinity.
A QUICK word on Parallax correction
With any camera where you’re not looking directly through the lens (rangefinders and TLRs being two examples) what you see through the viewfinder is not exactly what will be captured on film. On Leica Ms, the center of the lens is approximately 4cm/1.5 inches down and to the right from the center of the viewfinder. This displacement doesn’t have a huge impact when taking photographs with the lens at infinity. However, the closer your subjects are, the more pronounced the difference between what the two see becomes.
The Leica M6 provides parallax correction by automatically compensating for the difference in position of the viewfinder and lens by moving the framelines down and to the right as you focus the lens closer. The movement is hardly noticeable in use and ensures that what you see is what ends up on film.
Rangefinder mechanism, Effective Base Length (EBL) and focusing
You could say that Leica cameras and lenses play second fiddle to their rangefinder mechanisms. I understand that’s a rather strange standpoint but consider this: viewfinder optics and focusing systems are the first and arguably the most important part of any camera. They are your first impression as you look through them and regardless of how good or bad the rest of the camera is, if you can’t live with a viewfinder, it’s hard to live with the rest of the camera.
Rangefinder mechanism
Let’s start with an image taken from one of Leica’s promotional materials. It’s the Leica M4-P rangefinder assembly — the same basic mechanism found in the 0.72x M6 TTL:

Image credit: Leica promotional material
This is the brains of your Leica and incorporates:
- A rangefinder cam that couples with your lens (bottom center).
- Viewfinder window (far right).
- Frameline mask Window (center).
- Rangefinder window (far left).
Here’s how they sit in a fully assembled camera:

Image credit: EMULSIVE
Covering the leftmost window (4) above will obscure the viewfinder’s split-image focus. Covering the center window (3) will obscure your frameline illumination and covering the rightmost window (2) will give you a blurry image of your finger or thumb.
Effective Base Length (EBL)
Viewfinder magnification is one aspect of a rangefinder that helps you focus, the other is rangefinder base length. Rangefinder base length is the distance between the rangefinder window and the viewfinder (number 4 and 2 respectively in the image above). The longer the rangefinder base length and the higher the viewfinder magnification, the easier it is to obtain critical focus, especially with wide aperture lenses shot wide open.
When comparing the potential accuracy of rangefinders, we need a common ground. This is called Effective Base Length or EBL. EBL is a number you calculate by taking the rangefinder’s actual base length (RB) and multiplying it by the viewfinder magnification (VM):
RB x VM = EBL
Again, the longer your rangefinder’s EBL, the more accurate you’ll be able to focus (in theory).
The Leica M3 has the accolade of being the standard by which all Leica M cameras are measured. It has a 0.91x magnification viewfinder and a 68.5mm rangefinder base length. Multiply these together and you get 62.33mm. I’ve compared the M3’s EBL (marked as 100% for this comparison) in the table below.
| Camera name | Viewfinder magnification | Rangefinder base length (RB) | Effective base length (EBL) | VS Leica M3 |
|---|---|---|---|---|
| Leica M3 | 0.91x | 68.5mm | 62.33mm | 100% |
| Leica M6 TTL 0.58 | 0.58x | 69.25mm | 40.17mm | 64% |
| Leica M6 TTL 0.72 | 0.72x | 69.25mm | 49.86mm | 79% |
| Leica M6 TTL 0.85 | 0.85x | 69.25mm | 58.86mm | 94% |
These numbers aren’t a statement of “best”. What they tell us that the 0.85 M6 TTL’s viewfinder is potentially more accurate than the 0.72, which is potentially more accurate than the 0.58. What you don’t see here is the 0.85 viewfinder is effectively useless for critical framing with a 35mm lens if you wear glasses…hence this very long article. The higher the viewfinder magnification is obviously helpful for shooting longer lenses (as I do).
One thing to note is that the 0.85 viewfinders make it easier to also use “two eye focusing”. This a technique where you keep both eyes open, with your right eye looking through the viewfinder while you frame and focus. It doesn’t work 100% for everyone but when you get used to it, it feels wonderfully intuitive — especially on the M3.
Focusing the Leica M6 TTL
If you’re used to using an SLR, you might be using a matte focusing grid, which relies on your eyesight to discern if your subject is in focus. You might also be using a split-image fresnel which splits the center of your focus screen into two halves of a circle. Bring the two halves together and you’ve nailed focus.
Rangefinder focusing is quite similar to the latter. See the diagram below, which has been adapted from Leica’s documentation:

It can be quite confusing when you first use a rangefinder. You might not even notice the rangefinder patch to begin with! With a little practice and a bit of experience, using a rangefinder will quickly become second nature for both snapshots and critical focus.
One of the advantages of a rangefinder camera is that the viewfinder does not show the lenses actual depth of field. This makes zone focusing incredibly easy. I won’t deal with that in this article but there’s a great article over on the ILFORD blog with covers the basics.
M6 TTL light meter

Image credit: Ade Taylor
The Leica M6 TTL provides both through-the-lens (TTL) light metering and TTL flash. Rather than pointing at a shutter speed in the finder like the Leica M5 or many SLR film cameras, the Leica M6 TTL’s meter shows how close the selected shutter speed and aperture combination is to the meter’s reading.
In other words, the camera will tell you how close it thinks you are to the “correct” exposure for the scene but won’t tell you the aperture/shutter speed combination you’re using. The meter guides you via a pair of triangular LEDs and single red dot at the bottom of the viewfinder. At the time of writing this, I wonder if that red dot of “perfect” exposure could have been used more effectively in Leica’s marketing material about the “perfect camera” 😉
To use the M6 TTL’s light meter, first make sure the desired film speed has been set using the dial on the cameras rear plate. Next, lightly press the shutter button down until the LED(s) light up. Finally, rotate the shutter speed dial or your lens’ aperture ring until only the center red LED is lit.
These are the light meter’s five main states:
| Display | State | Action |
|---|---|---|
| Underexposure by at least one f-stop. | Turn shutter speed dial clockwise or lens aperture ring counter-clockwise. | |
| Underexposure by half an f-stop. | Turn shutter speed dial clockwise or lens aperture ring counter-clockwise. | |
| Correct exposure. | No action required. |
|
| Overexposure by half an f-stop. | Turn shutter speed dial counter-clockwise or lens aperture ring clockwise. | |
| Overexposure by at least one f-stop. | Turn shutter speed dial counter-clockwise or lens aperture ring clockwise. |
In comparison to the M6 Classic, the M6 TTL’s shutter speed dial turns in the corresponding direction indicated by the triangular LEDs of the meter. It may not sound like it but this is a big deal and a feature shared by only the Leica M6 TTL and M7. When the LED points to the right, you turn the shutter speed to the right, and vice-versa. It’s the same as LEICA R SLR cameras…and most other cameras ever made.
The M6 TTL’s light meter LEDs will flash if you try to use it in very low light or even on dull days with a small aperture set on your lens. If you’re shooting in very low light, it may take the second or two for the LEDs to show. The same low-light warning will also be triggered if a lens cap is still on your lens, thus saving you the embarrassment of a roll of film with nothing but blank frames. As I said, half-truth but a truth nonetheless.
The light meter’s photocell reads light coming through the lens that is reflected off 12mm diameter circular white patch on the first shutter curtain. You can see it with the shutter advanced and with the lens off. The brightness of this patch can vary from camera to camera but if yours isn’t perfectly white, don’t worry too much about it. As the M6 TTL’s light meter reads through the lens, any filters mounted to your lenses will be compensated for, from skylight and coloured filters all the way down to IR filters and opaque multi-stop ND filters or variable ND filters.
According to Leica, the M6 TTL’s meter is based on a spot in the center of the viewfinder covering between 23% and 66% of the field of view of your lens. These diagrams from the M6 TTL manual put that into perspective:

Illustration credit: Leica documentation
The as with the M6 Classic, the M6 TTL’s meter runs from ISO 6/9° to 6400/39° in ⅓-stop increments. There is no DX Coding support. Unlike the M6 Classic, the M6 TTL’s light meter does have a dedicated off setting. The meter is also disabled if the shutter has been fired but the film has not been wound on.
When set to any shutter speed (with the shutter ready to fire), the meter will be activated by a light press of the shutter button and will remain on for approximately 10 seconds. If your camera is in a bag, be careful to make sure the shutter button is free of anything that can push down on it or you might find yourself with a dead meter the next time you take it out.
With the meter set to ISO 100, you have a working range of EV -2 – 20. To put that another way, that’s 4 seconds at f/1 up to 1/1000 second at f/32.
Tip: If your meter’s LEDs are not appearing on a light press, check the film has been advanced before you reach for a fresh set of batteries!
Shutter
The M6 TTL features a horizontal focal plane shutter made of rubberized cloth (both first and second curtain). As with all cloth shutters, it is inadvisable to leave the camera pointed at the sun without a lens cap on, as you can burn a hole through the shutter in mere seconds under the right conditions. I’ve done this myself (on a large format Graflex). Don’t be me.

Image credit: Leica promotional material
The shutter runs from its top speed of 1/1000 second down to 1 second and bulb in full stop increments: 1/1000 second, 1/500, 1/250, 1/125, 1/60, 1/30, 1/15, 1/8, 1/4, 1/2 and 1 second. The camera’s single shutter release button has a standard thread mount for shutter release attachments such as timers, cables or air bulbs.
The Leica M6 TTL’s shutter is like all other Leica rangefinder shutters: quiet.
Flash
The M6 TTL can be used with the vast majority of Leica flash units, as well as those from third parties such as Metz and Sunpack. Leica specifically suggests their SF20 flash or any SCA 3000 flash unit equipped with the SCA adapter 3501. If you need TTL flash with a Leica, the M6 TTL and the M7 are your best bet. If you don’t use flash enough to know what TTL flash is, you probably don’t need it.
The M6 TTL’s fastest flash sync is 1/50 second, which sits as an intermediate notch between the 1/60 and 1/30 mark on the shutter speed dial. Flashbulbs/cubes can be synced from 1/30 down to bulb.
Power
The Leica M6 TTL only requires batteries for its light meter/TTL flash metering. Its shutter works 100% mechanically. The meter is powered by a single 3v or two 1.5v batteries (1xDuracell DL 1/3 or 2xLR44 or SR44 cells or their equivalents).
The M6 TTL Based on approximately 10 seconds of metering per frame, Leica tells us that a fresh set of batteries will last for approximately 2,900 exposures, or around 80 rolls of 36 exposure, 35mm film — that’s around 8 hours with the meter running continuously. This is considerably less than the M6 Classic’s 4,800 exposures, which equates to about 133 rolls of 36 exposure 35mm film or 20 hours with the meter running continuously.
The light meter’s LEDs will appear solid when the meter is activated and will blink when the batteries are low or when there is not enough light coming in through the lens (low light or more likely, you left the lens cap on).
Flashing LEDs don’t mean you need to replace batteries right away — check the lens cap/available light. That said, if you notice a flicker in their brightness you should replace them immediately.
Loading and unloading film
The M6 TTL features the quick loading system first introduced with the Leica M2R and brought to the mass market by the M4 range. To load film, simply remove the bottom plate — after a light turn of the rewind crank to make sure there’s not already film loaded — and flip up the hinged back.
Next pull out the film leader to just shy of the camera’s width and drop in the film canister while feeding the film across the rear of the shutter. The tip of your film leader should be long enough so that 6-8mm sits inside the take up spool’s three-pronged circular “fork”.
Make sure the film’s sprockets are engaged with the camera’s gearing, flip down the hinged back, return the base plate and lock it. The basic film feeding instructions are helpfully present on the underside of the camera, in case you forget. Just in case, I’ve drawn up a larger version for you below.

Illustration credit: EMULSIVE
With a fresh roll of film loaded, fire and wind-on the shutter twice until the camera’s film counter shows “0”. If you loaded your film in the dark, a single crank on the wind-on lever will be enough and you can start shooting from “-1”.
When loading, you should have noticed the rewind crank rotating when you were winding the film on. If not, take a few seconds and gently turn the crank clockwise for a few turns until you feel resistance. If you don’t feel any, your film has not been correctly loaded.
Tip: Thin film stocks may require more turns of the crank but be careful.
To an exposed roll, first disengage the camera’s rewind clutch (on the front of the camera) by flipping it down clockwise towards the engraved “R”. Next, flip out the rewind crank and turn it clockwise until you feel zero resistance and the crank spins freely.
Turn the camera upside down, then unlock and remove the baseplate, then turn the camera right way up and the exposed film cartridge should fall into the palm of your hand. 36 opportunities for greatness await.
Lenses, use with

Image credit: Kris Askey
The Leica M6 TTL is compatible with nearly every single Leica M-mount lens ever made, as well as LTM (Leica Thread Mount) M39 and L39 lenses made by Leica, Canon, Nikon and a host of other manufacturers.
Using LTM lenses
To use LTM lenses, all you need is an LTM-to-M adapter for the focal length of your lens. These screw onto the thread of your LTM lens, replacing it with a Leica M-mount. The Leica M-mount flange focal distance (the distance from the mount to the film plane was intentionally made a little longer than the screwmount Leicas that preceded it — 27.80mm for LTM vs 28.80 for M-mount.
This was to ensure that users with existing LTM lenses would be able to use them with the new M-mount. Most LTM lenses will couple with the M6’s rangefinder cam, meaning you can focus them in the viewfinder.
Notes on LTM adapters
LTM to M-mount adapters should be matched to the lenses they’re being used on. You can use, for example, a 135mm adapter with a 28mm lens but bear in mind that with the M6, you’d see 35/135mm framelines in the viewfinder, not 28/90mm.
Some adapters are better than others. My advice would be to find a middle of the road manufacturer as opposed to a very cheap or very expensive (Leica branded) one. On the subject of LTM lenses, it’s worth double-checking they were originally rangefinder coupled to ensure that you can both focus using the camera’s rangefinder patch and use viewfinder’s built-in parallax correction.
“Goggle” lenses
The M6 “Classic” is the same height as the M1, M2, M3 and M4 variants, meaning that it can be used with Leica’s “goggle” lenses. This M6 TTL is 2mm taller due to extra flash electronics. This extra height means that the “goggle optics of the following can cause problems:
- 50mm f/2 Dual Range Summicron
Incompatible lenses
According to Leica, the following lenses can be mounted onto and used normally with the Leica M6. the only exception being that the light meter won’t work:
- Hologon 15mm f/8
- Super-Angulon-M 21mm f/4
- Super-Angulon-M 21mm f/3.4
- Elmarit-M 28mm f/2.8 (up to serial number 2314921)
Collapsible lenses work just fine on the M6, just make sure you extend them before taking a photograph — more a user problem than a camera problem…
Variations and special editions
The M6 TTL has fewer special editions than its predecessor, most notable of which is the “M6 TTL Black Paint”, colloquially known as the M6 TTLMillennium. As the name suggests, it was a camera made to celebrate the turn of the millennium. 2000 were made and the camera was released in January 2000.
Unlike the standard M6 and M6 TTL, the Millennium came with brass top and bottom plates, black paint and an M3 style wind-on lever.
The Leica M6 TTL Titanium is the other notable “special edition” but remained in productions for long enough to be considered another main production variant. Known by some as the Leica M6 TTL Titan or Leica M6 TTL/T, it was released in 1998 with the standard 0.72 magnification and featured a brass top and bottom plate, both of which were coated with titanium (along with some other components). It was produced in limited quantities and three lenses were made available with the same finish:
- Leica Summicron-M 35mm f2 ASPH
- Leica Summicron-M 50mm f/2
- Leica APO-Summicron-M 90mm f/2 ASPH
Production and materials
Internally, the M6 TTL features the use of (some) steel gearing as opposed to brass, which was first introduced with the original Leica MP and MP2 of 1958-59. Some Leica purists compare film wind-on action of the M6 TTL and other steel-geared Leicas to mixing gravel with cement but you really shouldn’t pay any attention to them. These cameras work perfectly fine and do not make your photography or experience better or worse as a result of the newer, more resilient materials used.
Saying that, there are subtle differences in the way earlier brass-geared cameras feel to the steel-geared versions. The most important thing to state is that more than any other Leica I’ve used, my M6 TTL simply gets out of the way, steel gears or not.

Image credit: Leica promotional material
The change from brass to steel allowed the use of Leica’s motor winder options (rather difficult/troublesome with softer brass gears). The additional strength and durability the steel components bring isn’t without issue but the potential problems aren’t something I expect many, if any, film photographers reading this article today will encounter. If the wind-on mechanism jams, forcing the camera to wind would likely result in stripped brass gears — easily replaceable — however, harder steel gears have been known to destroy the entire winder mechanism. Over the years I have read two, maybe three accounts of this, none of which were experienced first hand by the author/individual telling the story.
Approximately 51,000 Leica M6 TTL serial numbers were assigned during its production life, however, that’s not a hard and fast indication of how many actual cameras rolled off the production line.
Reliability, repairability and upgradeability
The Leica M6 and M6 TTL are still able to be repaired directly by Leica and third-party technicians. Meter repairs/replacements are not possible, either by Leica to third party technicians. Apparently the M6 TTL’s light meter requires specific, proprietary equipment (at Leica) in order to calibrate meters after installation/repair/failure. These are either unavailable or not in use, so if you have an M6 with a faulty/damaged meter, you’re out of luck.This reason alone is enough for some people to choose the older M6 over the newer M6 TTL.
A short list of camera repair technicians and services follows. If you provide repair, restoration, customisations services, etc., yourself, or would like to add someone you know to the list, please get in touch.
| Name | Website | Location |
|---|---|---|
| European Camera Service | Link | Australia, Melbourne |
| Leica | Link | Germany, Wetzlar |
| Kanto Camera | Link | Japan, Kawasaki |
| CAMERAWORKS-UK | Link | UK, Bury |
| Newton Ellis & Co | Link | UK, Liverpool |
| Aperture UK | Link | UK, London |
| CCR Luton | Link | UK, Luton |
| YYeCAMERA | Link | USA, MA |
| Sherry Krauter | Link | USA, NY |
| DAG (Don Goldberg) | Link | USA, WI |
The M6 TTL (and the M6 Classic) can be upgraded with classic M (single piece, all metal) film wind-on levers but please be aware that Leica (direct) will not perform the upgrade or allow you to buy the parts you need. You need to ask a third party service provider to do it for you.
It’s possible to mask the M6 TTL’s frameline pairs and also to upgrade the viewfinder glass to coated optics.
With a top plate made of zinc, repainting the M6 TTL can be difficult but it is possible. I recommend checking out some of the links above to see some of the possibilities.
Motor drives / film winding attachments
Motor drives require hardy camera gearing due to the stresses components are placed under. For Leica Ms, this translates to the MP2 and then the M4-2 onwards.
Unlike SLRs from Nikon, Canon, et al, using a motor drive with a Leica is not a particularly smooth experience. That said, if you really must use a motor winder or other manual film winding attachment, here’s what works with the Leica M6:
| Name | Type |
|---|---|
| M4-P Winder | Motor |
| Winder M (renamed M4-P Winder) | Motor |
| Leica Motor M | Motor |
| Tom Abrahamsson Leica Rapidwinder | Manual |
| Leicavit M (14008 or 14009) | Manual |
Accessories
An uncomfortable strap was provided with the M6 TTL. I dislike them terribly but some don’t. To state the obvious, there are many, many excellent third-party options out there.
I personally use a black Yosemite strap from Japan’s Extended Photographic Material for my M6 TTL and a Hyperion strap for my modified M2. If you’re after something leather, check out Luigi (formerly Leicatime). The website is a time machine from the 1990s but his workmanship, while not inexpensive, is second to none.
There are also a number of case options, both hard and soft leather, as well as larger kit cases. I don’t know anyone who persists in using them. I had a half case when I first purchased my M6 TTL 0.85 but it only lasted a week before I ditched it for bare metal.
Various hard grips are also available from Leica and a number of OEM manufacturers in black/silver. That said, a colour changing Butter Grip might also tickle your fancy. I use mine exclusively when meeting other Leica owners.
Finally, I highly recommend getting a SLING from Leica Goodies. It might come across as hyperbole but this little thing changed my life and can now be found on both my Leica M bodies and my Olympus XA. It’s stupidly simple, incredibly comfortable and perfect for use in conjunction with my Peak Design Cuff. Best of all, it works with or without a grip mounted.
The Leica M6 vs the Leica M6 TTL
I’m going to break this out into its own dedicated article. Until then, there are really only a few reasons why you’d want to purchase one over the other:
The M6 beats the M6 TTL when:
- You don’t want to spend an extra ~US$500.
- You need the light meter repaired.
- You don’t need or expect to use TTL flash.
- You are an existing Leica owner and are easily confused.
The M6 TTL beats the M6 when:
- You have the extra cash on hand.
- You want a viewfinder suitable for wide-angle lenses (0.58 magnification option).
- You are an existing Leica owner and are not easily confused (or this is your first Leica).
- You like things to make sense.
The three main differences between these cameras are:
- The M6 TTL’s light meter has easier to read LEDs and comes with an extra dot in the middle to let you know you’ve matched its reading. It’s also easier to read.
- The M6 TTL’s shutter button is huge and can be adjusted by swiping a finger across the front of the camera. It’s great and similar in size to the shutter speed dial found on Leicameters over the years.
- The M6 TTL’s shutter speed dial is “backwards” compared with every Leica that came before it but “correct” for the photographer: selecting shutter speeds now works in the same direction as indicated by the light meter.
This illustration I put together should help clarify the last two points above:

Illustration credit: EMULSIVE
Combining the M6 TTL’s light meter display, the “reversed” shutter speeds and bigger shutter speed dial make for a potent combination. Look through the viewfinder, and swipe your right index finger over the front of the camera until a single red dot appears in front of you. No awkwardly pinching a at tiny shutter button click-click-click.
With the M6, when the light meter tells you your shutter speed/aperture combination will result in underexposure, an arrow points to the right. Leica tells you to turn the lens’ aperture ring in the same direction (clockwise), which makes sense, as you’ll open it up. That is, until you realise that most people don’t work like that and will want to adjust the shutter speed dial instead. Turning the shutter speed dial on the M6 Classic to the right (clockwise again) will set a faster speed and thus add further underexposure.
The M6 TTL fixes this by flipping the speeds around on the dial. When the meter LED points to the right (underexposure), turning the shutter speed dial in the same direction (clockwise) reduces the shutter speed. When it points left (overexposure), turning the dial in the same direction (anti-clockwise) results in a faster shutter speed being set.
Only the M6 TTL and M7 share this “funny” shutter speed dial aberration. I love it and personally don’t have a problem when I switch from my M6 TTL to an M2 or other Leica M. Some people do, hence the “easily confused” points above.
Leica M6 TTL vs the Leica M4, M4-2 and M4-P
I see this question asked all the time and the answers are mostly too complicated and rarely get to the bottom of it. The short version: the Leica M6 TTL is essentially an M4, M4-2 or M4-P with a light meter and the same comparisons against the M6 and M4, M4-2 or M4-P stand.
In a world where the M6 is not an option, the simple specific differences between the M6 TTL and M4 versions is as follows:
- A meterless M6 TTL: M4-P.
- A meterless M6 TTL without 28mm or 75mm framelines: M4-2.
- A meterless M6 TTL, without 28mm or 75mm framelines but WITH a self-timer: M4.
Better still, use this tool I created to find the perfect Leica for you.
Final thoughts, strengths and weaknesses
The first thing older Leica shooters will tell you is that the M6 TTL and other more recent mechanical Leicas cannot compare to the original M3 or M2. This is rubbish. The M6 TTL feels great in the hand — just like any Leica M — and shoots as well as any Leica M that came before or after.
In SLR terms it’s somewhere between a Nikon F3 and an FM2. There’s enough new stuff in there to make the some of old guard wary of it and thus, spin a few yarns. Some folks won’t like the double-jointed film wind-on lever and I’ll admit that it took some getting used to for me but to bottom-line it: you need to use the Leica M6 it to fully understand and appreciate it.

Image credit: Tim Norman
The M6 TTL (and M6) are less fussy than the M7 and importantly, not hobbled by needing power in order to function. There’s only a half-press of the shutter button to activate the meter or a full press to fire the shutter. Just like the older mechanical Nikons (and older Leicas), there’s just enough resistance in the shutter button so when you do proceed beyond that half-press, you can feel exactly when it’s going to trip. I love that on my FT3 and F2, and I love that on my M6 TTL. That’s not hyperbole, it’s useful haptic feedback that’s very welcome regardless of the speed you’re shooting at but certainly useful on the lower end of the range.
Film wind-on is pretty smooth, although there’s a definite feeling of sharp-toothed gears mushing together. That might make you think it’s a bit clunky. It’s not. You can wind on in a single action, or by making 2-3 short strokes.
Finally for strengths — and this is true of all rangefinders with TTL light meters — shooting infrared film is ridiculously easy in comparison to an SLR. There’s no need to frame, meter, add the filter and then shoot blind. With an IR filter mounted on a lens, your world view is completely unaffected and you can simply run and gun!
Note: It’s possible to perform multiple exposures with the M6 TTL and most other Leicas, although probably not advised. Here’s how. Fire the shutter, flip down and hold the film rewind clutch and wind the camera on to prime the shutter without winding on film. Please be aware there will be crunchy sounds.
With so much in the “strengths” corner, you’d almost be forgiven for thinking I have nothing bad to say about this camera. Truth be told, there aren’t many but I’ll try. I won;t be mentioning the price as a bad point. It is what it is and technically, most vanilla M6s can be purchased for about half of their original retail price. These cameras have always been expensive.
First of all, if you’re not a fan of rangefinder cameras, this Leica, or any Leica rangefinder is not going to be for you. I drove myself in circles abut this before eventually coming round to the idea and I can summarise it all in a few bullet points:
- If you’re curious about a Leica “being for you” and have the money to spend, buy one. If you don’t like it, you’re guaranteed to get your money back (and maybe a bit more).
- If you’re curious about a Leica “being for you”, don’t have the money to spend and have never used a rangefinder, spend a bit less on something like a Canon 7 or Leica CL to see if it’s for you. Again these can be sold on without leaving you in the red.
- If you’re curious about a Leica “being for you”, don’t have the money to spend but have used rangefinder cameras before and hated them…it’s a tough one. I came back to rangefinders via longer focal lengths after having sworn off them. Follow the second point above and see if anything sticks.
For the record, there’s a reason I haven’t suggested older (small window) rangefinders above. I don’t like them and they’re not close enough to the Leica M experience to warrant inclusion here.
On to specific weaknesses of the M6 TTL (and the M6), and the first is a QC issue. Some copies exhibit a “bubbling” on the top plate. It looks ugly but is, generally speaking, harmless and does not affect the camera’s operation. The bright side of this is that you can purchase M6 and M6 TTLs with this problem for a fair bit cheaper than examples without.

Image credit: Ben Mills
In low light, the meter’s LEDs are way too bright and can leave ghosts in your vision. It’s not really a huge issue but personally does contribute to eye strain.
The shutter button is ludicrously easy to trip by accident — especially with a soft shutter release cap screwed into it — that said, I’ve found it to be a common issue with all Leica Ms. Perhaps it’s just me?
The battery cap is odd, can often be screwed down too tightly — requiring an awkward push-in-and-twist action — or will come loose of its own accord. Be sure to check yours every time you take your camera out. These things fall out so much that several industrious sellers are offering 3rd party replacement options for them. Also I’ve found the paint on my M6 TTL’s battery cover to have worn off much faster than elsewhere on the camera…not that it bothers me but I wouldn’t be doing my job if I wasn’t nit-picking.
Finally for weaknesses — and this is somewhere between a stretch and a personal choice — according to some opinions, black chrome versions don’t age as gracefully as other all-brass Leicas such as the M2, M3 or MP. This is down to that zinc top plate, which is coated with a layer of nickel before being coated in black chrome. The result of extended use/rubbing against objects or inside your camera bag are shiny silvery points, as opposed to the brass patina many people have some to expect. I personally like it. Your mileage may vary.
All that’s left to say is this: The M6 TTL is as you might expect, a fantastic camera and like every Leica M that came before it, it’s a real workhorse. These things were made to be used and to take a bit of abuse. I’m not encouraging you to scrape yours against a brick wall but be assured that it will likely outlast you.
If you’re a fan of rangefinder cameras, haven’t used a Leica before and you have a bit of spare cash burning a hole in your pocket, you could do much worse than buying an M6 TTL. Worst case scenario, you’ll hate it, sell it on and make your money back. Best case scenario? You might never buy another camera again.
~ EM
Full technical specifications
| Camera name | Leica M6 TTL |
| Camera type | 35mm interchangeable lens rangefinder |
| Film format/Image size | 35mm (135) 36 x 24mm |
| Manufacturer | Leica Camera AG |
| Manufacture dates | 1998-2002 |
| Lens mount | Leica M-mount 27.80mm flange focal distance |
| Viewfinder | Brightline frame viewfinder and automatic parallax-compensation 0.58x magnification with the following framelines: – 28mm + 90mm (paired) – 35mm (single) – 50mm + 75mm (paired) 0.72x magnification with the following framelines: – 28mm + 90mm (paired) – 35mm + 135mm (paired) – 50mm + 75mm (paired) 0.85x magnification with the following framelines: – 35mm + 135mm (paired) – 50mm + 75mm (paired) – 90mm (single) |
| Focusing | Split-image rangefinder |
| Shutter | Mechanical horizontal focal plane Rubberised cloth 1s – 1/1000s with Bulb and 1/50s flash sync |
| Metering | Center-weighted (between 23-66% of the frame) ASA 6 – 6400 (in ⅓ stop increments) Operates between EV -2 – 20 (at ISO 100) |
| Film advance / Rewind | Lever advance (single stroke). Counter resets after baseplate is removed. Folding crank rewind. |
| Flash | Hot Shoe, PC Sync |
| Loading | Leica quick loading |
| Power | 1x DL 1/3N 2x LR44/SR44 |
| Finish | Silver Chrome Black Chrome Titanium (plating) |
| Weight | 600 g (body only) |
| Dimensions (appx) | 138 × 79.5 × 338 mm (WxHxD) |
| Accessories | Leica strap Ever ready case options |
Share your knowledge, story or project
The transfer of knowledge across the film photography community is the heart of EMULSIVE. You can add your support by contributing your thoughts, work, experiences and ideas to inspire the hundreds of thousands of people who read these pages each month. Check out the submission guide here.
If you like what you’re reading you can also help this passion project by heading over to the EMULSIVE Patreon page and contributing as little as a dollar a month. There’s also print and apparel over at Society 6, currently showcasing over two dozen t-shirt designs and over a dozen unique photographs available for purchase.


9 responses to “An in-depth guide to: The Leica M6 TTL”
What if I told you the M6 Classic shutter speed dial is a thumbwheel, and the back of the dial rotates in the direction of the meter arrow?
Thanks for the excellent, in-depth article. One quibble: you say that the M6TTL 0.85 is only available in black chrome, but I have seen them in silver chrome finish.
Andrew
Thanks for taking the time and research doing this article – helped me a lot. Ended buying the M6 classic..but in titanium :). Not sure if all TI share this, but indeed they are like the classic version metering wise – the shutter dial is also the smaller type.
Never understood why some people complained about the M240 body size (which I have too), till I held and used the M6 – it just fits better, and yet the M240 can be almost used in same simplicity way.
One has to experience both mechanical and electronic M’s to fully understand what they are all about IMO.
Looking forward to read more articles from you.
Regards
Phillip
I’m glad it helped, Phillip and thank you for the lovely comment.
Great article, very comprehensive. I bought an M6 TTL .85 in February and I am still learning its nuances and how to shoot a RF again after years with an SLR and now mirrorless. What can you say about weather resistance? I don’t intend to shoot in pouring rain but can it be pulled out from a jacket in light rain for a shot or two? What about Leica glass? Thanks!
Whaouuuu ! BRAVO ! Great ! Fantastic !
After the M3, the M6 is my favorite M film Leica.
Perfect !
Everything is here.
Fantastic review.
Thank so much, thank you a lot.
Bravo again
An excellent in-depth comparison of the two M6 versions. I’ve owned an M6 for 30 years or so, and I’m completely at home with adjusting settings for its basic metering, although I totally agree with you that it could do with the TTL style big speed control. Generally, though, I am happier setting the shutter speed and adjusting the aperture, as this ensures that I set a speed that gives me some protection with camera shake, and which for me is a bigger issue than any slight loss of IQ that using an aperture outside the optimum for the lens may give rise to.
Viewfinder BLF masks aside, I couldn’t see a significant need for TTL flash on a Leica RF camera. In principle, yes, it can be more accurate but unless one is using a visoflex/bellows unit and where TTL flash is far superior, most quality flash units of their day with auto functions can do an excellent job with exposure, albeit there could be tricky lighting situations that may give the nod to the TTL.
Now coming to the present day, we have become aware of a significant issue with the metering with it apparently being prone to failure and Leica can’t repair it. No such issue with the M6. So my gripe with the M6 TTL is that unless the versatility of the BLF masks is important, or you use flash with a visoflex a lot, is it really worth the premium it seems to command? IMO, definitely not, although I would say that where the flash has a swivel and/or bounce capability, the TTL metering flash is superior. As you have to carry an external flash anyway, an M6 with any quality standalone auto flashgun, will provide equally as good flash exposure, and will usually be far less to buy than the bespoke Leica flash unit. Factor this into the premium price of a fully working TTL + flash compared to an M6 + third party branded flash, and the price equation favours the M6 even more.
Great in depth article Em, thank you.
I feel I’m another (big) step closer to upgrading from my Bessa R3M to a 0.85
Spot on review. My two pfennig:
-I think the TTL’s 25-30% price differential stems more from its more recent manufacture that anything else. The irreparable light meter is its Achille’s heel notwithstanding the premium, whilst I’ve heard the M6 Classic shares the MP’s simple meter board.
-The TTL’s 3-LED meter is akin to the Nikon FM2 and far easier to read on the fly compared to the two-arrow configuration of the Classic.
Given the steep rise in price of all M6 versions, a wiser consideration might be saving a bit longer for an MP. When you add the cost of a proper CLA (some of these cameras are 30+ years-old) and addition of ant-glare optics to the viewfinder, it becomes a wiser option.